


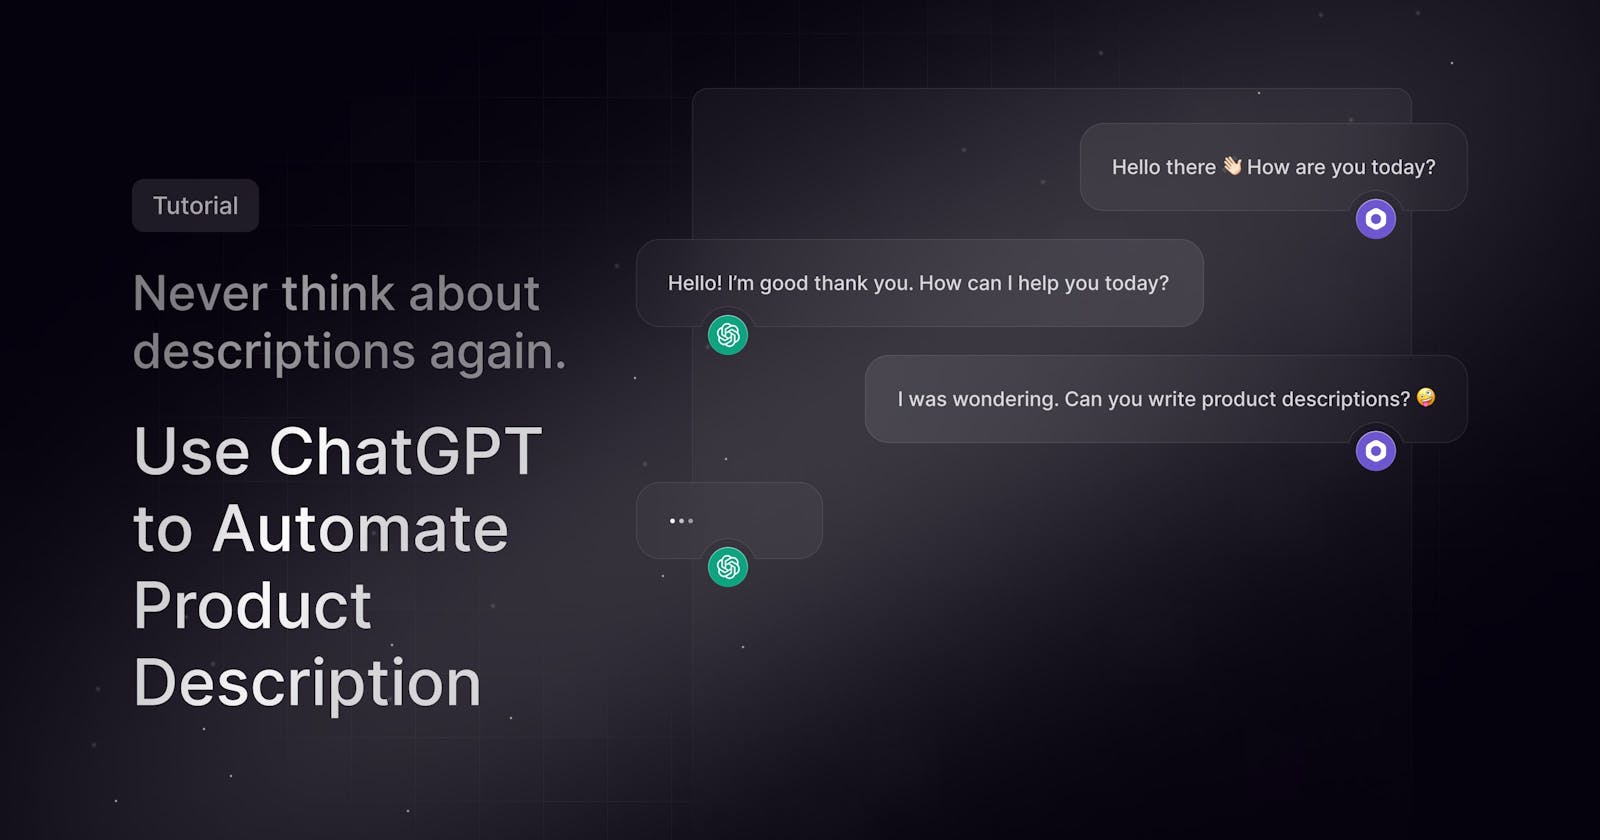
In today's fast-paced ecommerce world, it's more important than ever to have compelling product descriptions that clearly and accurately convey the value of your offerings. However, crafting effective descriptions can be time-consuming, especially if you have a large catalog of products. This is where ChatGPT comes in.
With ChatGPT, you can easily automate the writing of your product descriptions, saving you time and effort while still delivering top-notch content to your customers. What if I told you that the previous paragraph was written by ChatGPT? Did you see how ChatGPT generated human-like text that is indistinguishable?
In this tutorial, you’ll learn how to use ChatGPT to automate writing your product descriptions in Medusa. Medusa is a composable ecommerce platform that can be integrated with any third-party services, including ChatGPT.
You can find the code for the tutorial in this repository.
Here’s a demo of the end result.
What is Medusa?
Medusa is an open source composable commerce engine for developers who want to take ownership of their ecommerce stack. The platform is highly extensible and easy to customize which has made it the #1 JavaScript Ecommerce Platform on Github in record time with 16K+ stars.
Medusa is composed of three components: the headless backend, the admin dashboard, and the storefront. You can set up an entire ecommerce store within minutes by running just a couple of commands.
Since Medusa is highly extensible, it allows developers to build custom features or integrate third-party services such as ChatGPT into Medusa very easily. You can learn more about the official and community plugins here.
If you like this tutorial, please give Medusa a 🌟 on GitHub
What is ChatGPT?
OpenAI has developed a revolutionary long-form question-answering AI called ChatGPT; it is capable of answering complex questions conversationally. This technology is groundbreaking because it has been trained to understand the intended meaning behind human questions.
ChatGPT (Generative Pre-trained Transformer) is a powerful AI tool that leverages the capabilities of OpenAI's GPT-3.5 family of large language models. It has been fine-tuned using a combination of supervised and reinforcement learning techniques to deliver optimal performance.
Different Models Offered by GPT-3
The GPT-3 language models have the ability to understand and generate natural language. Four main language models are available, each with varying levels of power and capabilities to suit different tasks.
text-davinci-003: It is the most advanced and capable language model in the GPT-3 family. It is capable of completing any task that the other models can perform, often with higher quality, longer output, and better ability to follow instructions. Additionally, it has the ability to insert completions within the texttext-curie-001: It is highly capable, but faster and more cost-effective than Davinci.text-babbage-001: It can complete straightforward tasks efficiently and at a lower cost compared to other models.text-ada-001: It is capable of performing simple tasks quickly and at a low cost. It is typically the fastest model in the GPT-3 family.
Out of the above four, you’ll use the text-davinci-003 for text completion in this tutorial as it yields the best results.
Getting Your OpenAI API Key
OpenAI provides different APIs to interact with its AI models. It provides you free credit worth $18 to experiment for the first three months.
Follow the steps below to get your free OpenAI API key:
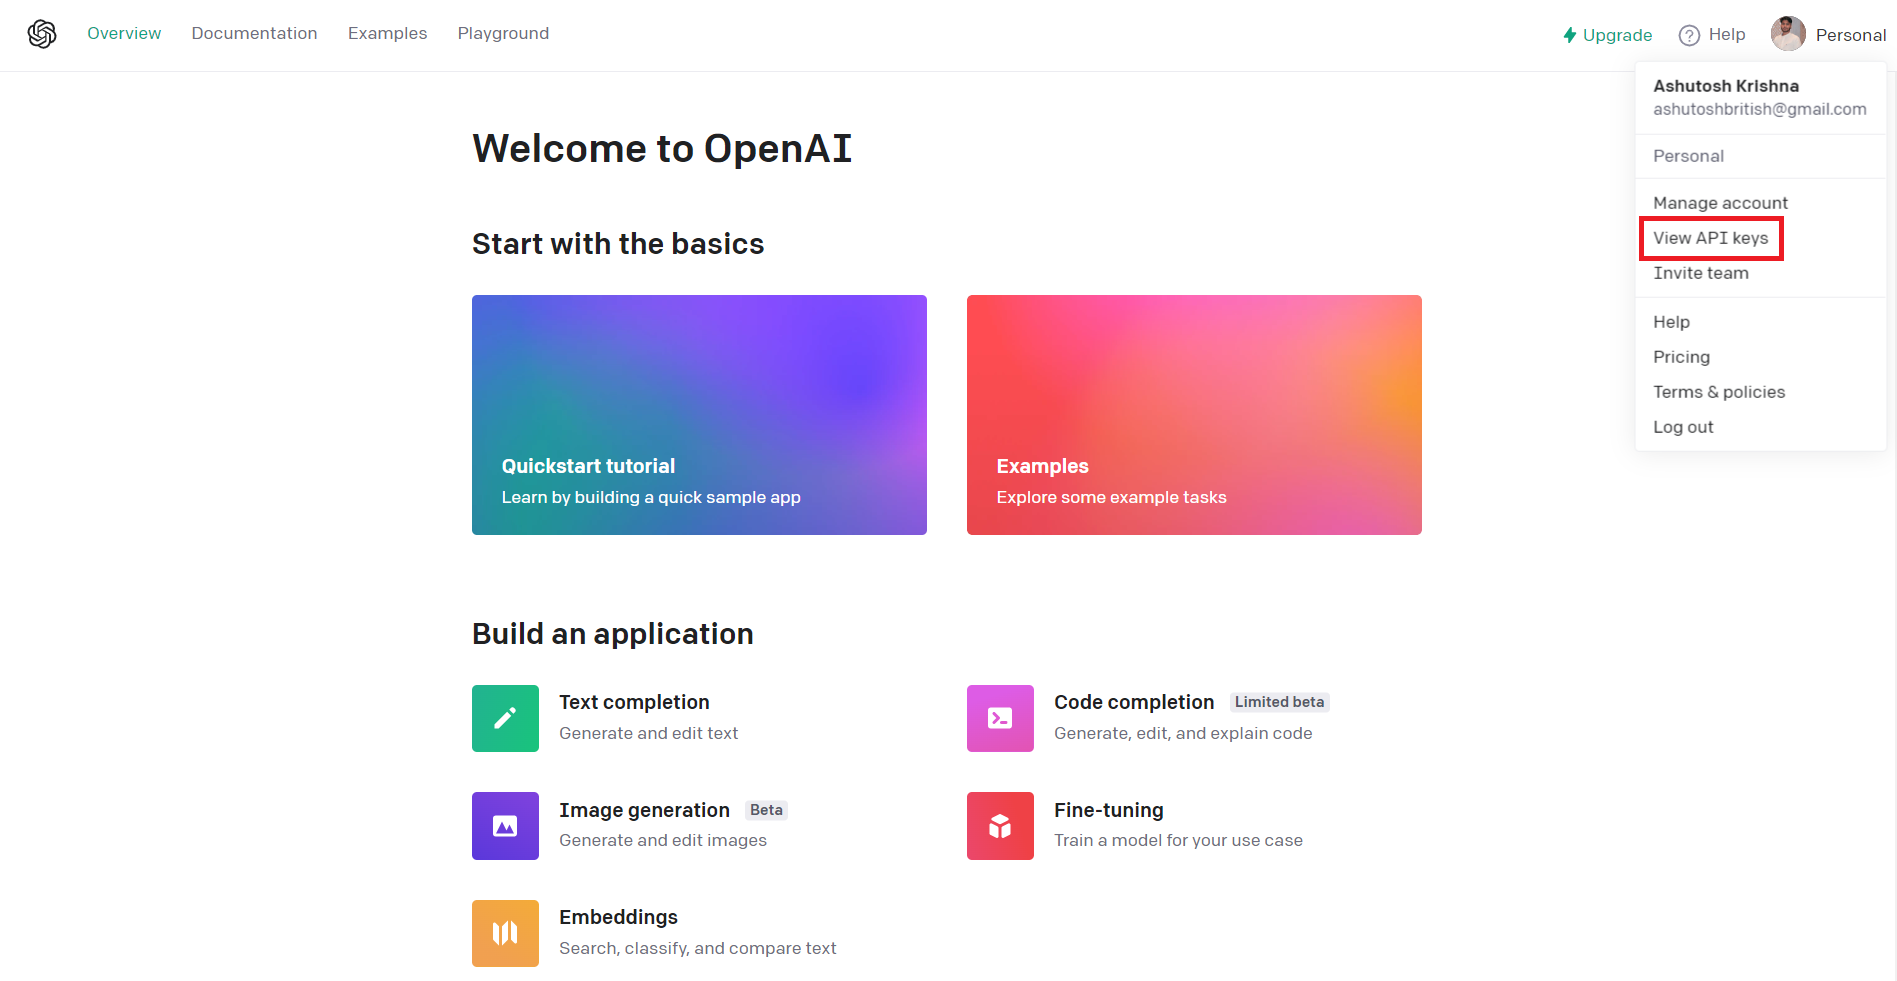
Go to OpenAI API and sign up for a free account. Follow the instructions, and you’ll be redirected to the API Dashboard.
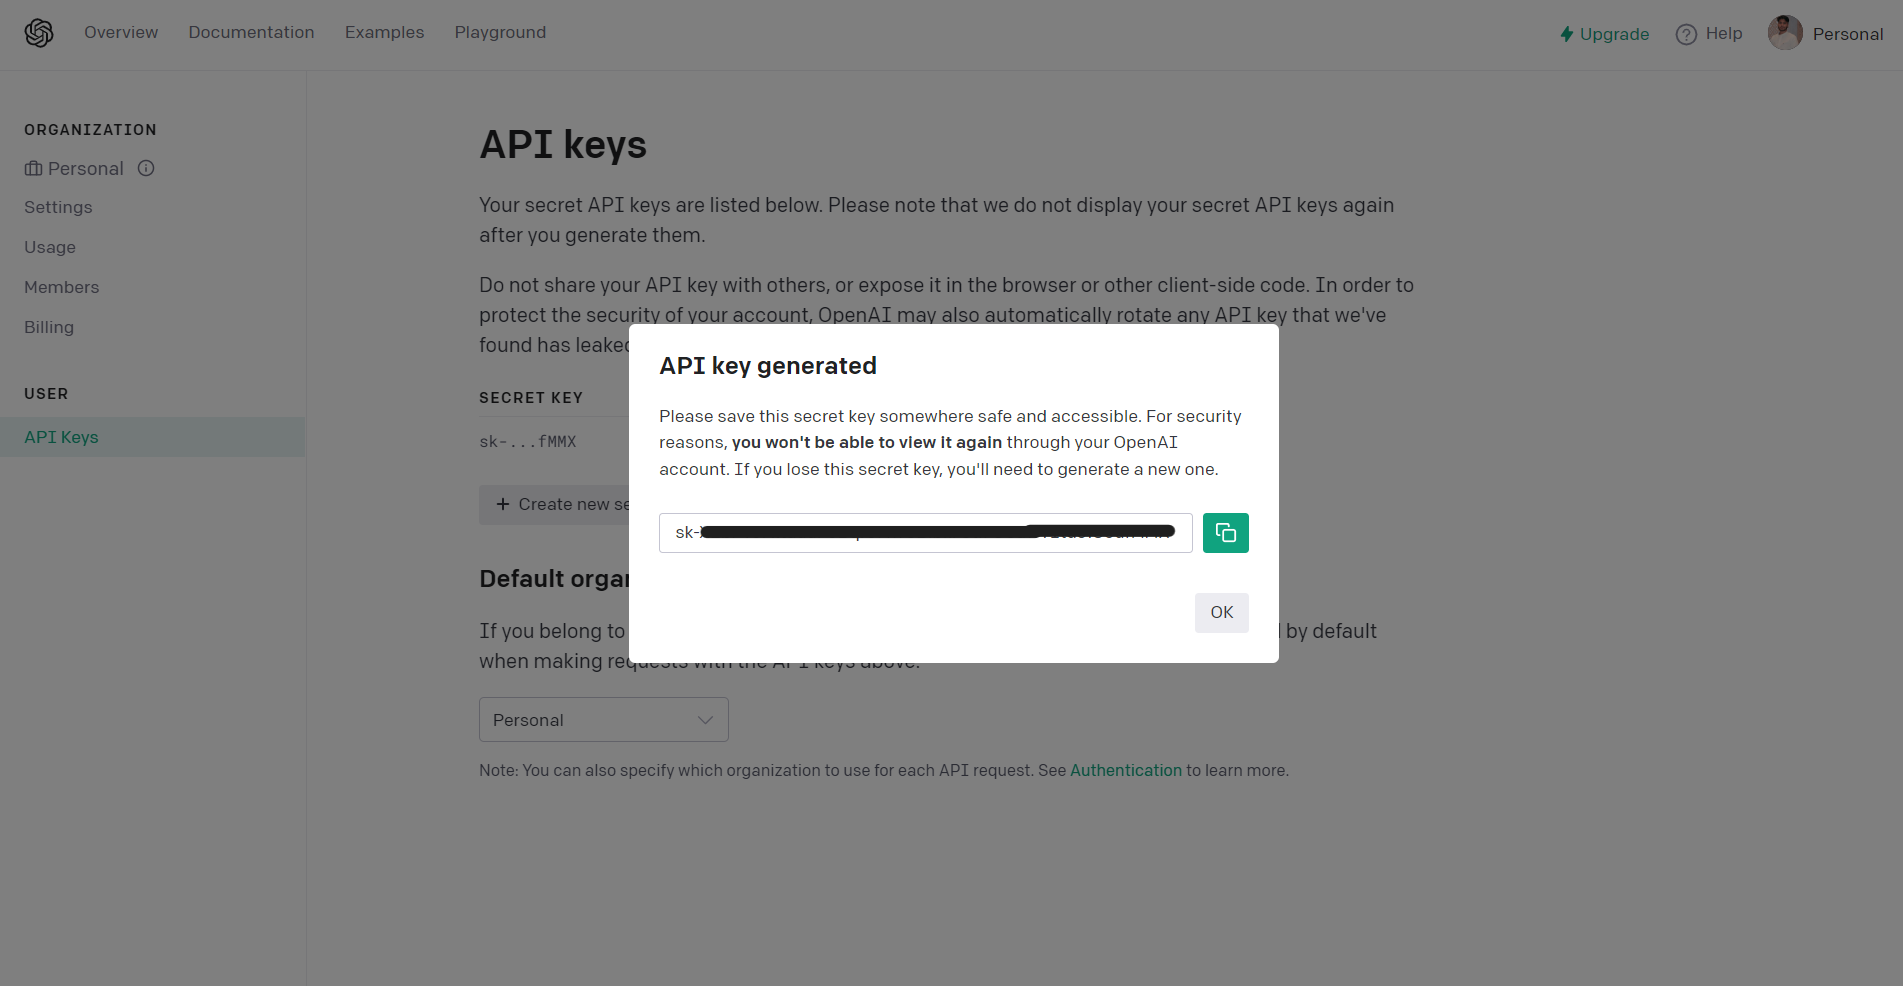
Click on your profile picture to view the menu bar, and then click on View API Keys to go to the API Keys page.
Click on Create new secret key to create a new API Key.
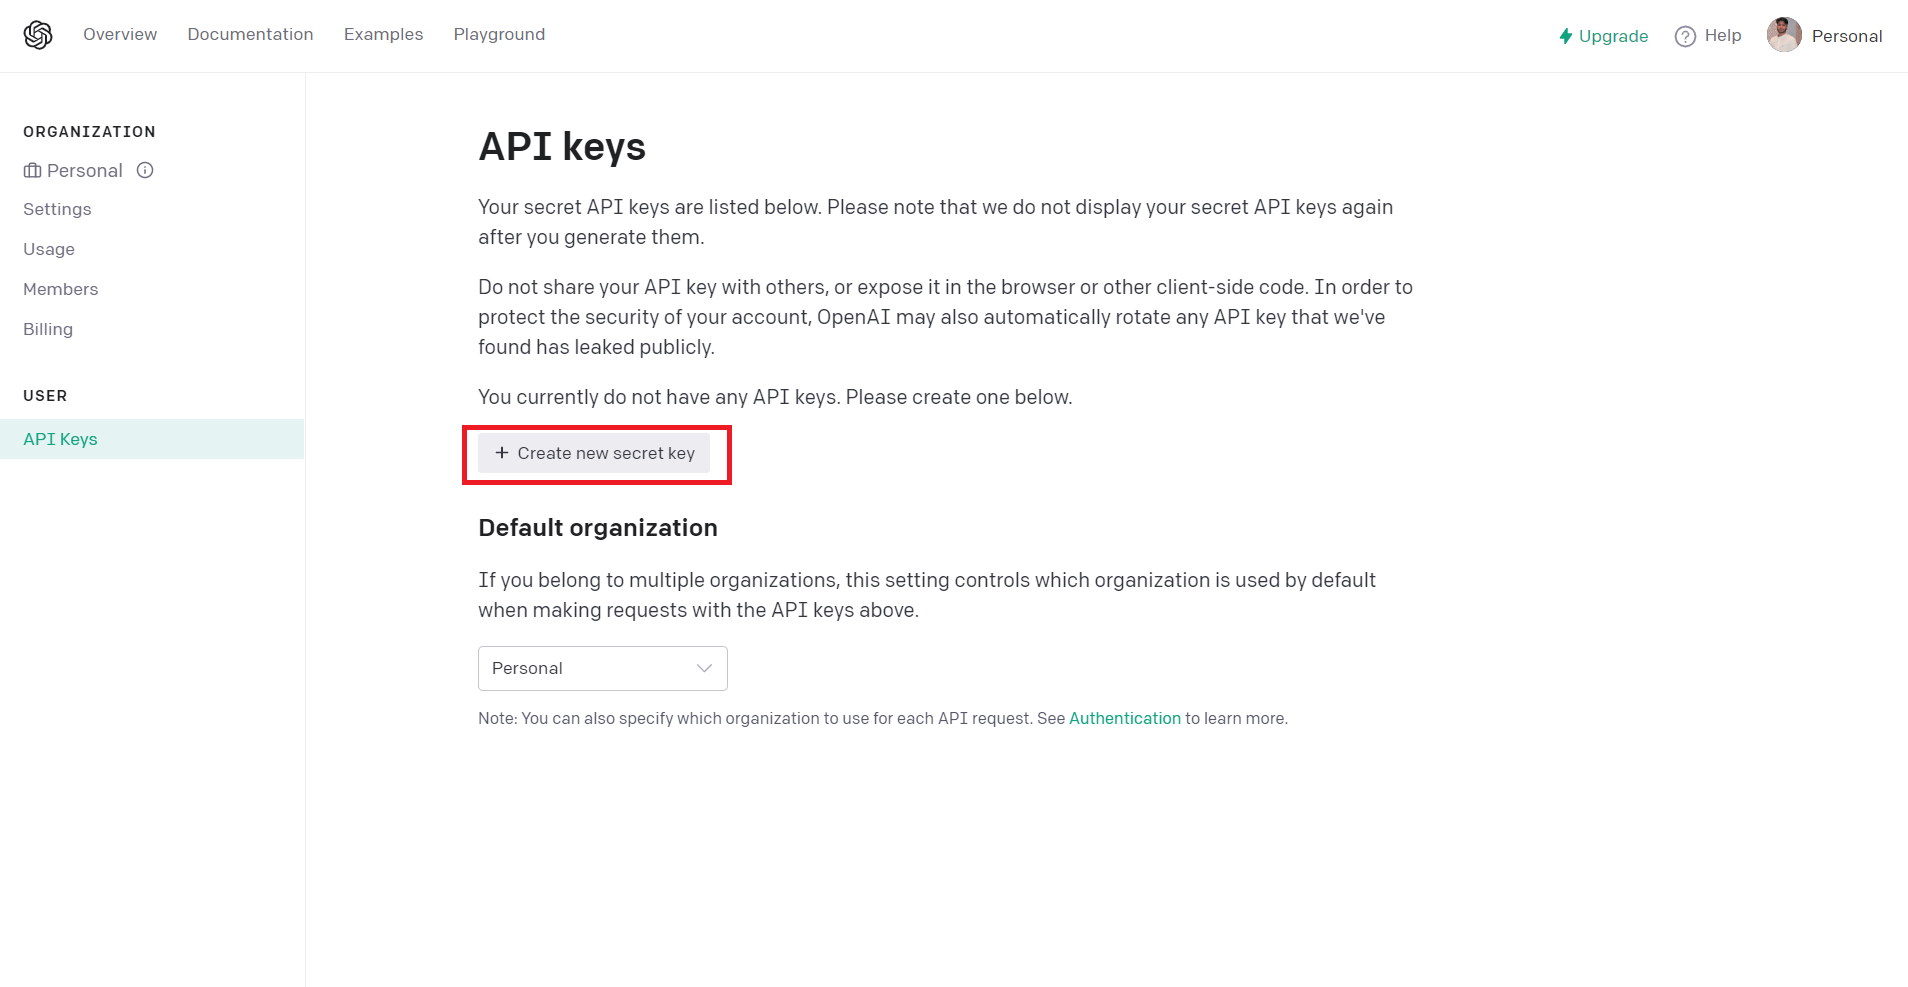
Copy the API Key and store it safely to use later in the tutorial.
Prerequisites
Before you get started with the tutorial, you should have installed:
Setting up Your Medusa Development Environment
In this section, you’ll create a Medusa server where you’ll integrate ChatGPT in the next step.
Setting up Your Medusa Server
Create a new Medusa store called my-medusa-store and seed the test data using the following command:
medusa new my-medusa-store --seed
Start your Medusa server using the following command:
cd my-medusa-store
medusa develop
The above two steps take a couple of minutes to set up and run your server on port 9000. You can test your server by going to http://localhost:9000/store/products on your browser or by running the following command:
curl localhost:9000/store/products
If you get a list of products, your server is successfully set up.
Create a Subscriber to Handle Empty Descriptions
In this section, you’ll create a subscriber in your Medusa server that will listen to the product.created event. The subscriber then calls a function to handle the description field of the product. If the description field is empty, another function will be called to interact with ChatGPT’s text-davinci-003 language model.
While you can directly interact with the models using their APIs, OpenAI also provides you with several official and community libraries for different languages.
Install the official OpenAI library in your Medusa server:
npm install openai
Add the OPENAI_API_KEY in the .env file in your Medusa server:
OPENAI_API_KEY=your-api-key-here
Note: Replace the value of
your-api-key-herewith a valid API key that you obtained from OpenAI earlier in the tutorial.
Since you’re going to create a subscriber in your Medusa server, make sure you enable Redis in the medusa-config.js:
module.exports = {
  projectConfig: {
    redis_url: REDIS_URL, // Enable Redis Here
        //...
  },
  plugins,
};
Create a description.js file inside src/subscribers directory in the Medusa server and add the following content:
import { Configuration, OpenAIApi } from "openai";

const configuration = new Configuration({
  apiKey: process.env.OPENAI_API_KEY, // Replace with your API key
});

class DescriptionSubscriber {
  constructor({ productService, eventBusService }) {
    this.productService_ = productService;
    eventBusService.subscribe("product.created", this.handleDescription);
  }
  handleDescription = async (data) => {
    let productDescription = "";

    const product = await this.productService_.retrieve(data.id);
    if (product.description == null) {
      try {
        const productName = product.title;
        const productFeatures = [product.subtitle, product.material];
        const prompt = `Write a product description for ${productName}, which has the following features: ${productFeatures.join(
          ", "
        )}.`;

        productDescription = await this.prepareDescription(prompt);
      } catch (error) {
        const errorMessage = error.response.data.error.message;
        console.error("Error: " + errorMessage);
        return;
      }

            product.description = productDescription;
      await this.productService_.update(product.id, product);
    }
  };

  prepareDescription = async (
    prompt,
    model = "text-davinci-003",
    temperature = 0.7,
    maxTokens = 256,
    topP = 1,
    frequencyPenalty = 0,
    presencePenalty = 0
  ) => {
    const openai = new OpenAIApi(configuration);

    const response = await openai.createCompletion({
      model,
      prompt,
      temperature,
      max_tokens: maxTokens,
      top_p: topP,
      frequency_penalty: frequencyPenalty,
      presence_penalty: presencePenalty,
    });

    return response.data.choices[0].text.trim();
  };
}

export default DescriptionSubscriber;
In the above code, you import the Configuration class from the openai module and then create a new Configuration object using the Configuration class. The Configuration object is initialized with an API key for the OpenAI API.
You also define a subscriber called DescriptionSubscriber which includes a constructor and two methods: handleDescription and prepareDescription.
The constructor method subscribes to an event called product.created using the eventBusService and specifies that the handleDescription method should be called whenever this event is emitted.
The handleDescription method is an async function that is called with a data argument. As mentioned in the documentation, the event data payload, i.e., the data argument contains just the id of the created product. This method retrieves a product from the productService using the id property of the data object.
If the description of the product is null, the method generates a description using the prepareDescription method and updates the product with the new description.
prepareDescription is an async function that is used to generate product descriptions using OpenAI's Text Completion API. The function takes several parameters as inputs:
prompt: a string that specifies the text prompt that the API should use as a starting point for generating text. In this case, the text that asks for a description of a product by its properties such as name, material, etc.model: (optional, default:"text-davinci-003") a string that specifies the ID of the model that should be used to generate text.temperature: (optional, default:0.7) a float that specifies the sampling temperature to use when generating text.maxTokens: (optional, default:256) an integer that specifies the maximum number of tokens (i.e., words or word pieces) that should be generated.topP: (optional, default:1) a float that specifies the "top-p" value to use when generating text. Higher values will produce more conservative and deterministic output, while lower values will allow for more randomness and diversity in the output.frequencyPenalty: (optional, default:0) a float that specifies the frequency penalty to use when generating text. Higher values will produce more diverse output, while lower values will allow the model to reuse more common tokens.presencePenalty: (optional, default:0) a float that specifies the presence penalty to use when generating text.
The function creates an instance of the OpenAIApi class, which is used to communicate with the OpenAI API, and then calls the createCompletion method on this instance to generate text.
Testing the Flow
Once you’ve made the required changes in your Medusa server, you’ll need to build your project using the command:
npm run build
Next, you can restart your server using the command:
medusa develop
Setting up Your Medusa Admin
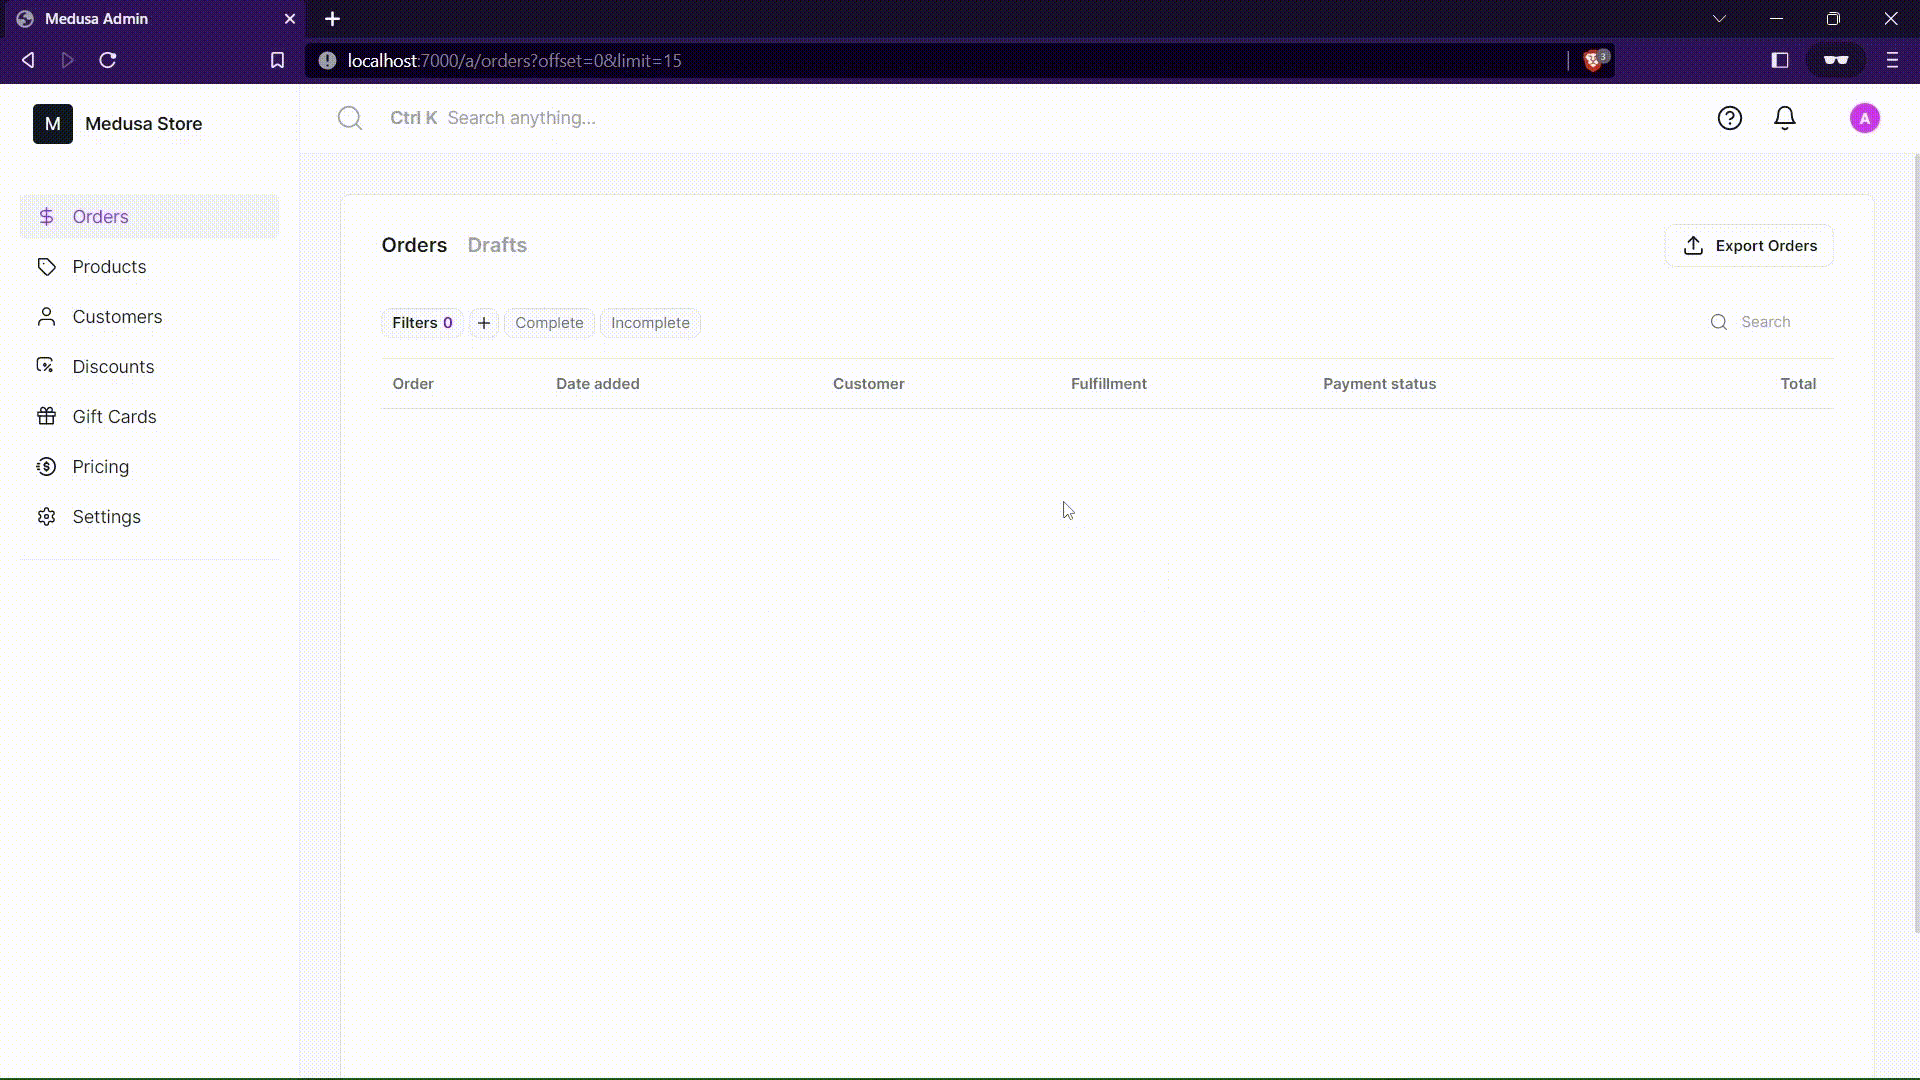
You can test the flow both from the Medusa Admin and the Admin APIs. In this case, you’ll test using the Medusa Admin.
Medusa Admin is an intuitively designed admin dashboard for your ecommerce Medusa server. Medusa Admin is built with Vite 3 and React. It allows merchants to manage their data such as products, orders, discounts, regions, and more.
Follow the steps to set up your Medusa Admin and create products:
Clone the Medusa Admin GitHub repository and change your path to the cloned directory:
git clone https://github.com/medusajs/admin my-medusa-admin
cd my-medusa-admin
Install the dependencies using the following command:
npm install
Once all the dependencies are installed, run the Admin server using the following command:
npm run start
The Medusa Admin runs on port 7000, so go to http://localhost:7000 in your browser to open your Admin Panel.
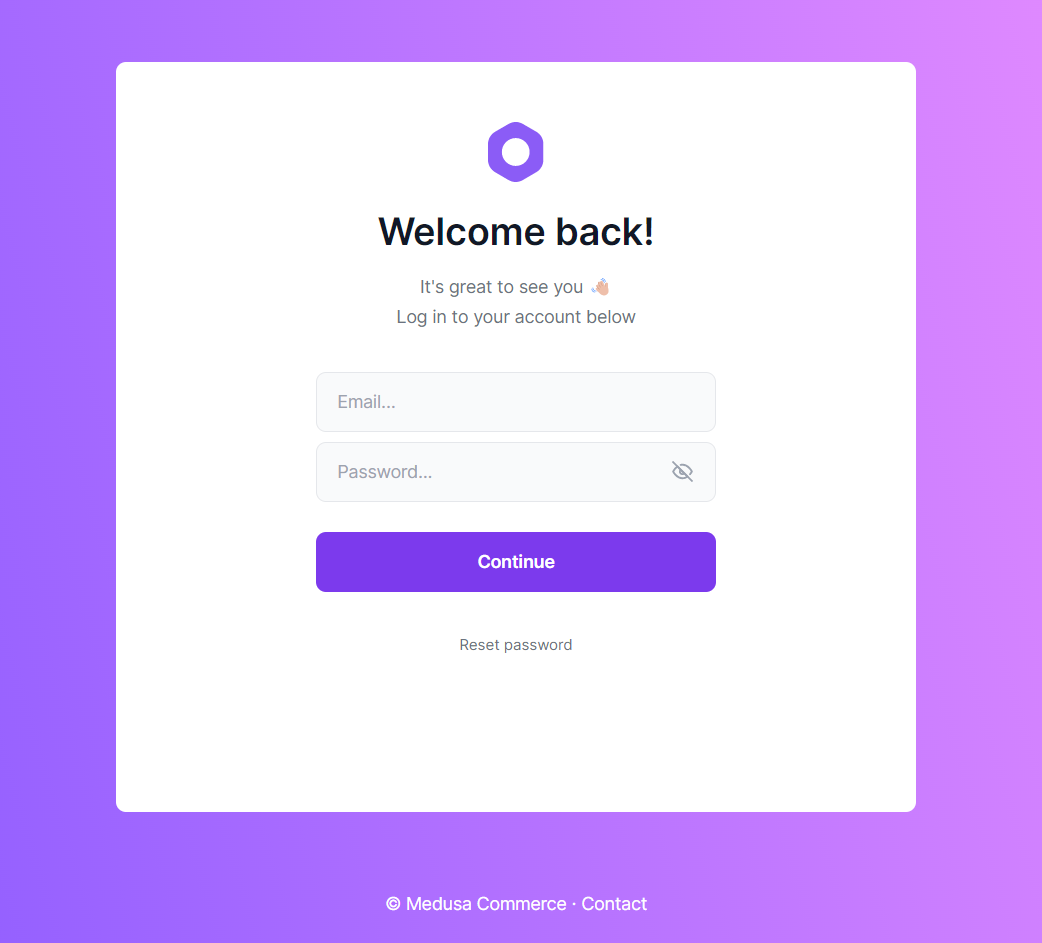
Since you’ve already seeded the data in your Medusa server, you can use the email admin@medusa-test.com and password supersecret to log in.
Creating Products in Medusa Admin
Click on the Products tab on the left side and then click on the New Product button.
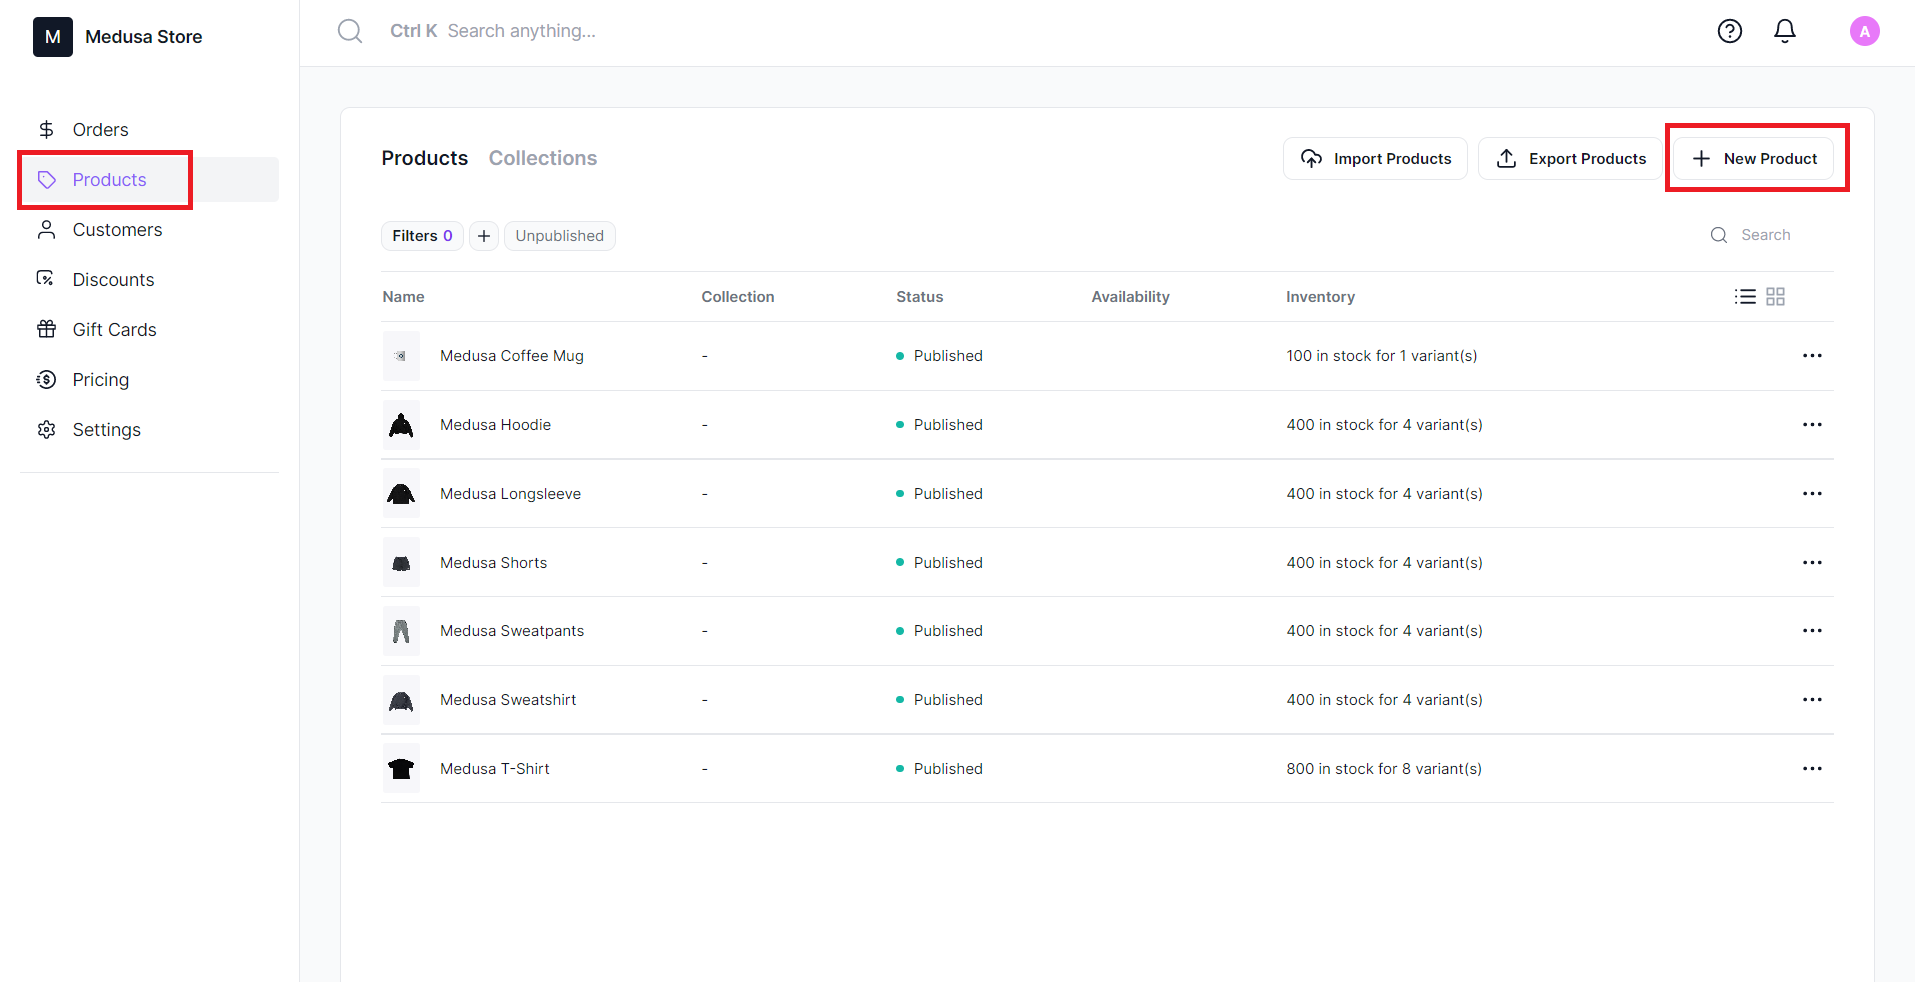
Since the admin is configured to fetch the products right after the product is created, which is before the subscriber runs, you’ll need to refresh the page to see the changes. You can customize the admin to refetch the product after it’s created to resolve this.
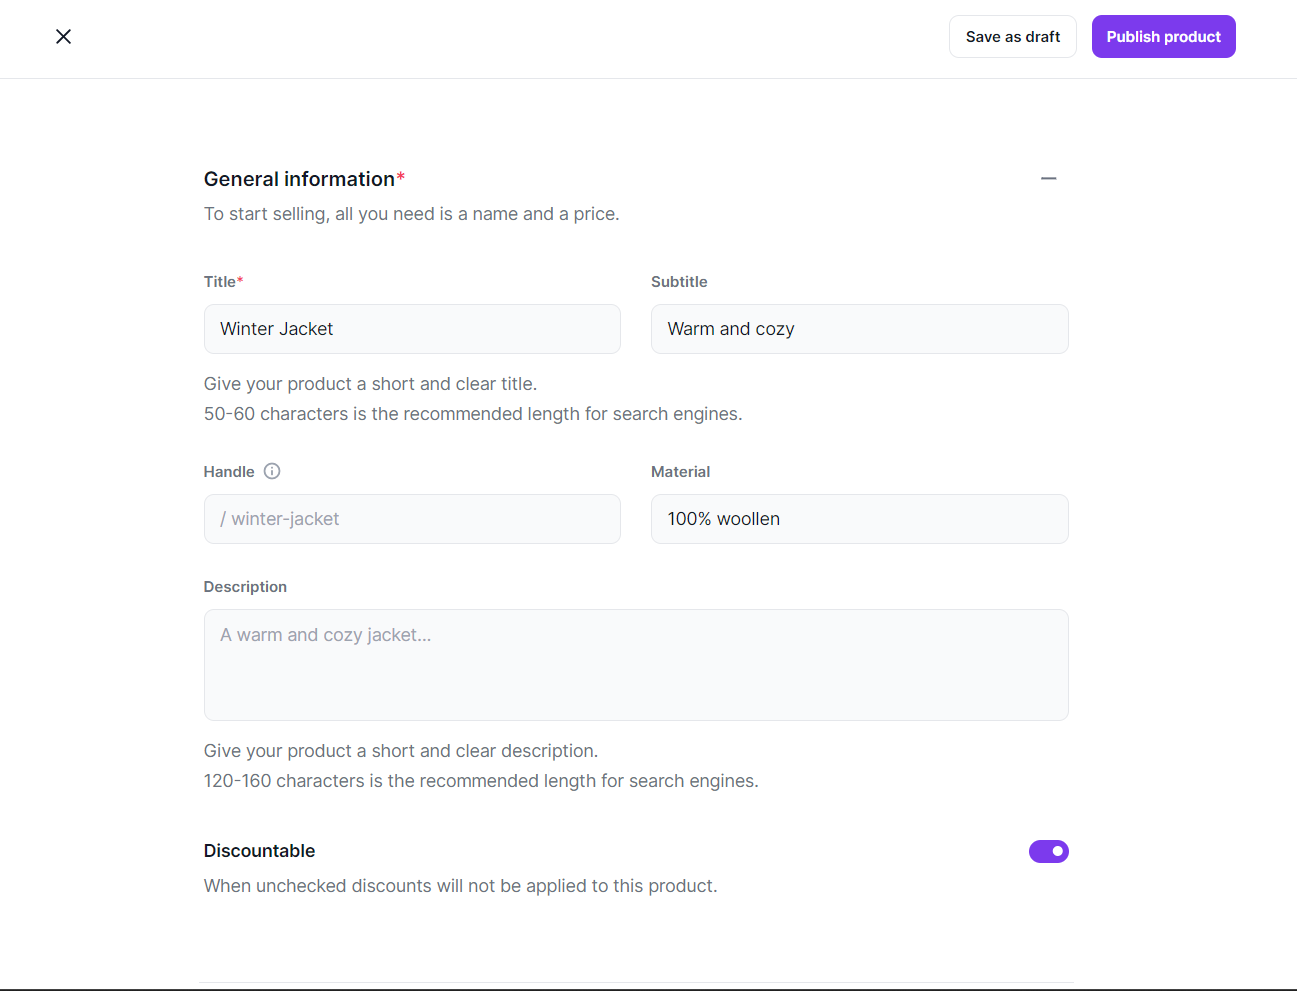
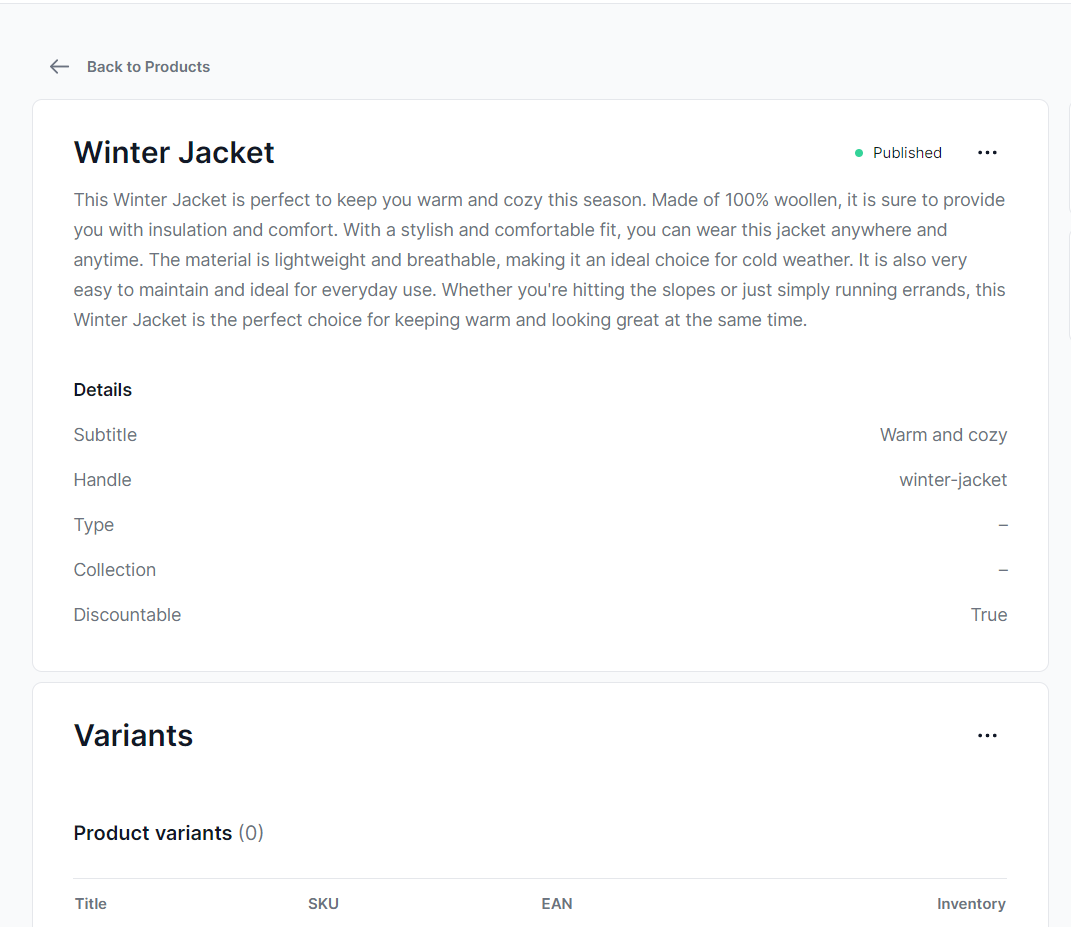
Once you publish a product without a description, your product will initially be created with an empty description. The product.created event is then emitted, and the DescriptionSubscriber is triggered.
Since the description is empty, the subscriber uses the prepareDescription function to generate a description and updates the description of the product.
Conclusion
In this tutorial, you learned how you can use ChatGPT to automate writing your product description. You can add more product features such as its price, variants, and more to generate a more unique description.
This integration was made easy due to Medusa’s composable architecture. You can learn more about Medusa through its documentation. Here are some documents that you can start with:
Integrate Stripe as a payment provider.
Create a custom endpoint.
Should you have any issues or questions related to Medusa, then feel free to reach out to the Medusa team via Discord.