Medusa is an Open Source headless commerce that allows you to build digital commerce through its API with just a few commands. You can host Medusa’s server on any of your preferred hosting choices, and one way to host it is using Railway.
Railway is a deployment platform where you can provide infrastructure, develop that infrastructure locally, and then deploy it to the cloud.
This guide will teach you how to pull your Medusa server code from a GitHub repository and automatically deploy it to Railway. You also will learn how to set up Postgres and Redis databases for your Medusa server.
Why Railway?
Railway helps you ship quickly by removing common developer hurdles. With it, you can deploy a Medusa server to production without hassle. Their tool extends your app with plugins; if you need a database, create a new service, and you are good to go.
Railway also offers a way to have several environments to test your apps before going to production. It scales apps to meet user demand automatically, based on load. You also get an automatic pipeline to make new deployments each time your repositories are updated.
Lastly, their user-friendly interface is easy to use, so you can do everything in the web app without touching your terminal. Railway makes it easy for developers to deploy their applications and go to production quickly.
Prerequisites
To follow along with this tutorial, you need a working Medusa server application. You can follow the quickstart guide to getting started.
Furthermore, your Medusa server should be configured to work with PostgreSQL and Redis. You can follow the Configure your Server documentation to learn how to do that.
You also need a GitHub account that needs to be linked with a Railway account, so you can pull your code to make the deployments.
Setting up a Project on Railway
Let’s begin by setting up the project on Railway.
Create the Postgres Database
The first step is to create a project on Railway with a PostgreSQL database. Later on, you will connect that database with the Medusa server.
Log in on the Railway platform, go to the dashboard, and then click on the New Project button.

You will be redirected to the new project page. Once you are there, on the dropdown, choose the Provision PostgreSQL option.
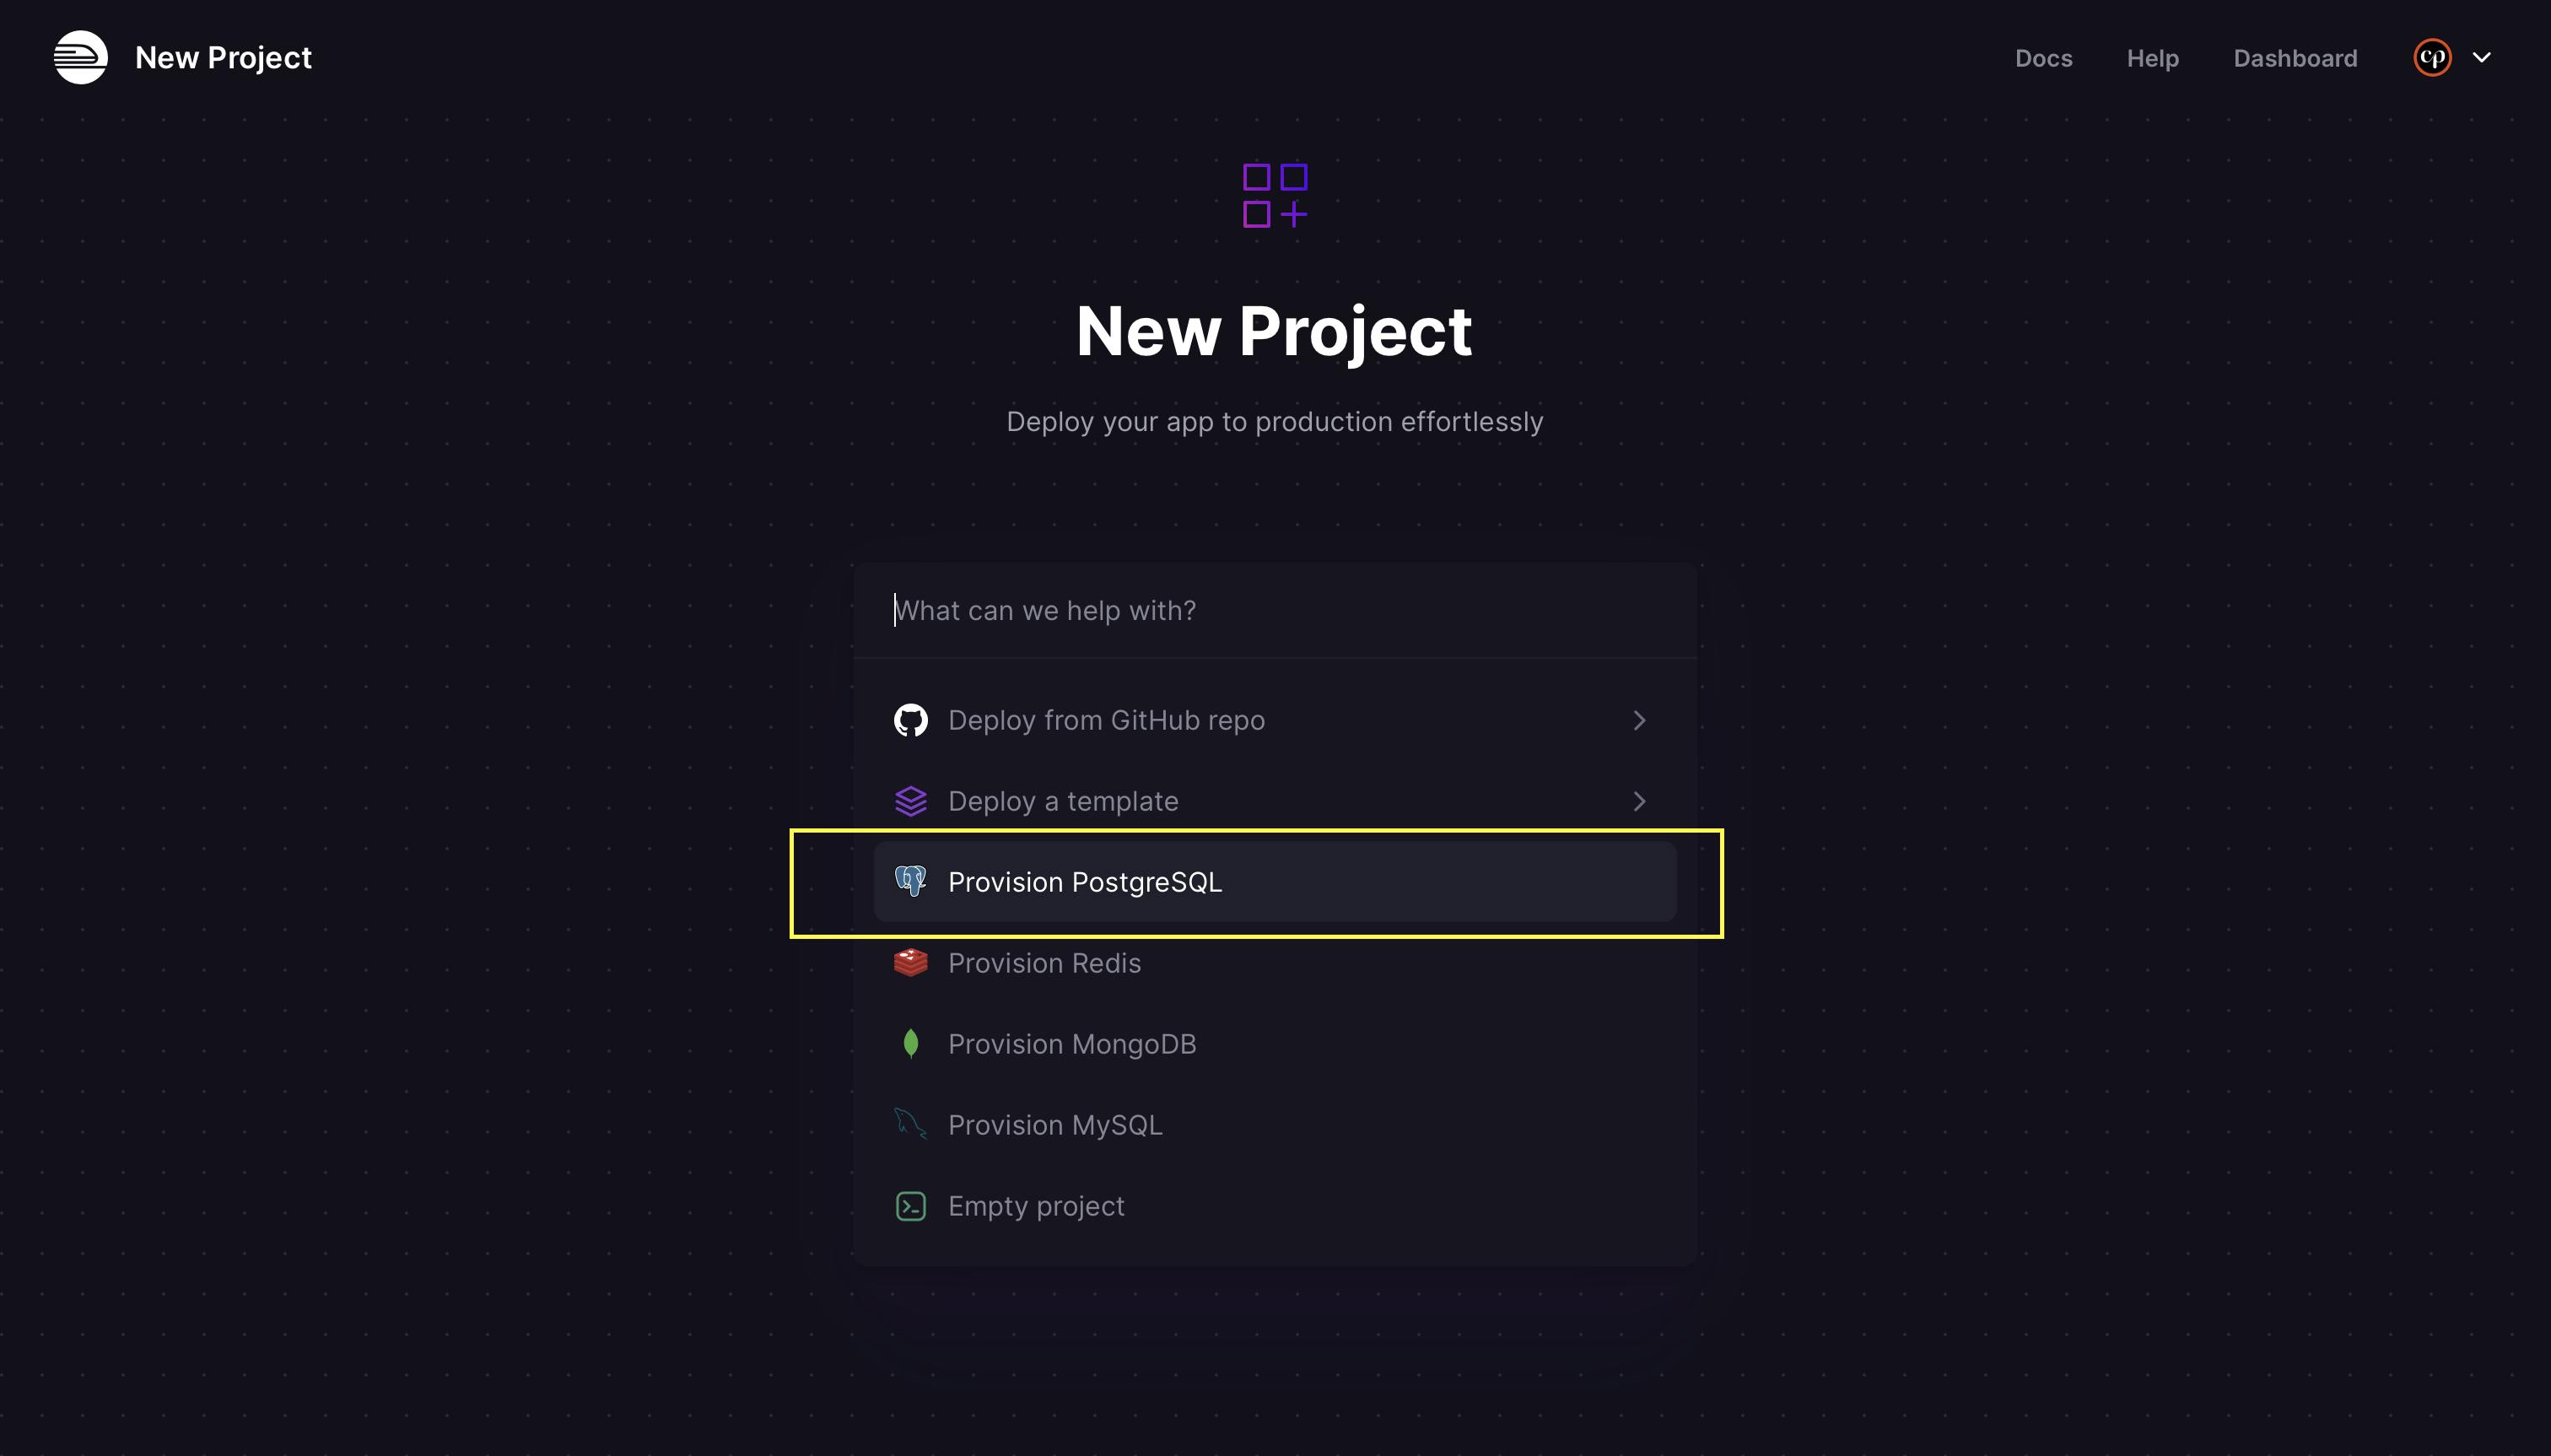
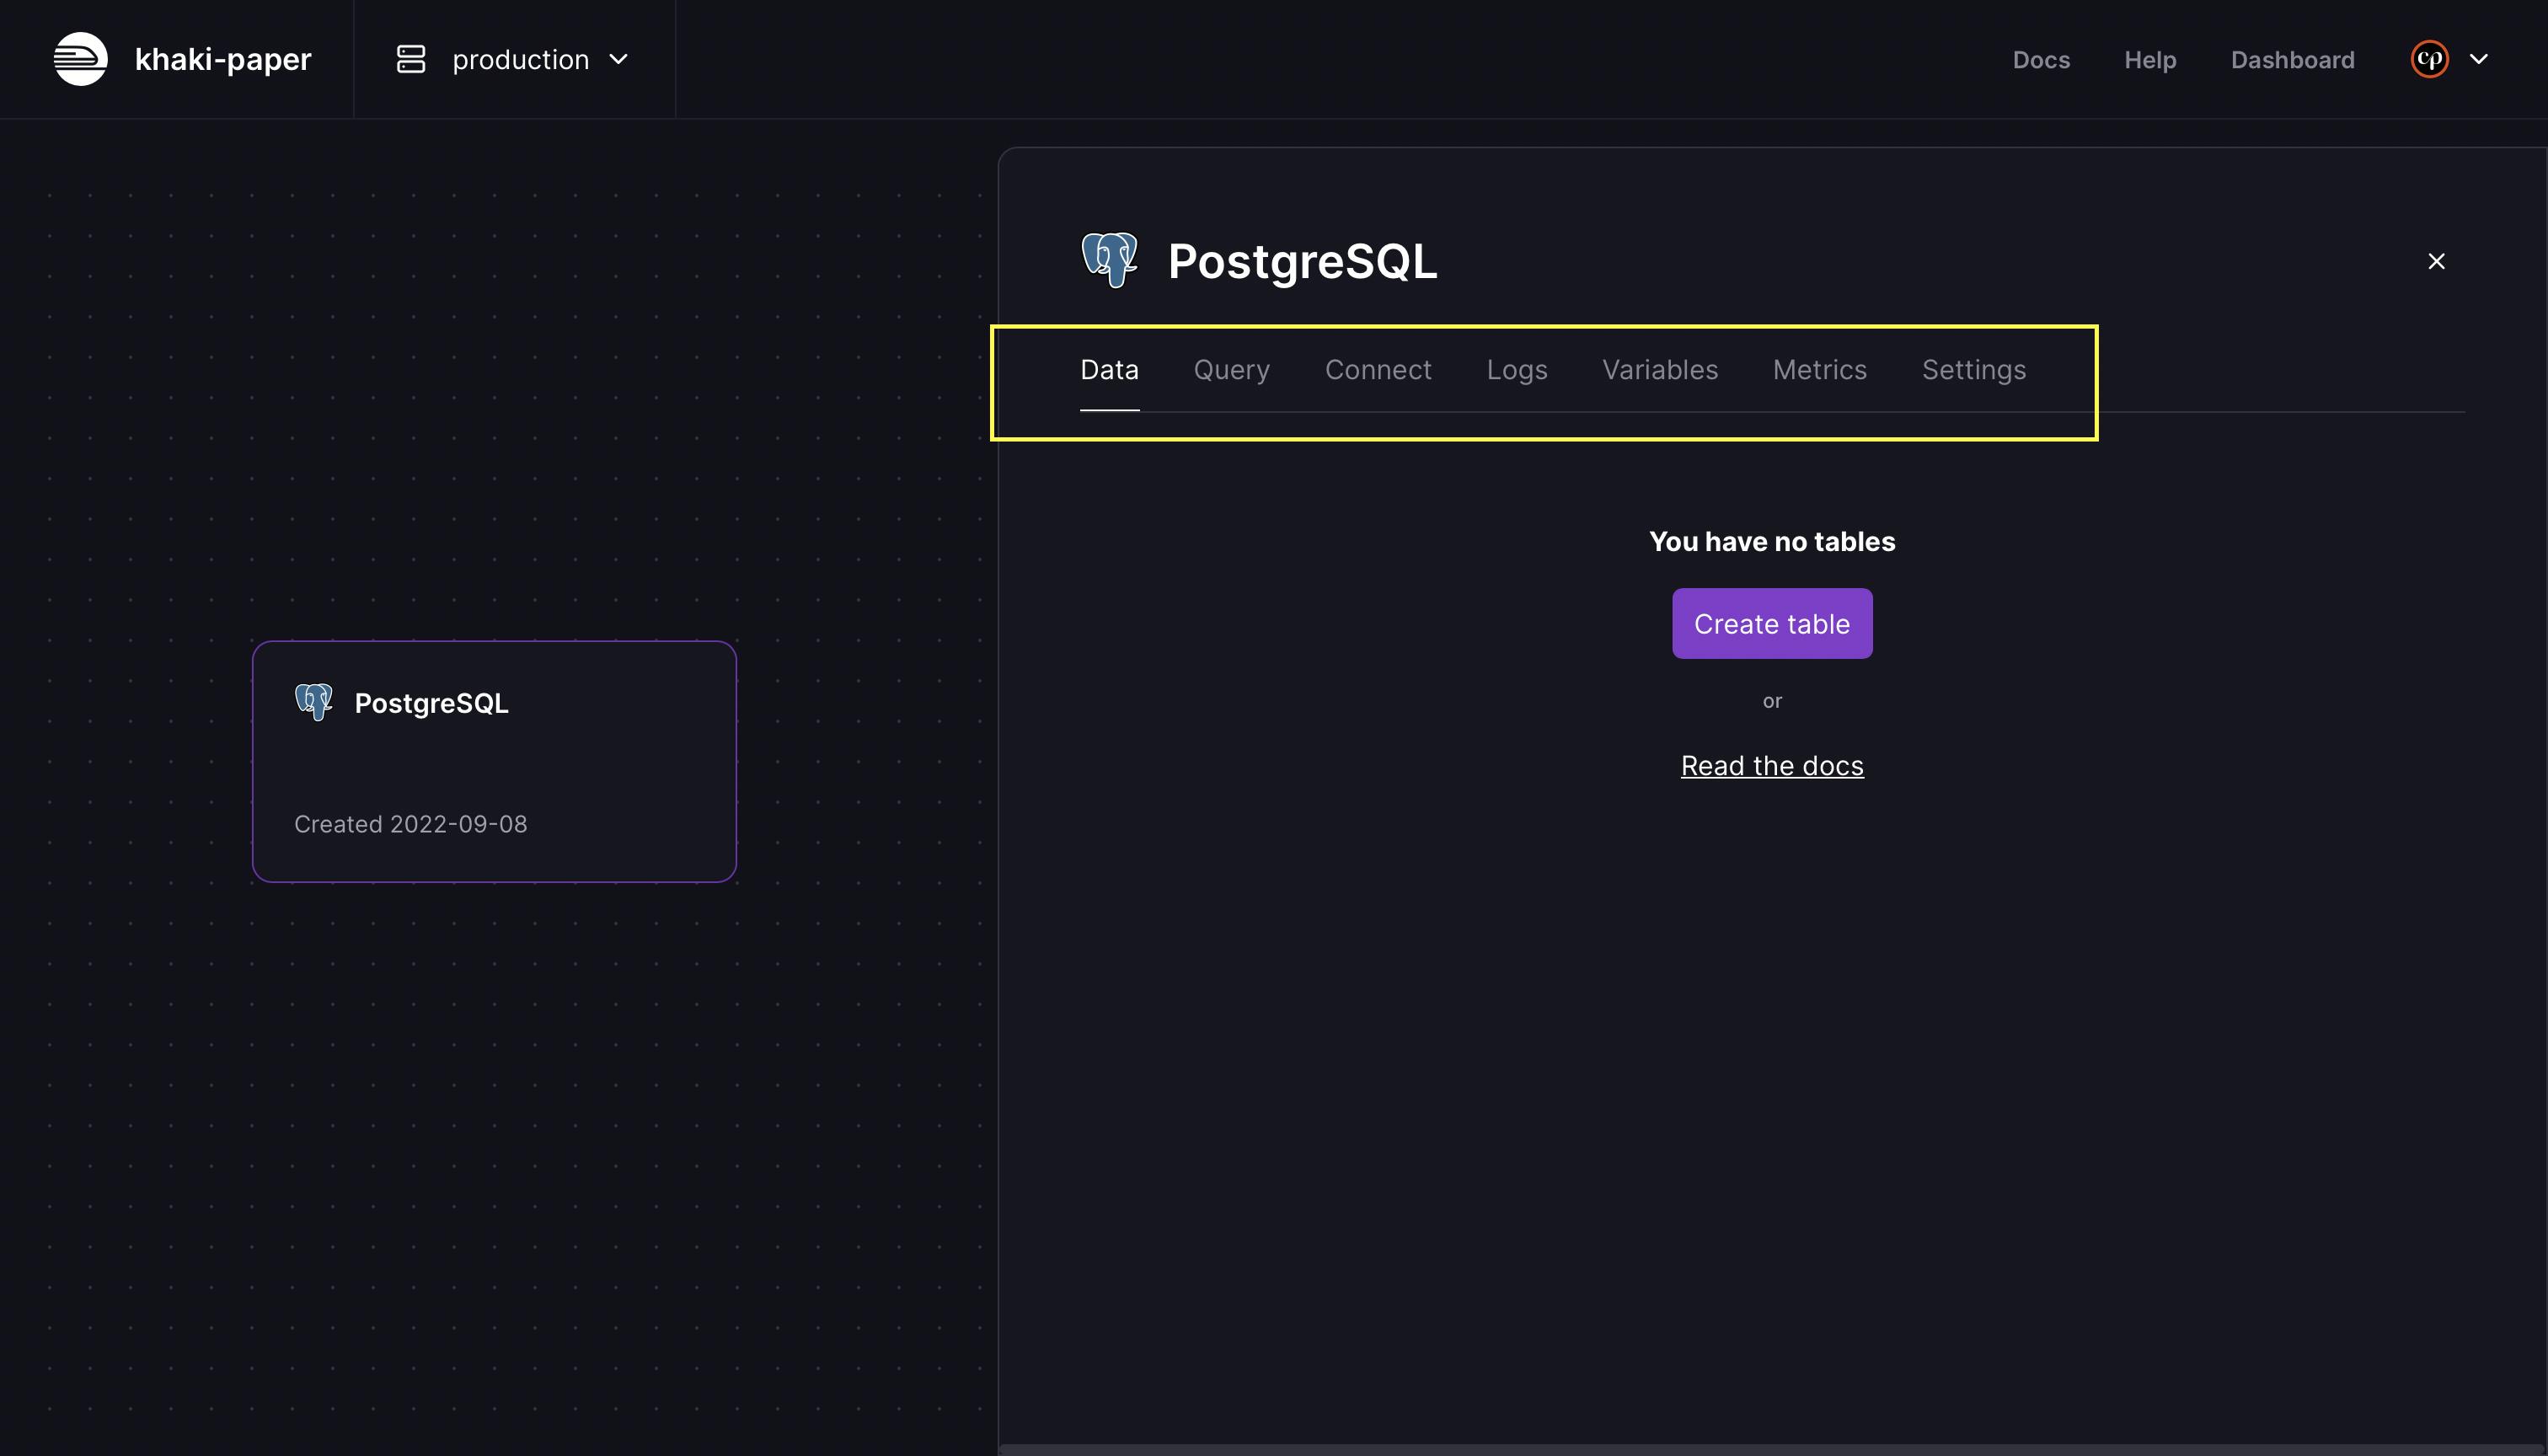
By choosing that option, a new database will be created and after a few seconds, you will be redirected to the project page where you will see the newly-created database. You will see a sidebar with some database options if you click on the database card.
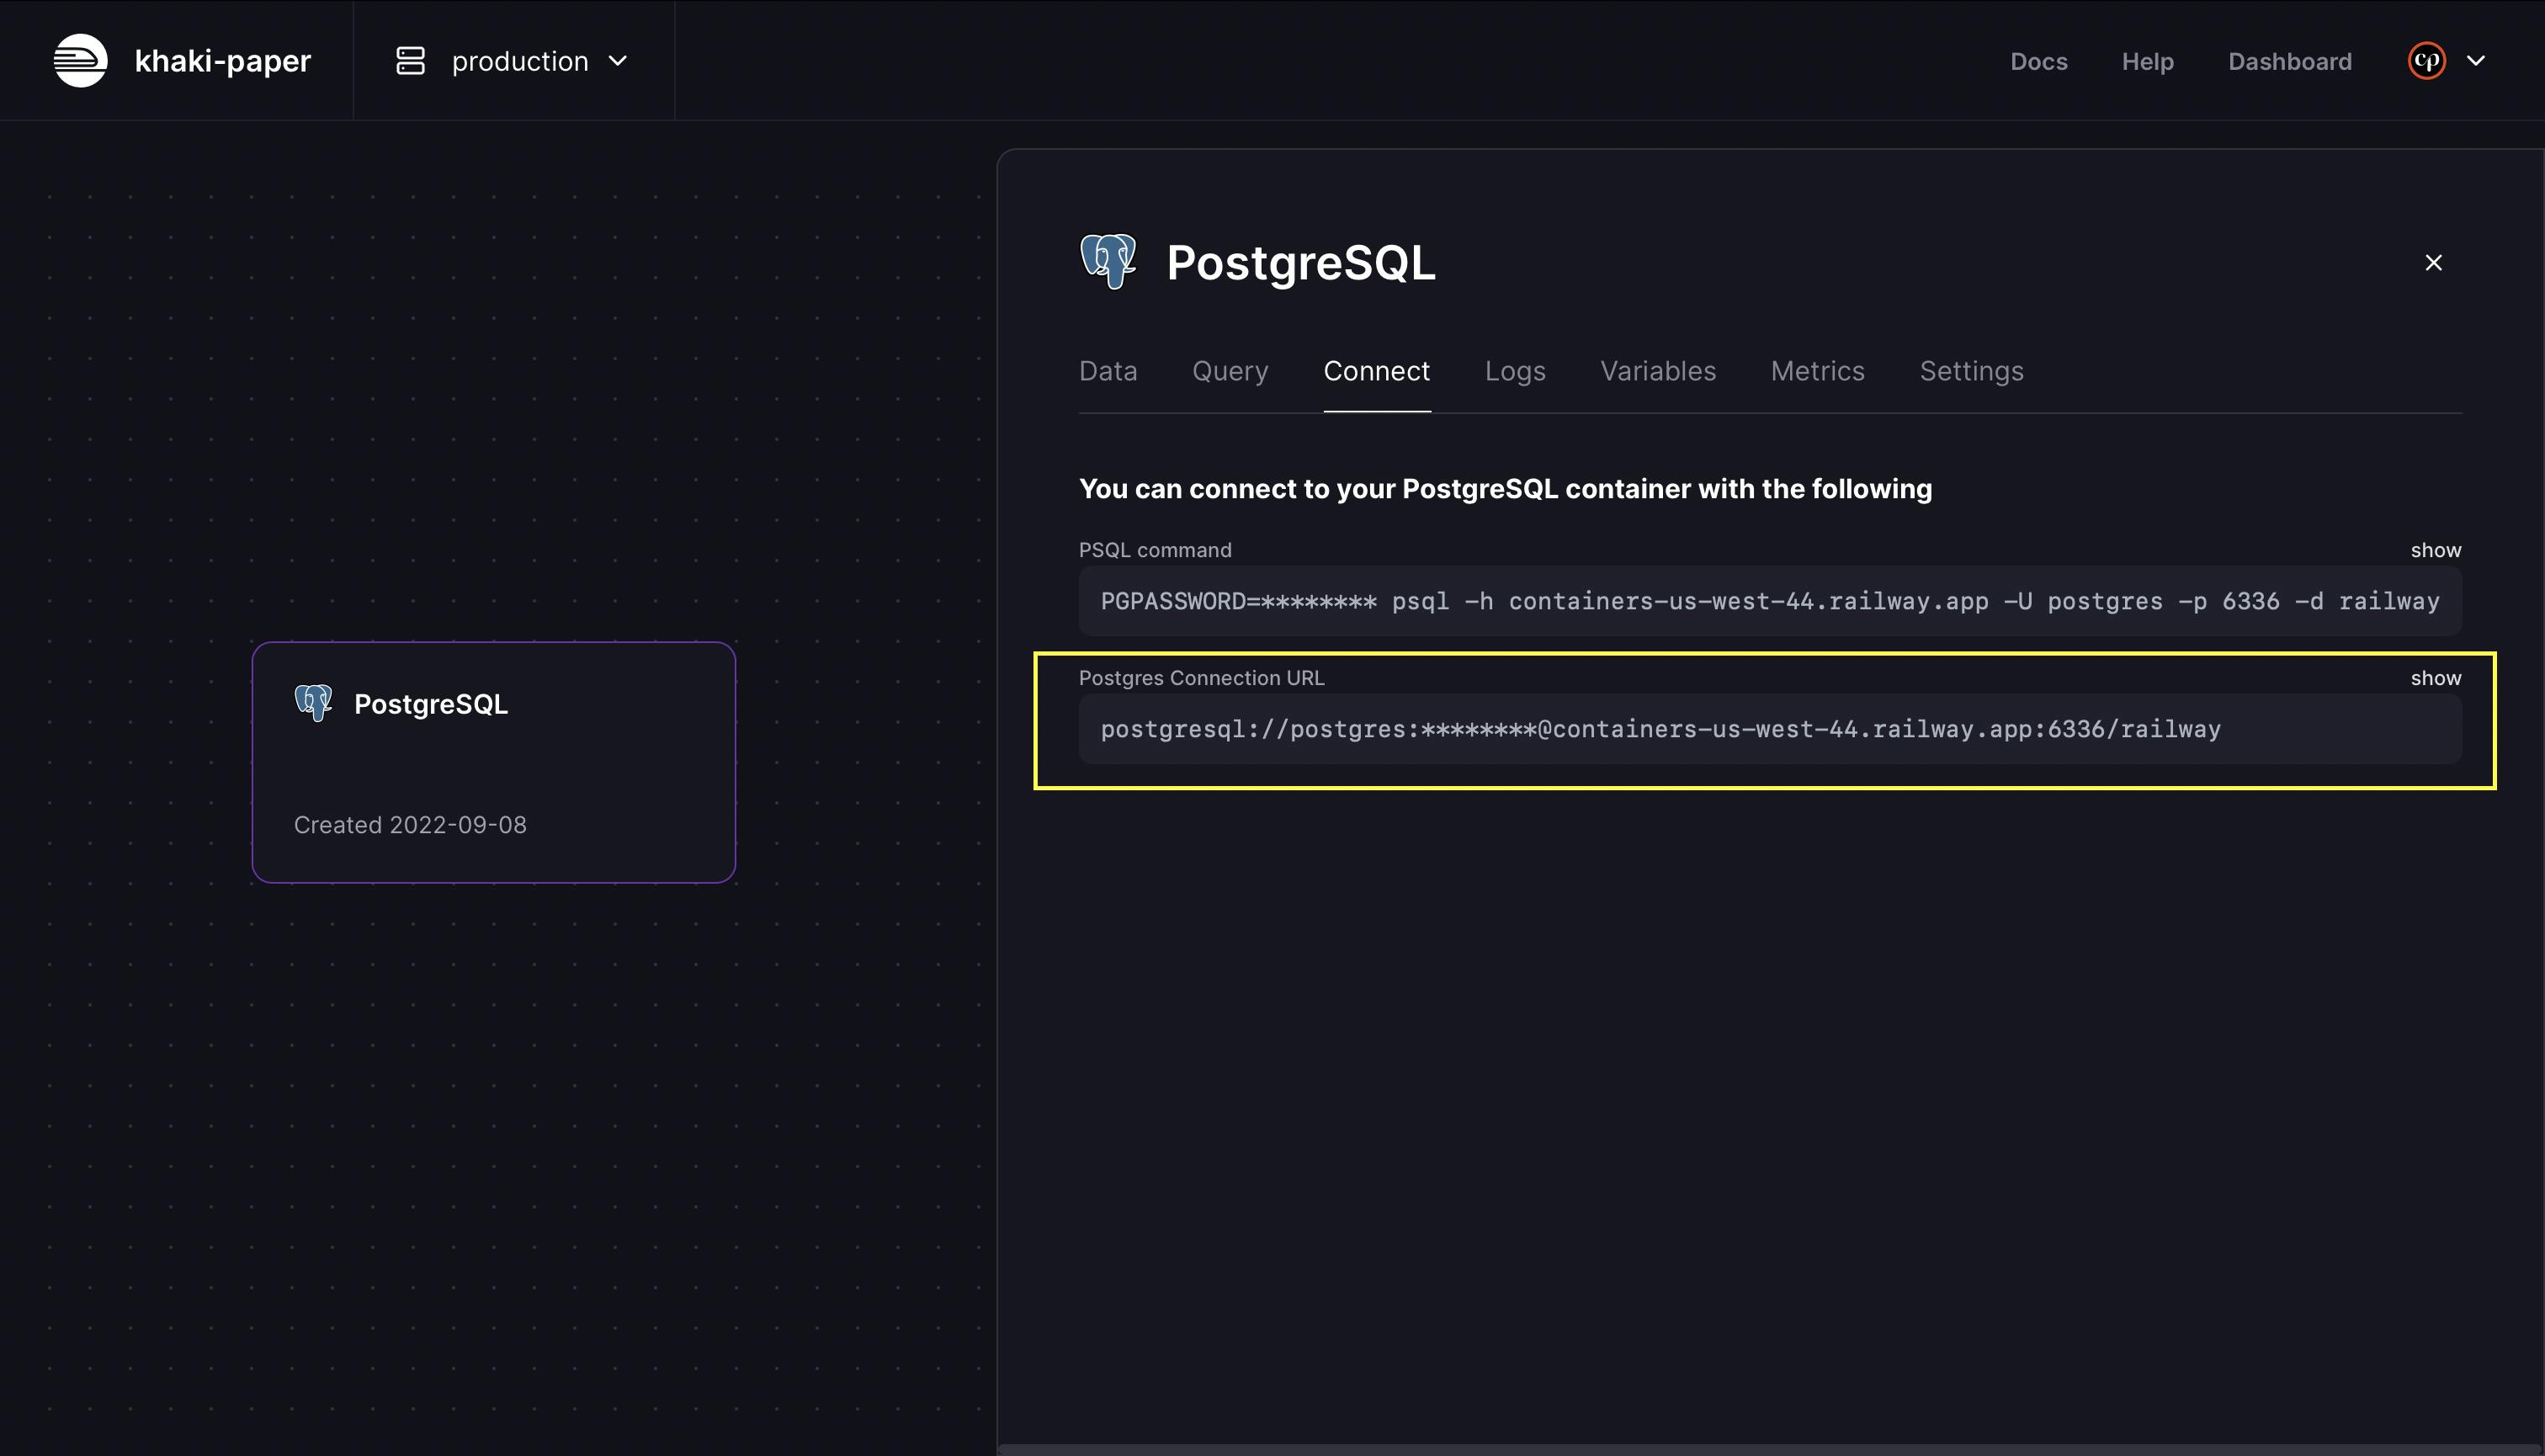
Go to the Connect tab you’ll find the Postgres connection URL. You’ll need to use this in the next section.
Create the Redis Database
The second step is to add a Redis database to handle the event queues of your Medusa server.
On to the project view, click on the New button, then choose the Database option, and choose Add Redis.
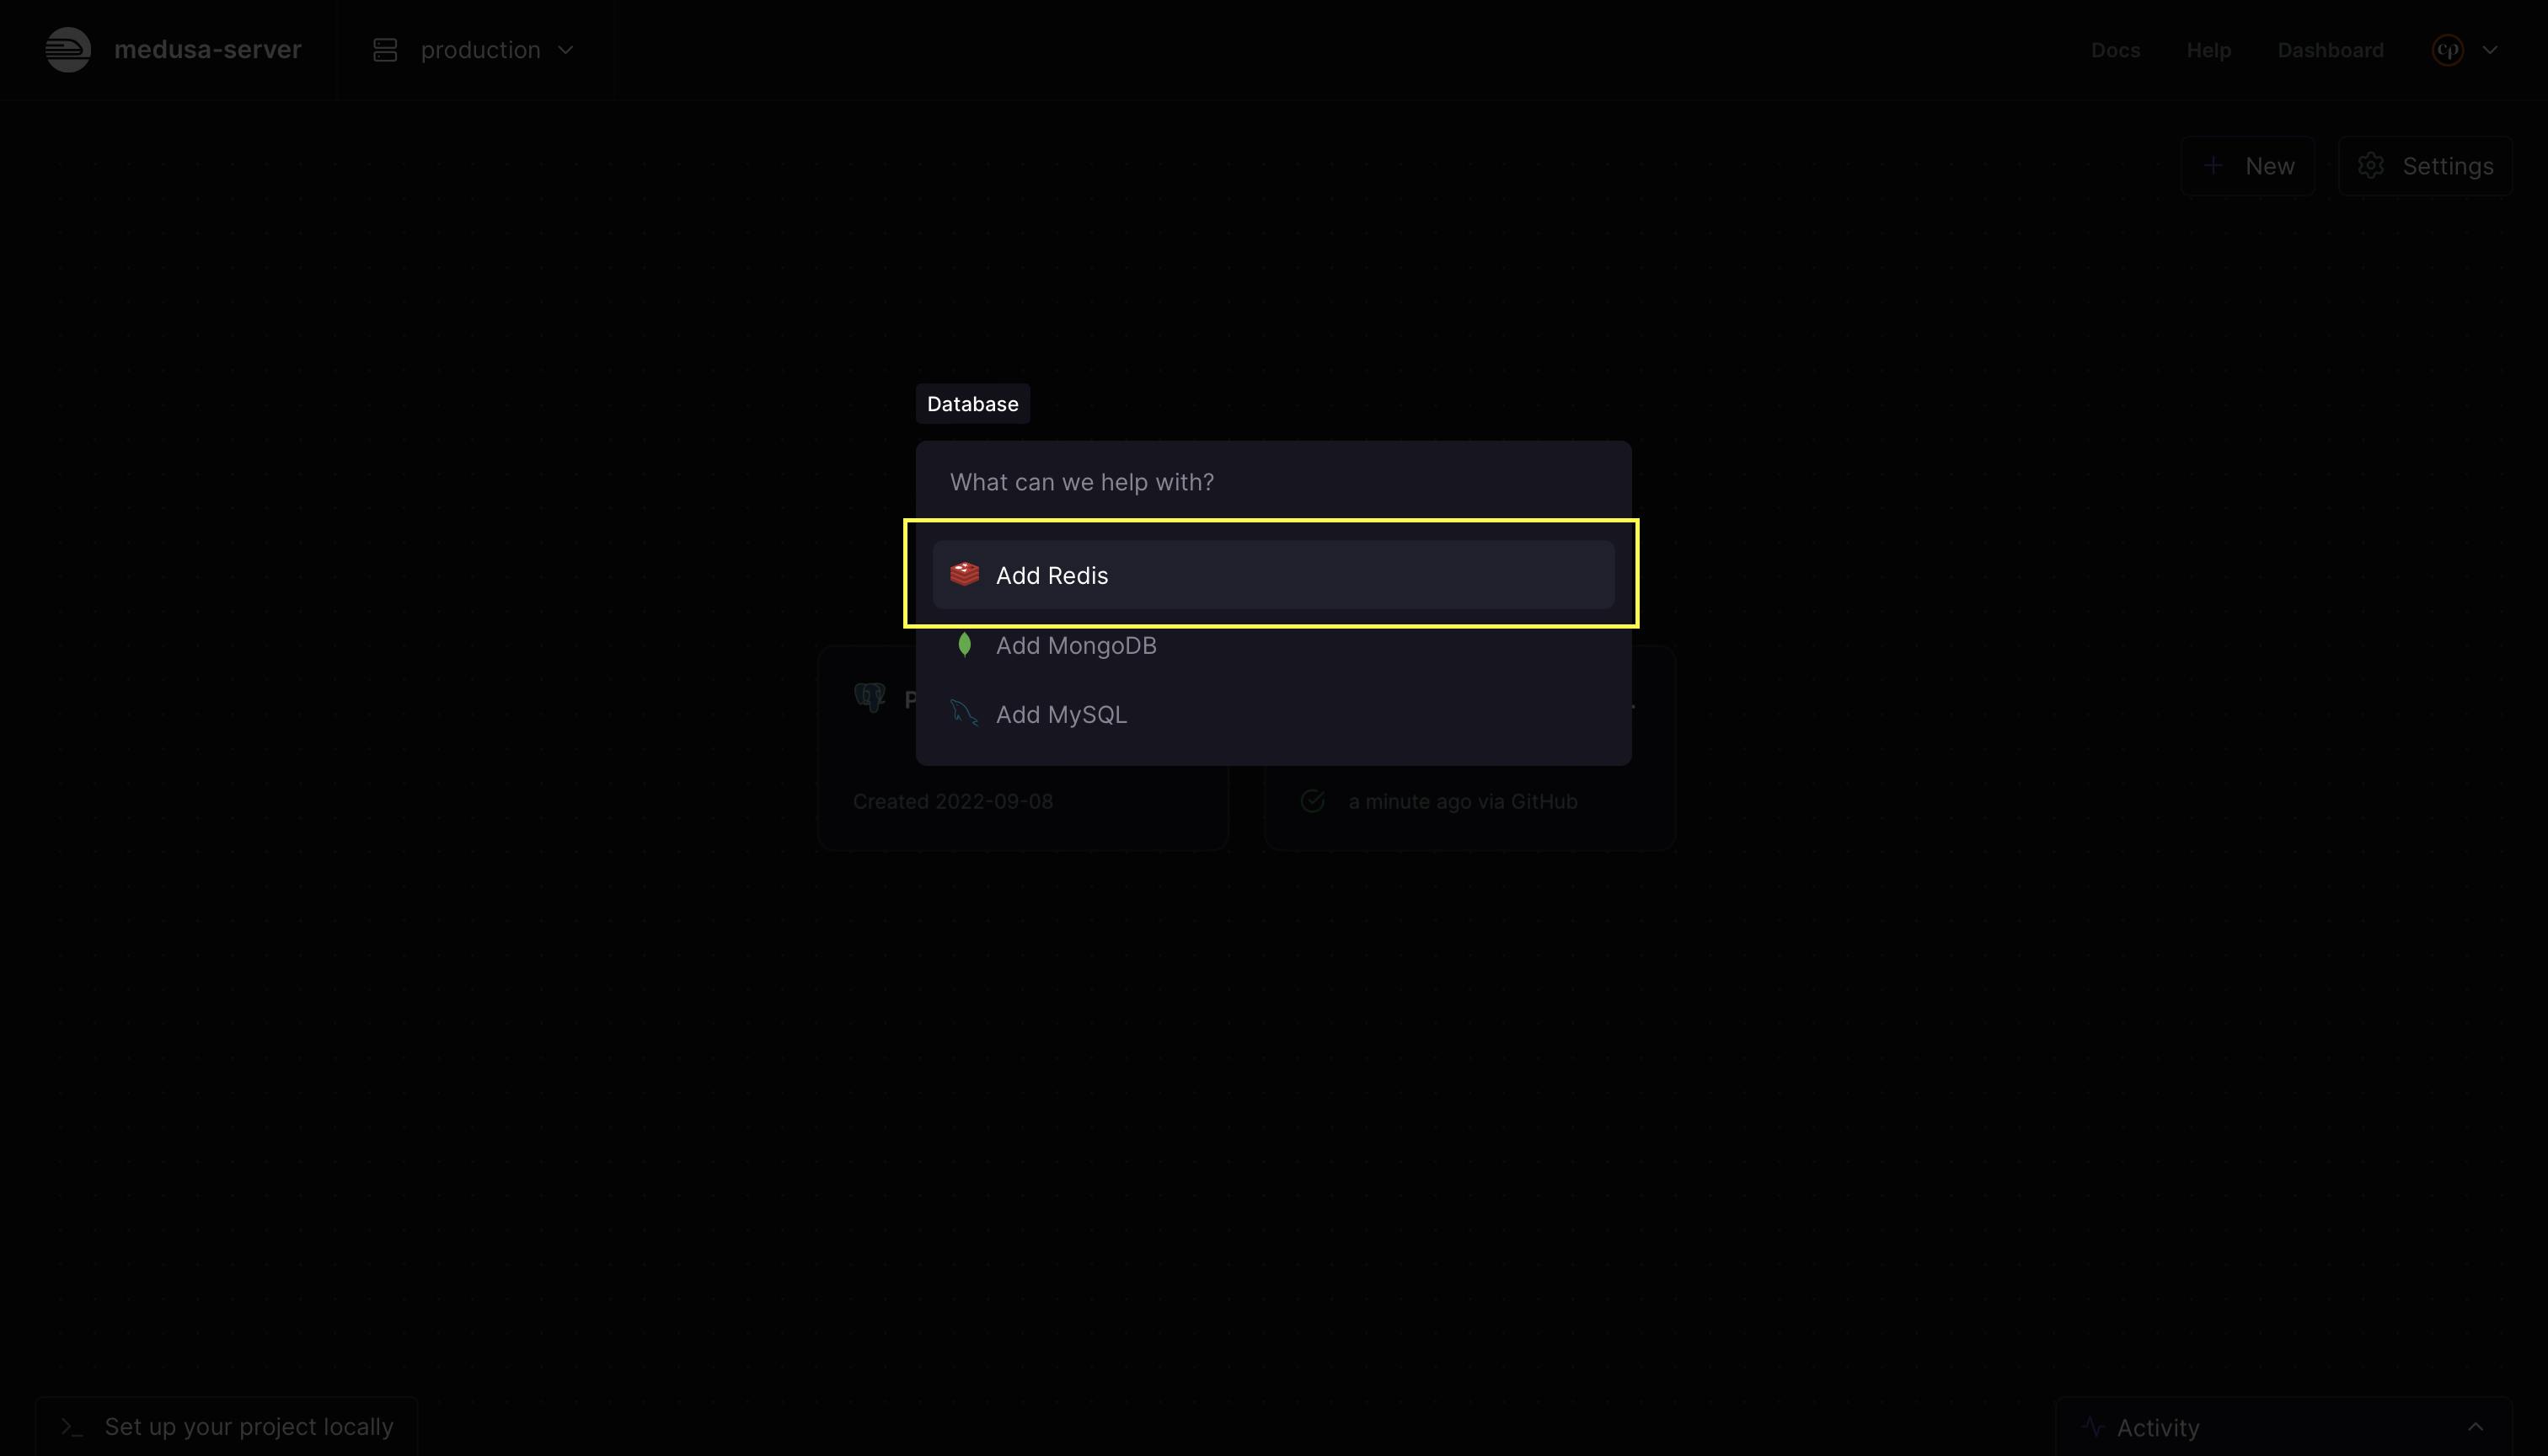
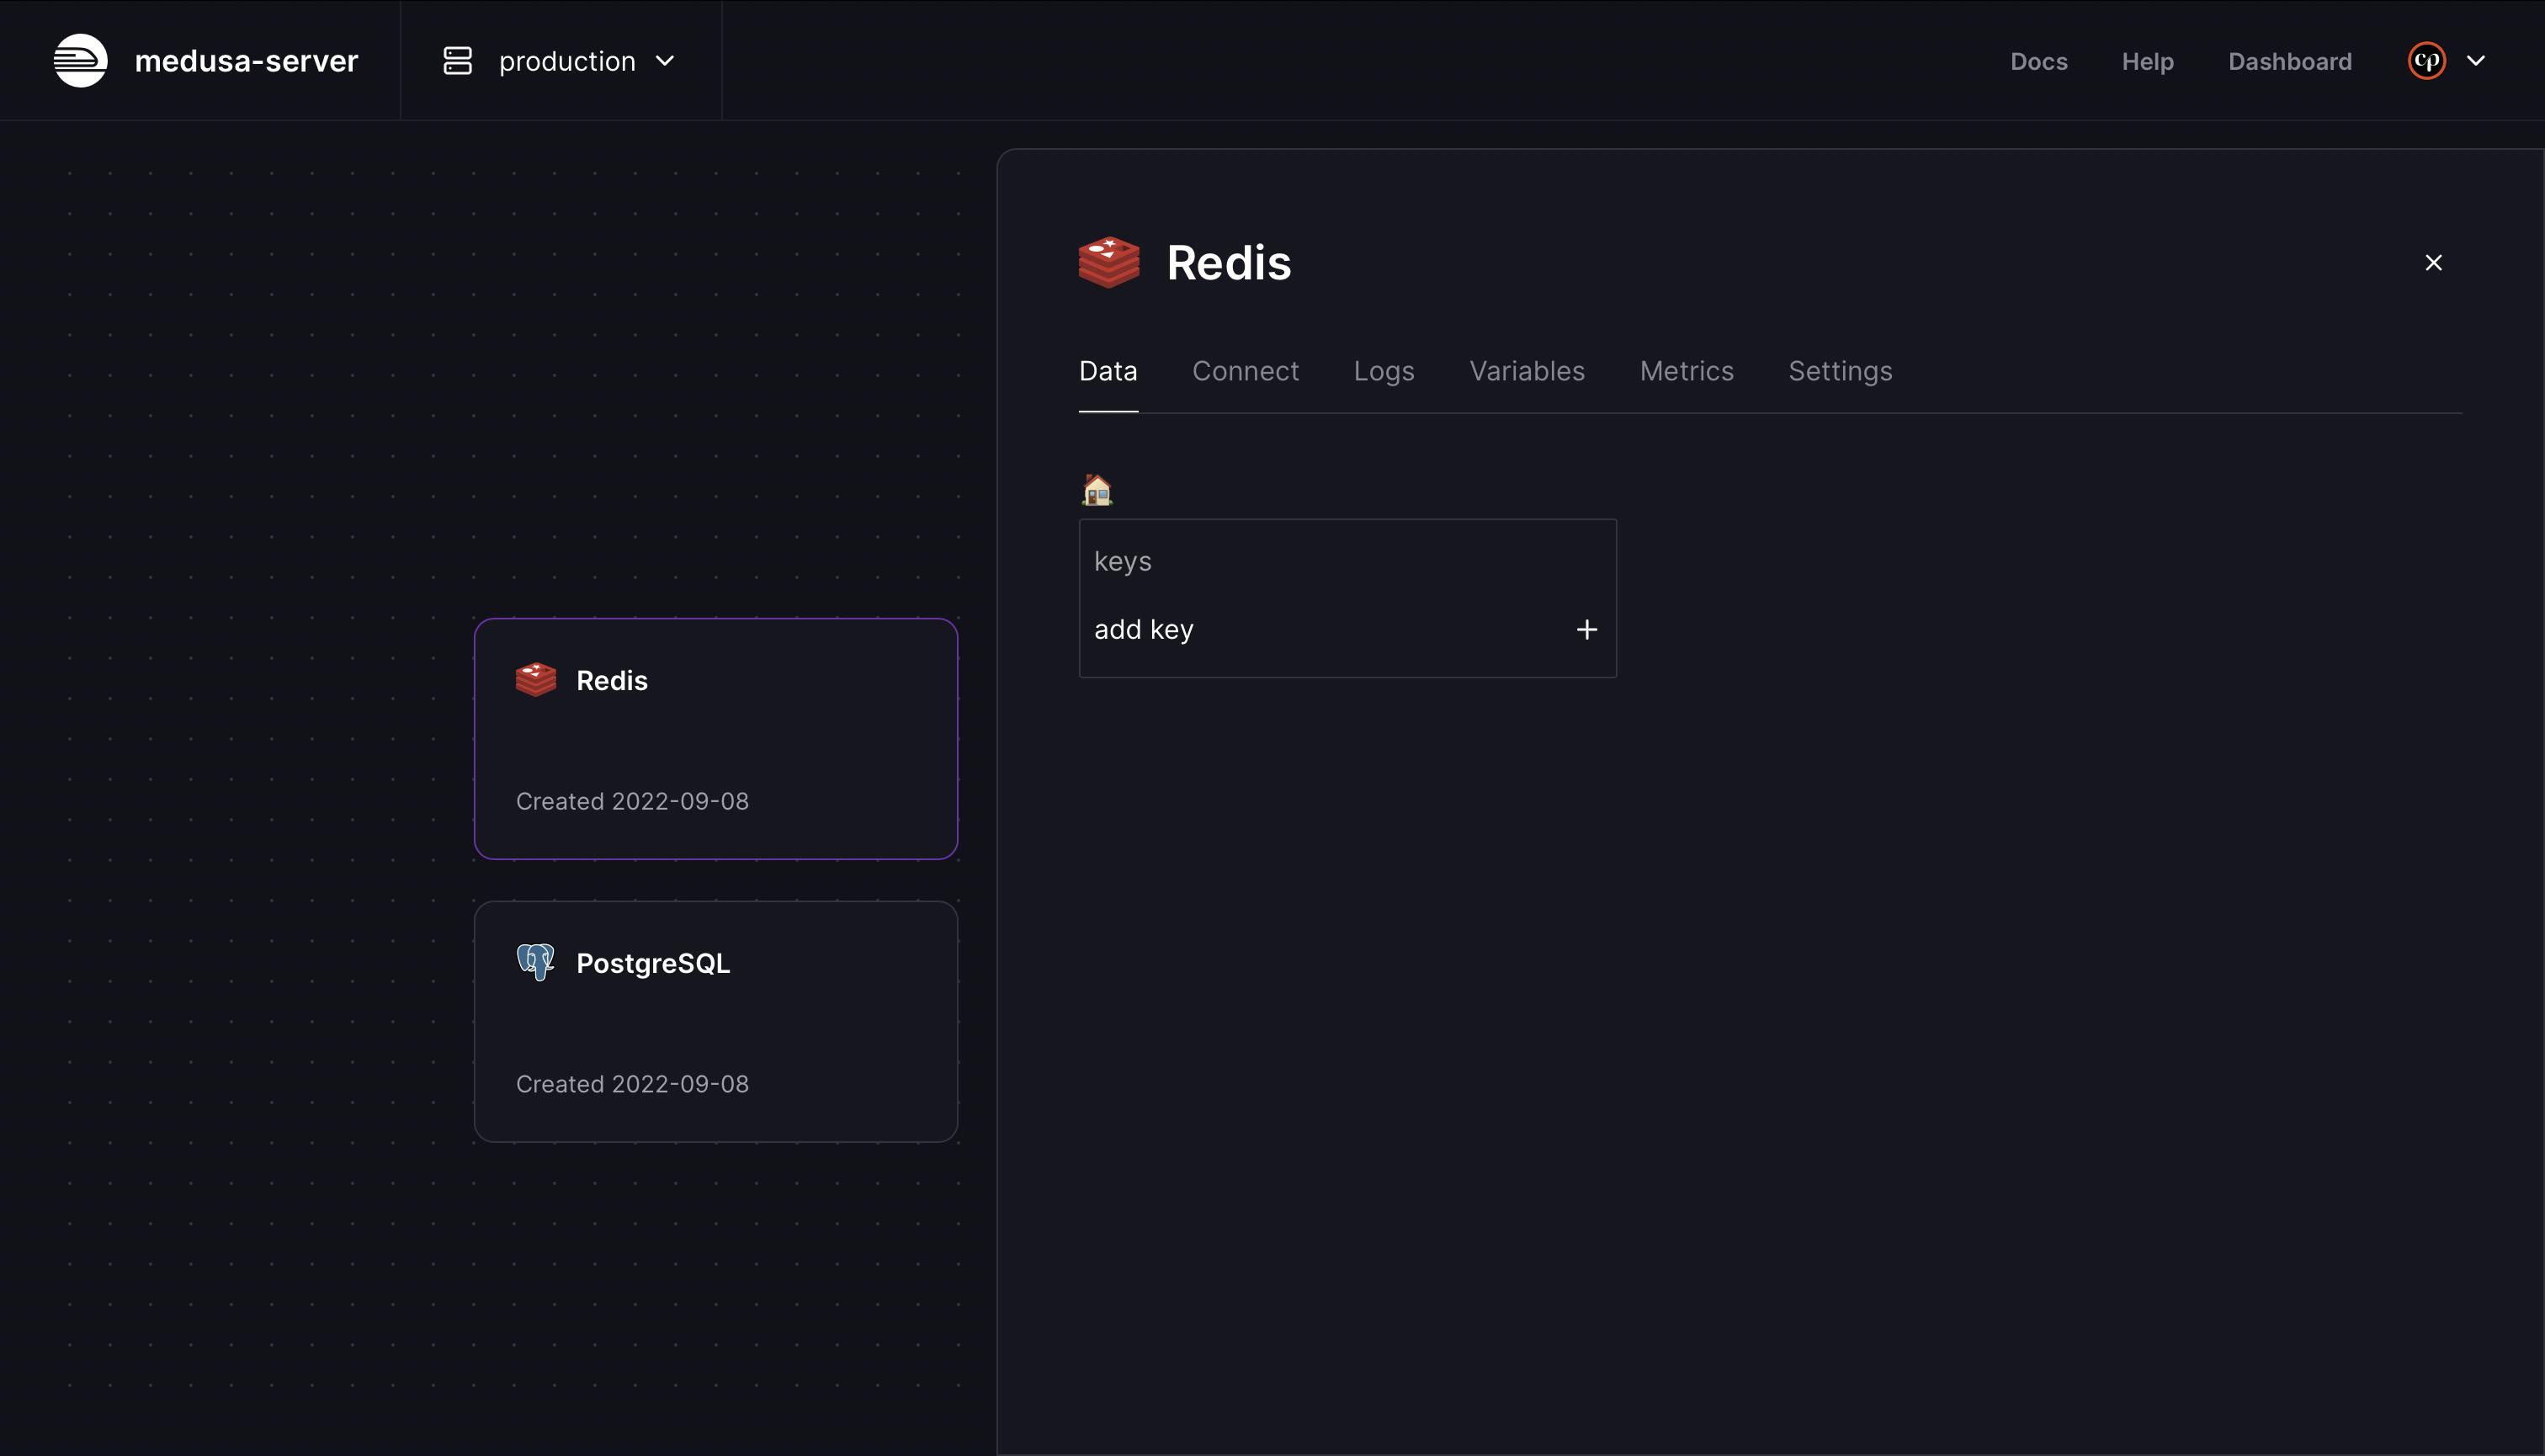
After a few seconds, you should see a new Redis database added to the project view. Click on it to open the database sidebar.
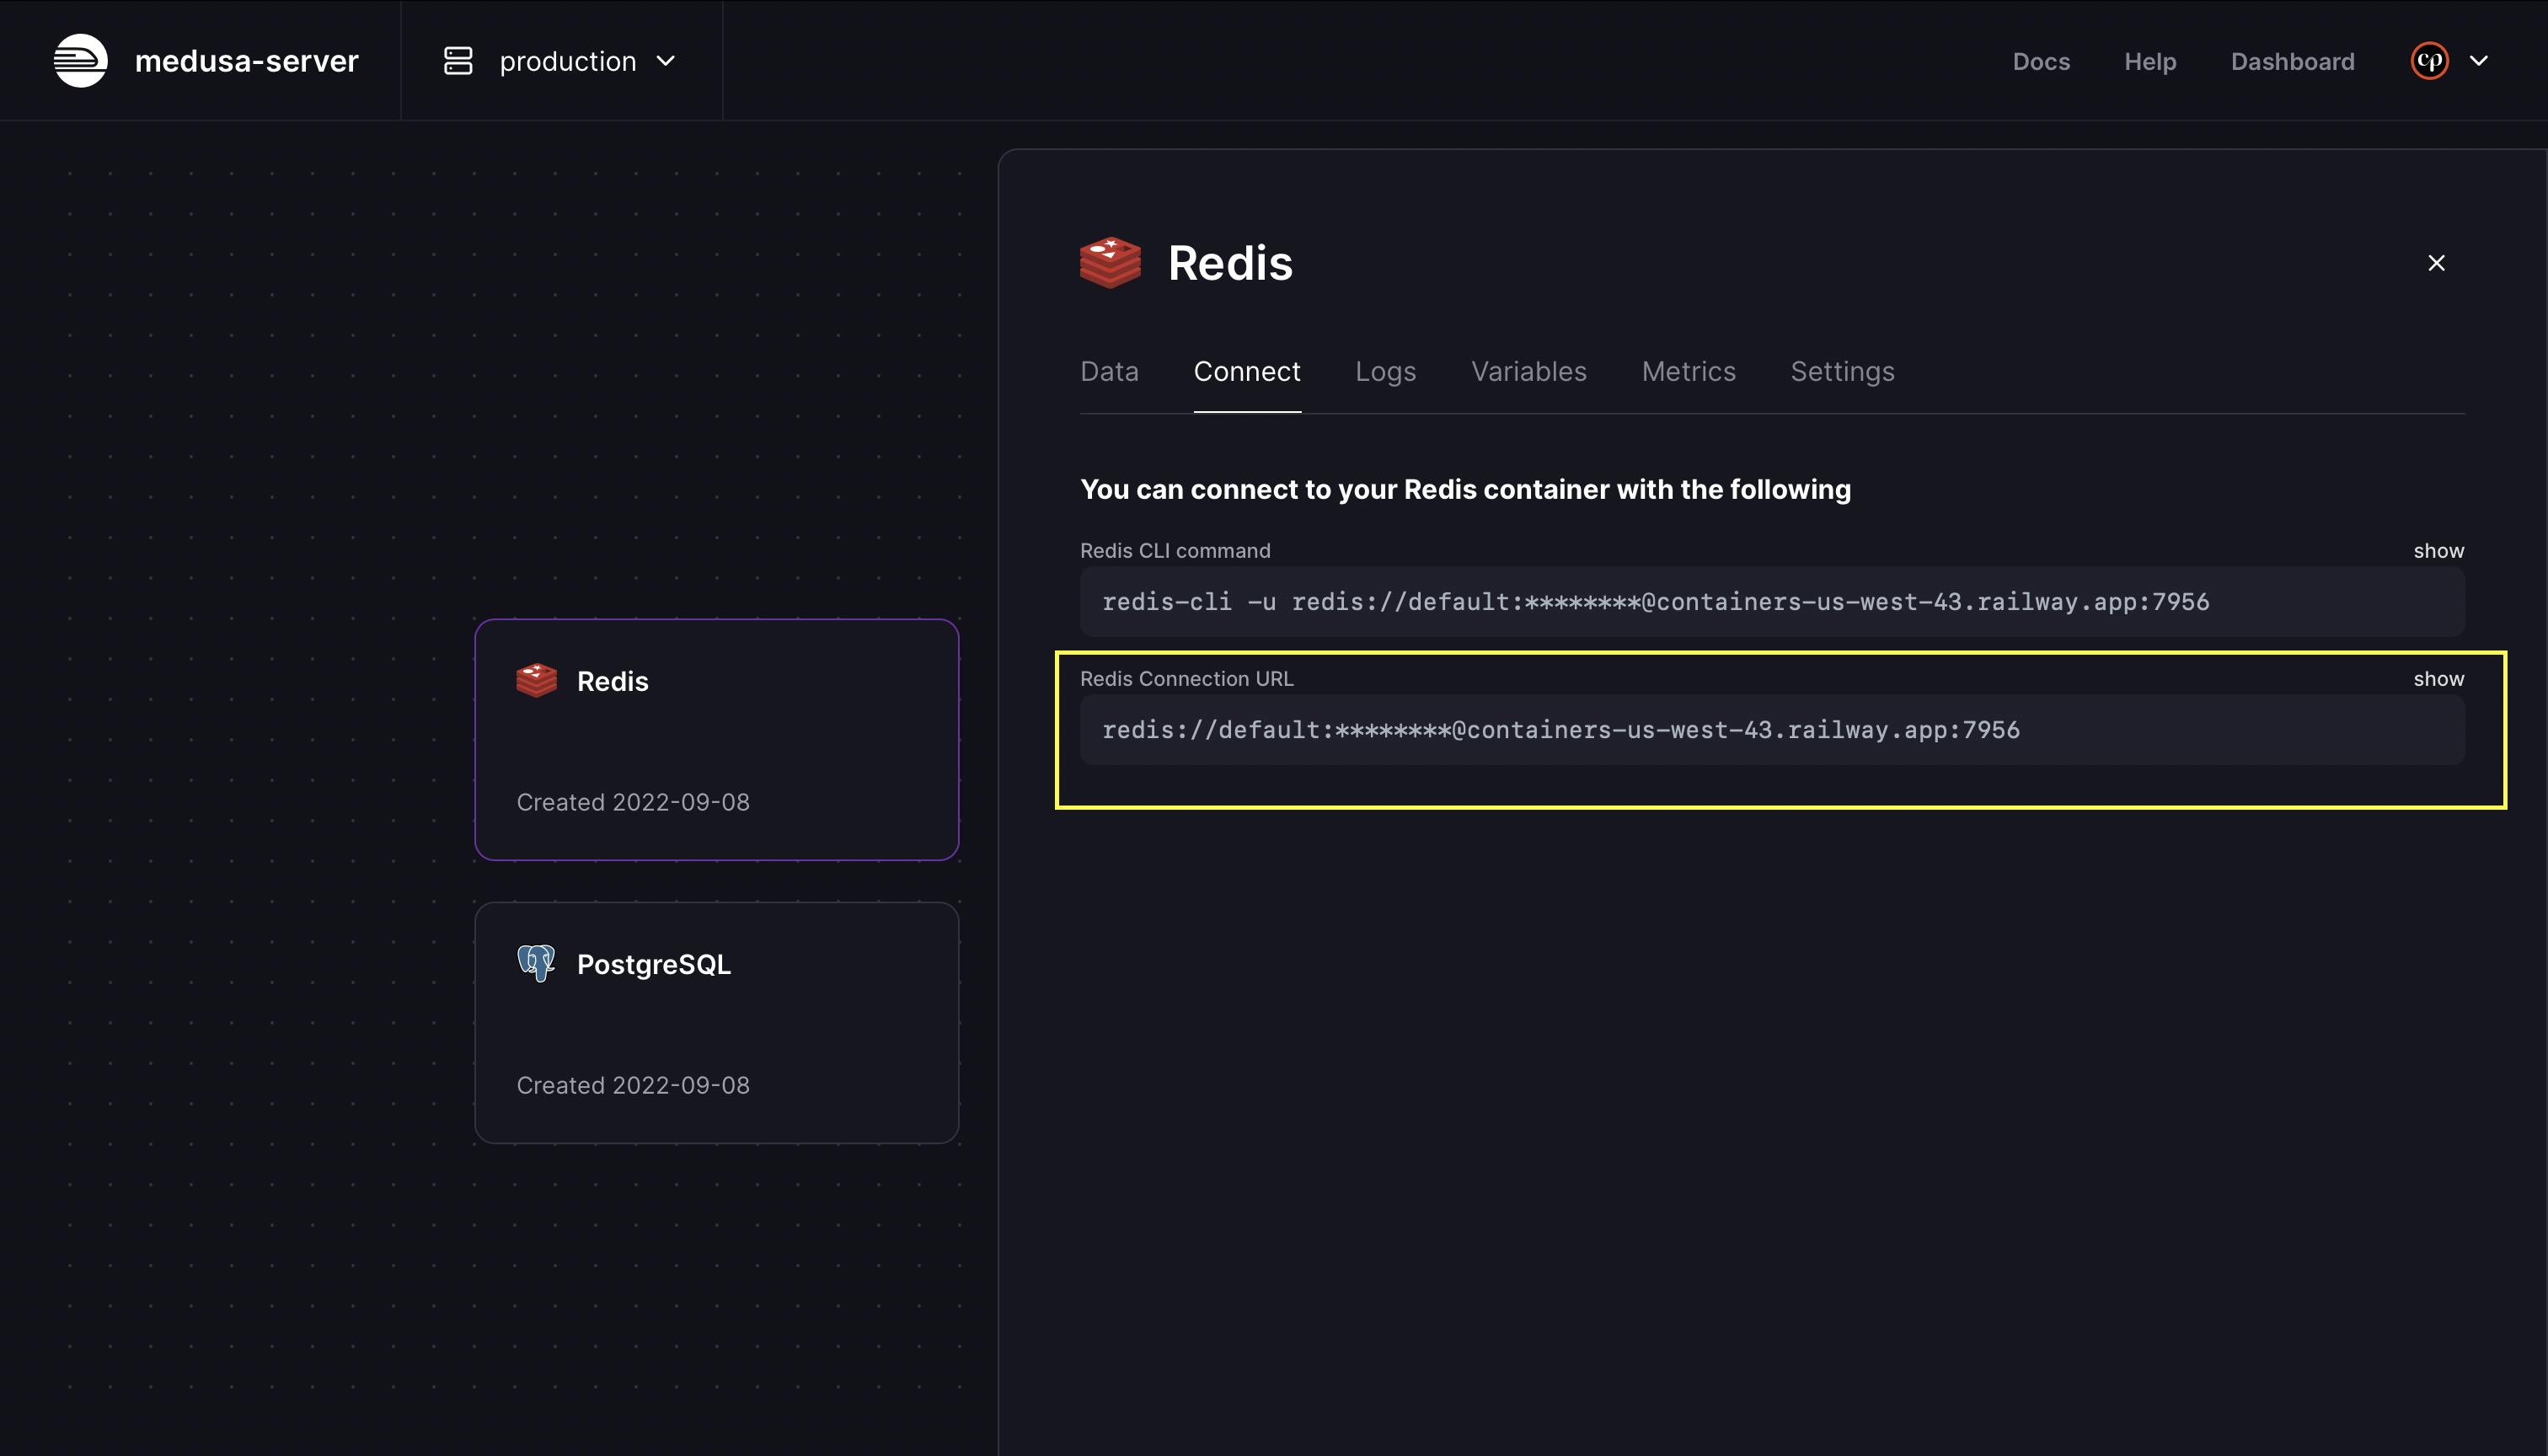
Then, go to the Connect tab to get the Redis Connection URL. You’ll need the URL in the next section.
Deploy Medusa Server
The next step is to prepare the Medusa server to be deployed. Go to your Medusa server directory and open your medusa-config.js file. Be sure you’ve set your database to use PostgreSQL. In medusa-config.js; make the following changes in the exported object:
module.exports = {
  projectConfig: {
    redis_url: REDIS_URL,
    database_url: DATABASE_URL,
    database_type: "postgres",
    store_cors: STORE_CORS,
    admin_cors: ADMIN_CORS,
  },
  plugins,
};
Next, delete the Dockerfile file. By default, Railway will look for it in the root of your repository. If there is one, it will try to deploy your server using it, However, for this tutorial, the deployment won’t be using docker.
Commit your changes and push them to your remote repository on GitHub. Once the repository is ready on GitHub, the next step is to connect it to Railway to be able to deploy it.
Go back to the project view on Railway and click on the New button, then choose the GitHub Repo option.
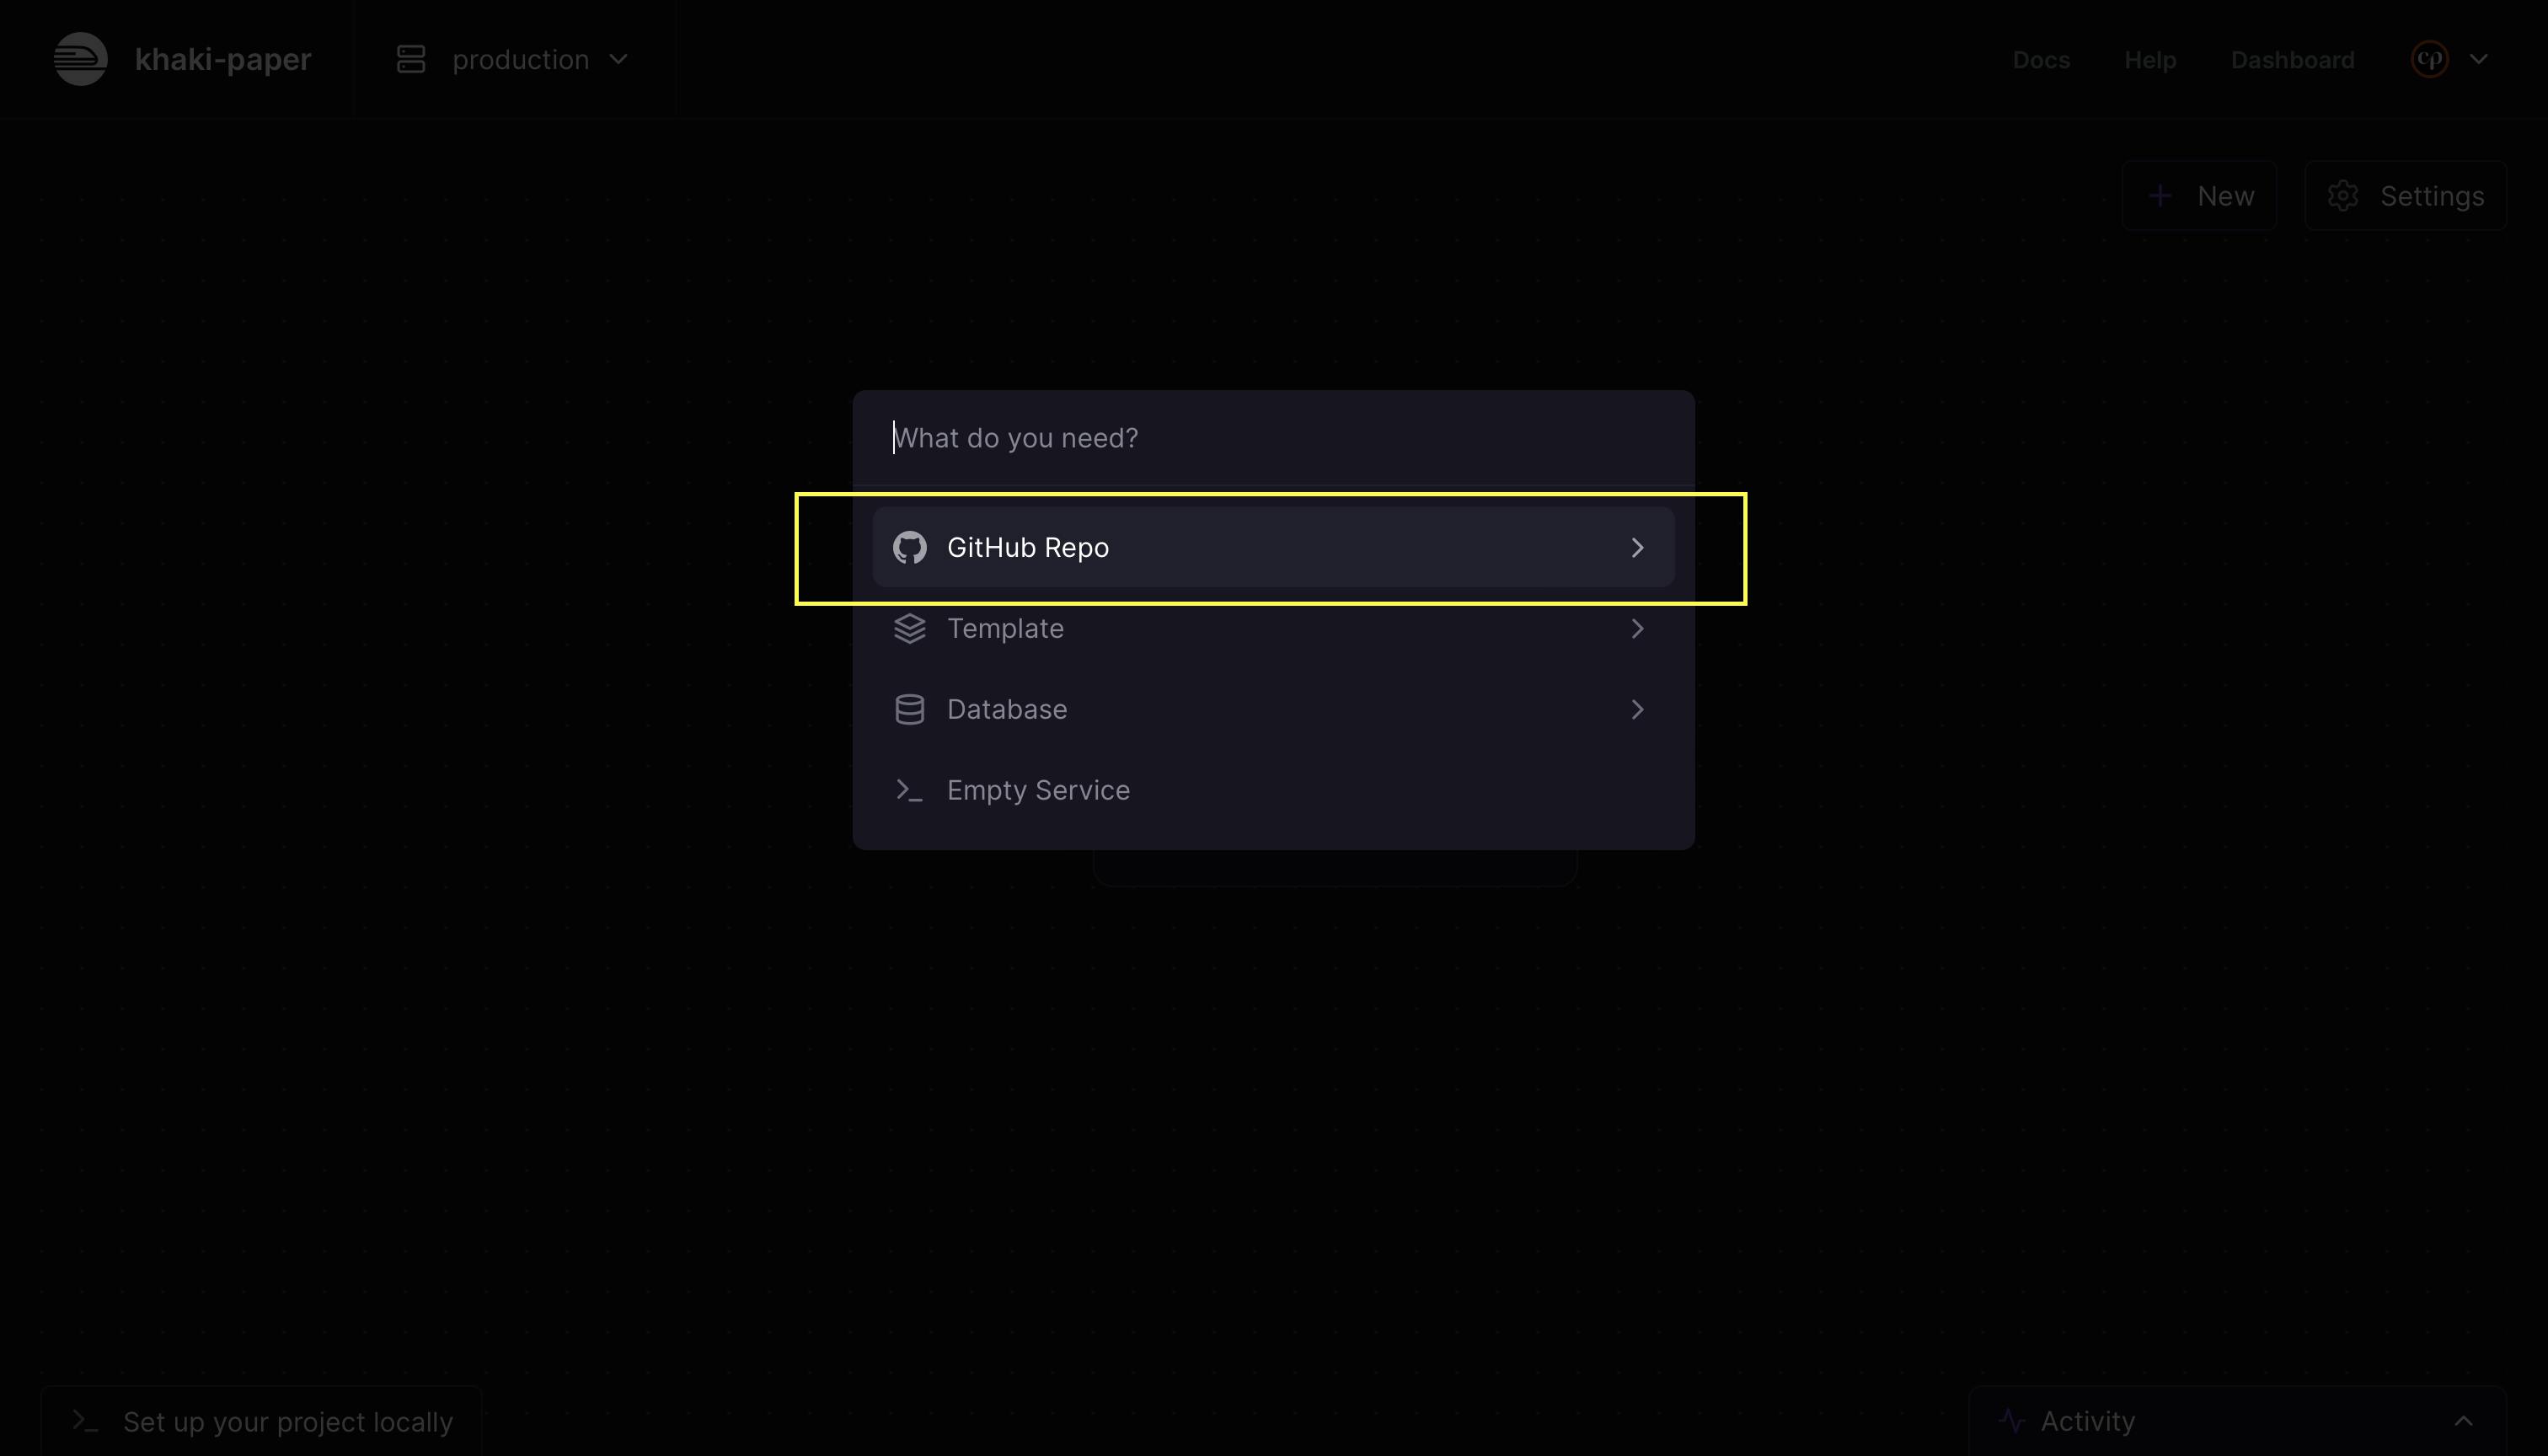
Choose the Configure GitHub App option to permit Railway to read and pull your code from GitHub.
Once you give the necessary permissions, go back to Railway, and you should see your repository displayed on the dropdown.
If the GitHub repositories are stuck on loading and not showing, you might need to delete the project and start over. This only happens before you configure your account with GitHub.
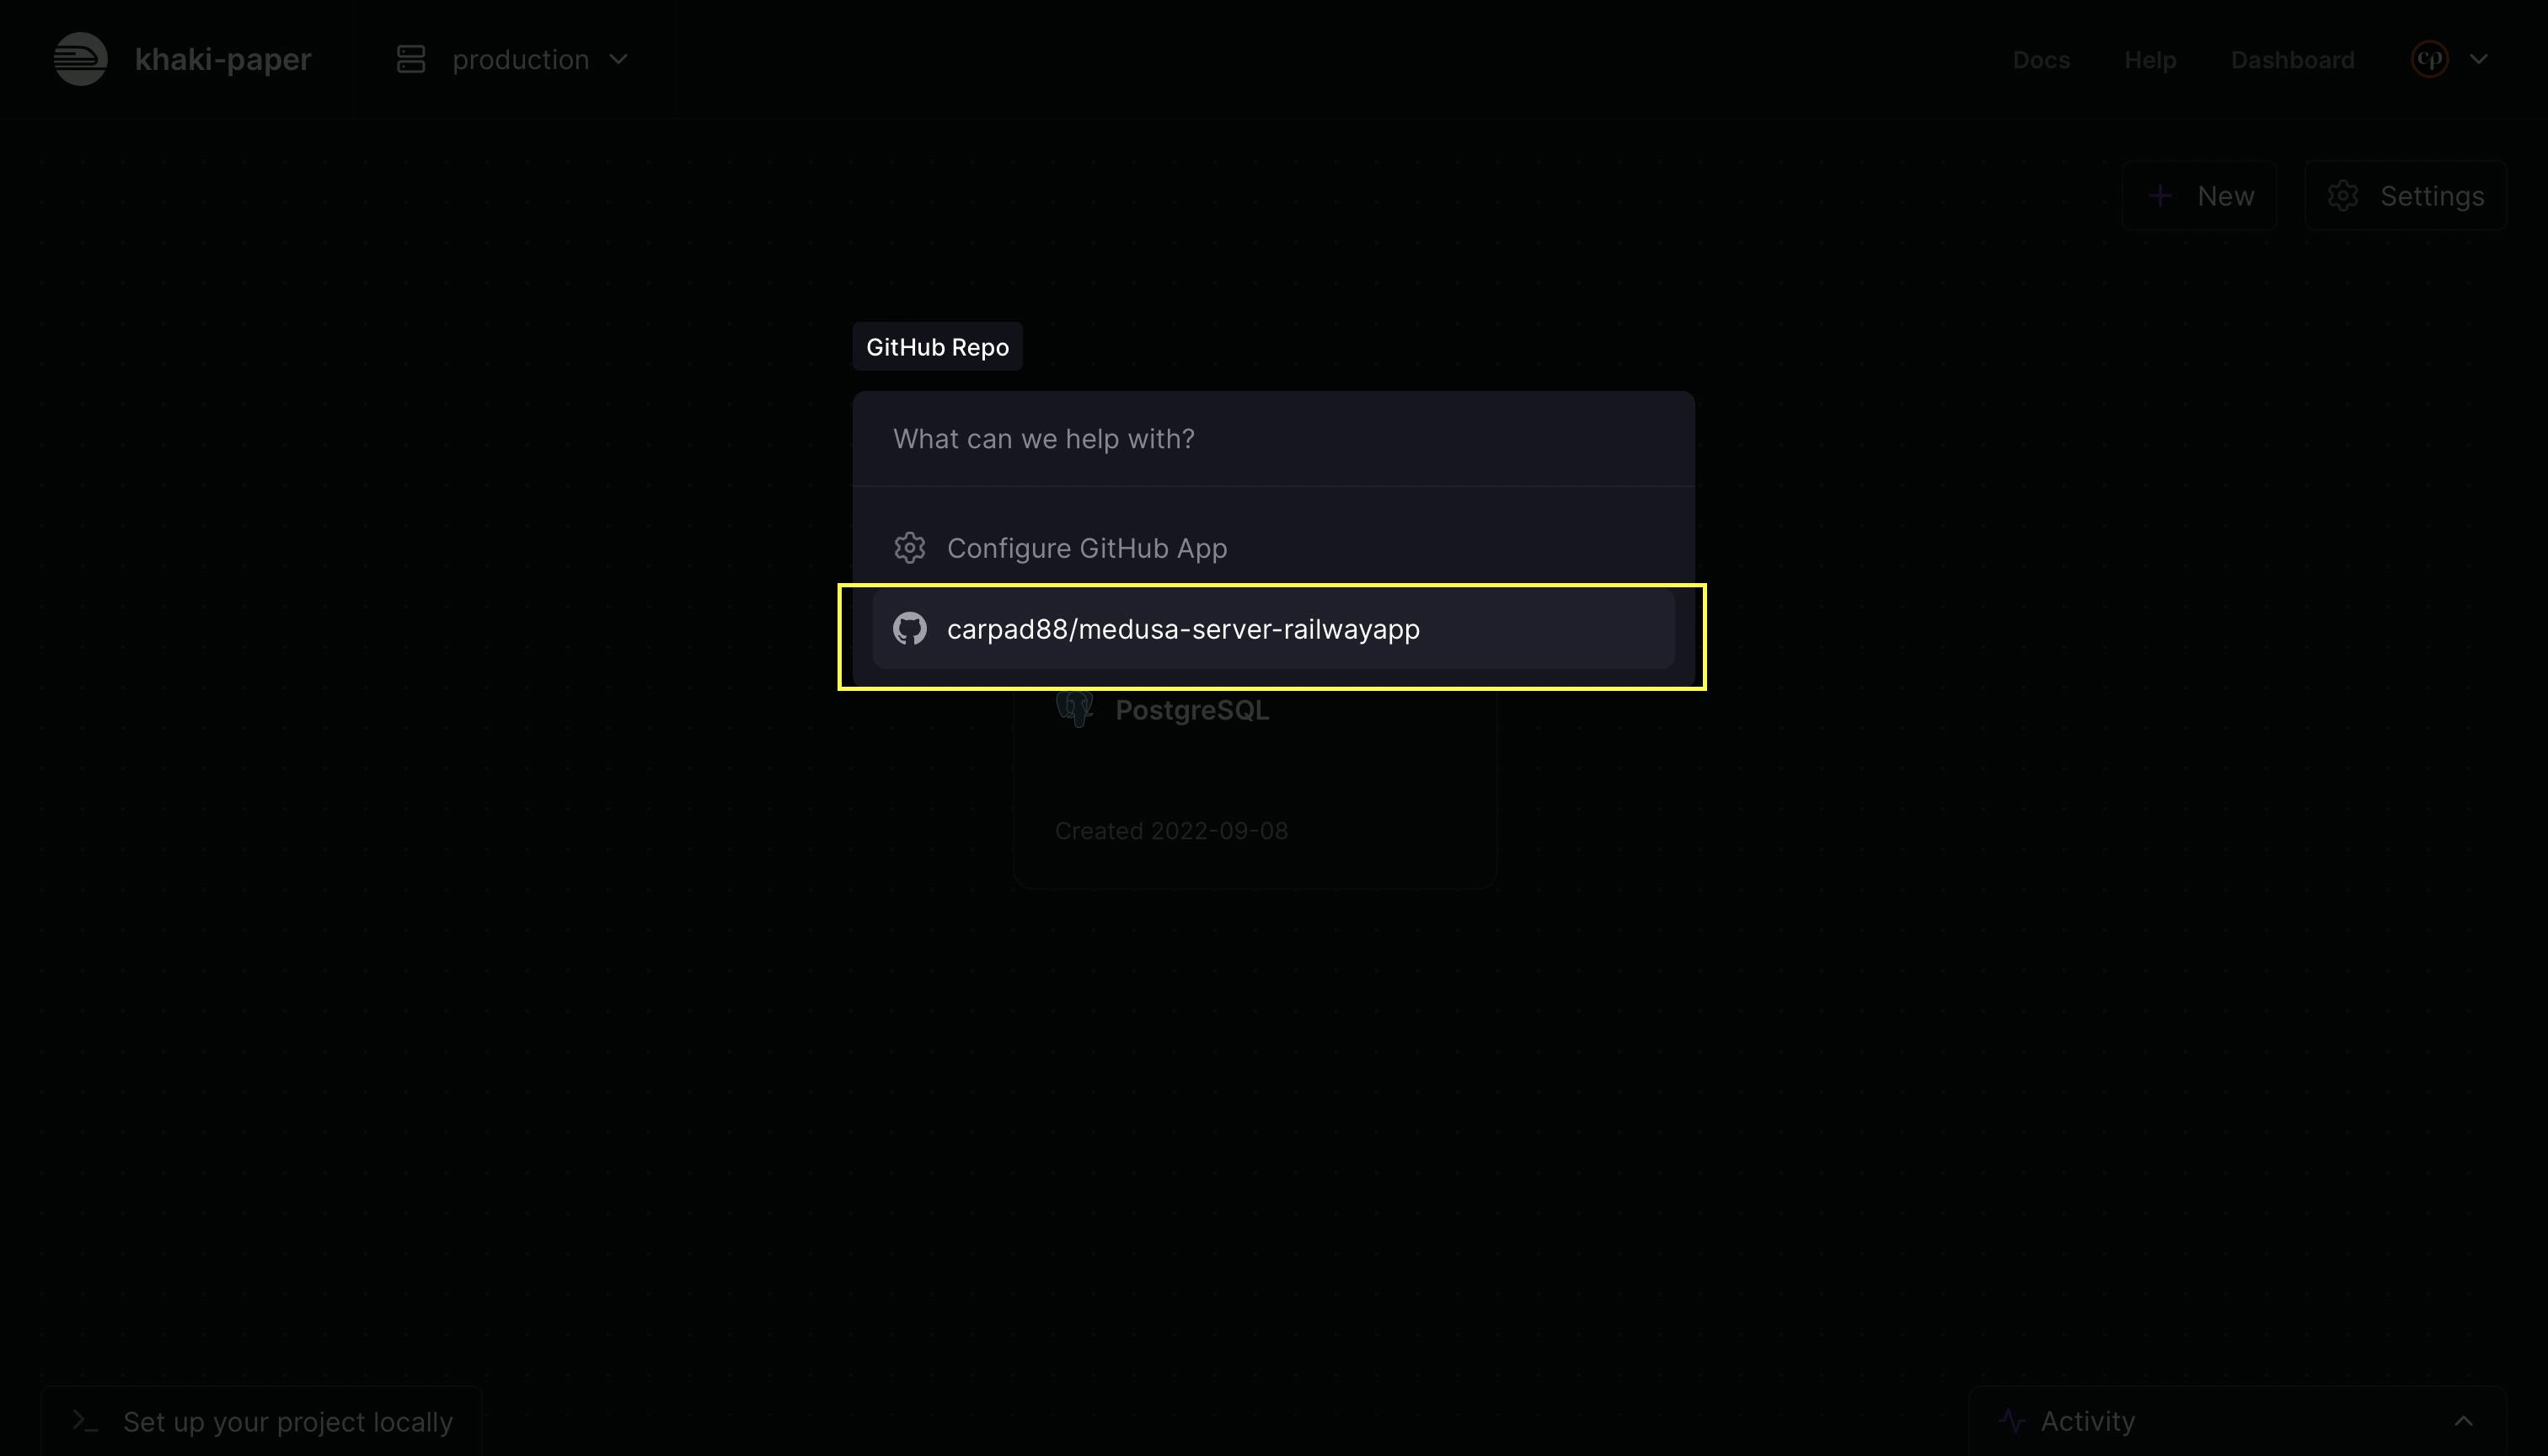
By selecting your Medusa server repo, a new app will be deployed, and after a couple of minutes,
you should see a successful deployment. Click on the repo app card to check it.
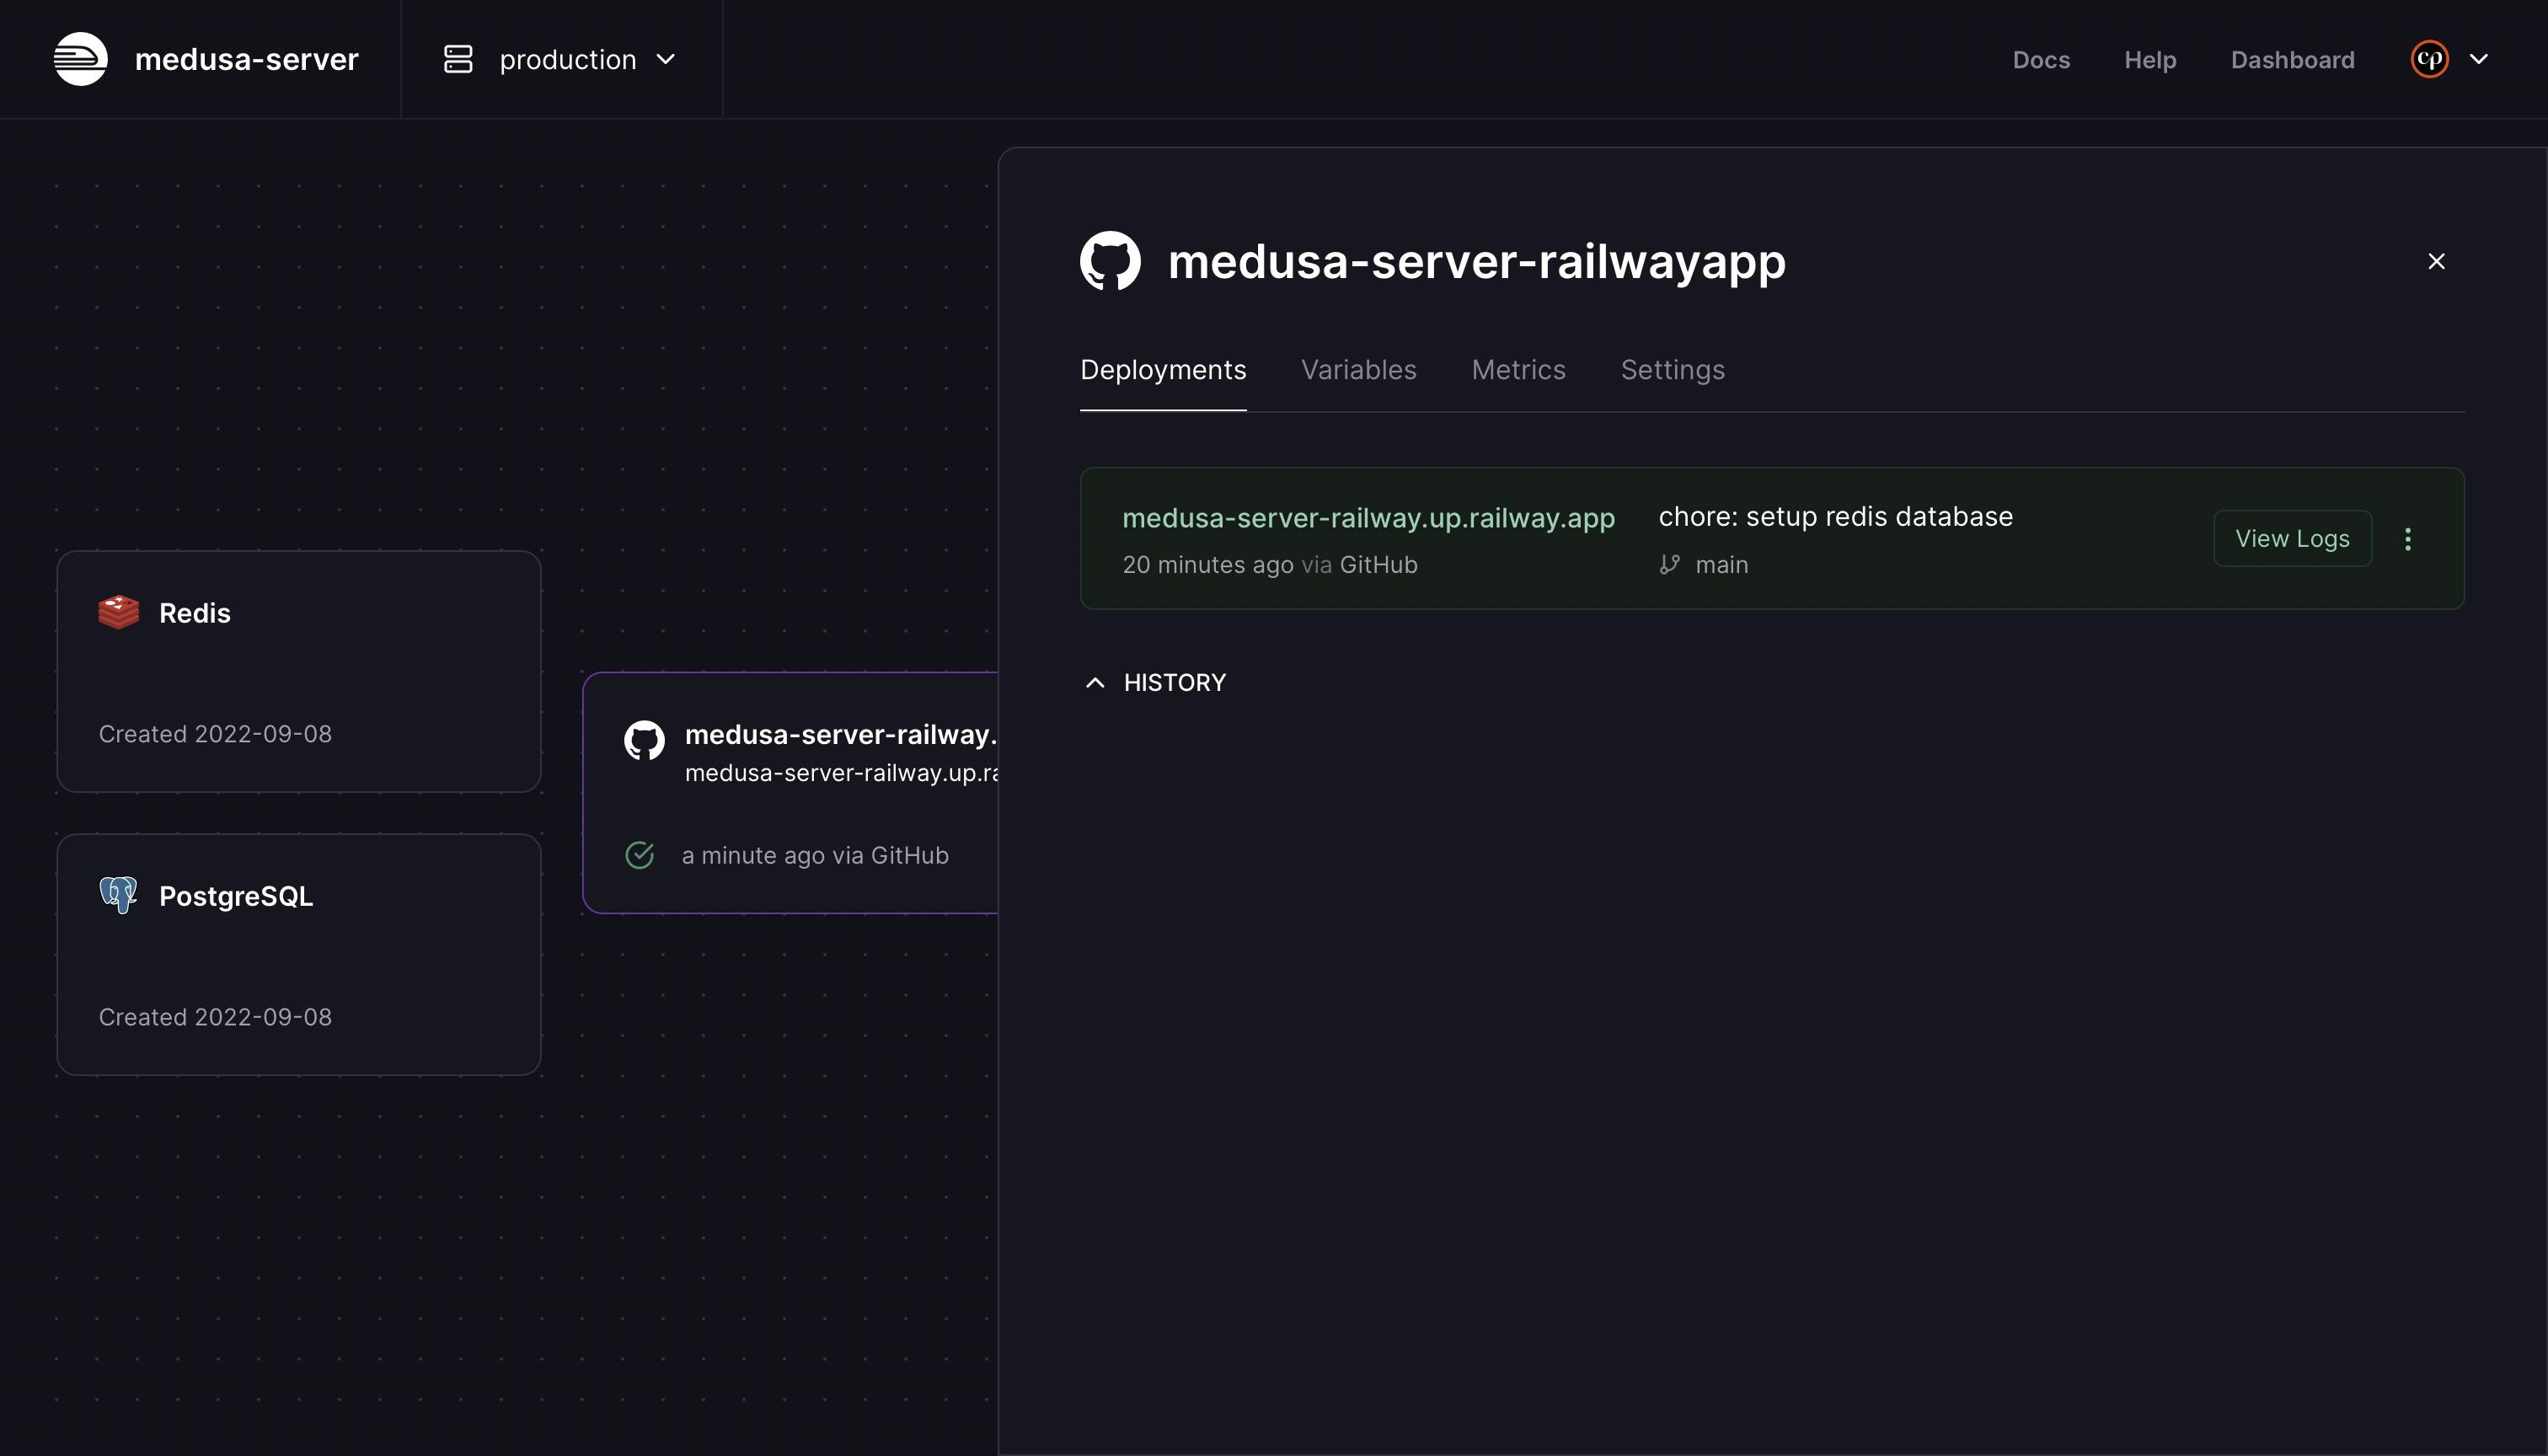
Until this point, you have a Medusa server, and a Postgres and Redis databases deployed, but the app is not public yet and the server is not connected to the databases. That is what you will do in the next section.
Add Environment Variables
On the app info sidebar, go to the Variables tab and add the following properties:
PORT=9000
JWT_SECRET=something
COOKIE_SECRET=something
DATABASE_URL=<<DATABASE_URL>>
REDIS_URL=<<REDIS_URL>>
It’s recommended to use other values for
JWT_SECRETandCOOKIE_SECRETthansomethingfor better security.
The last properties are the URLs to connect to the databases. There, you need to add the database URLs that you got when you created the Postgres and Redis databases earlier.
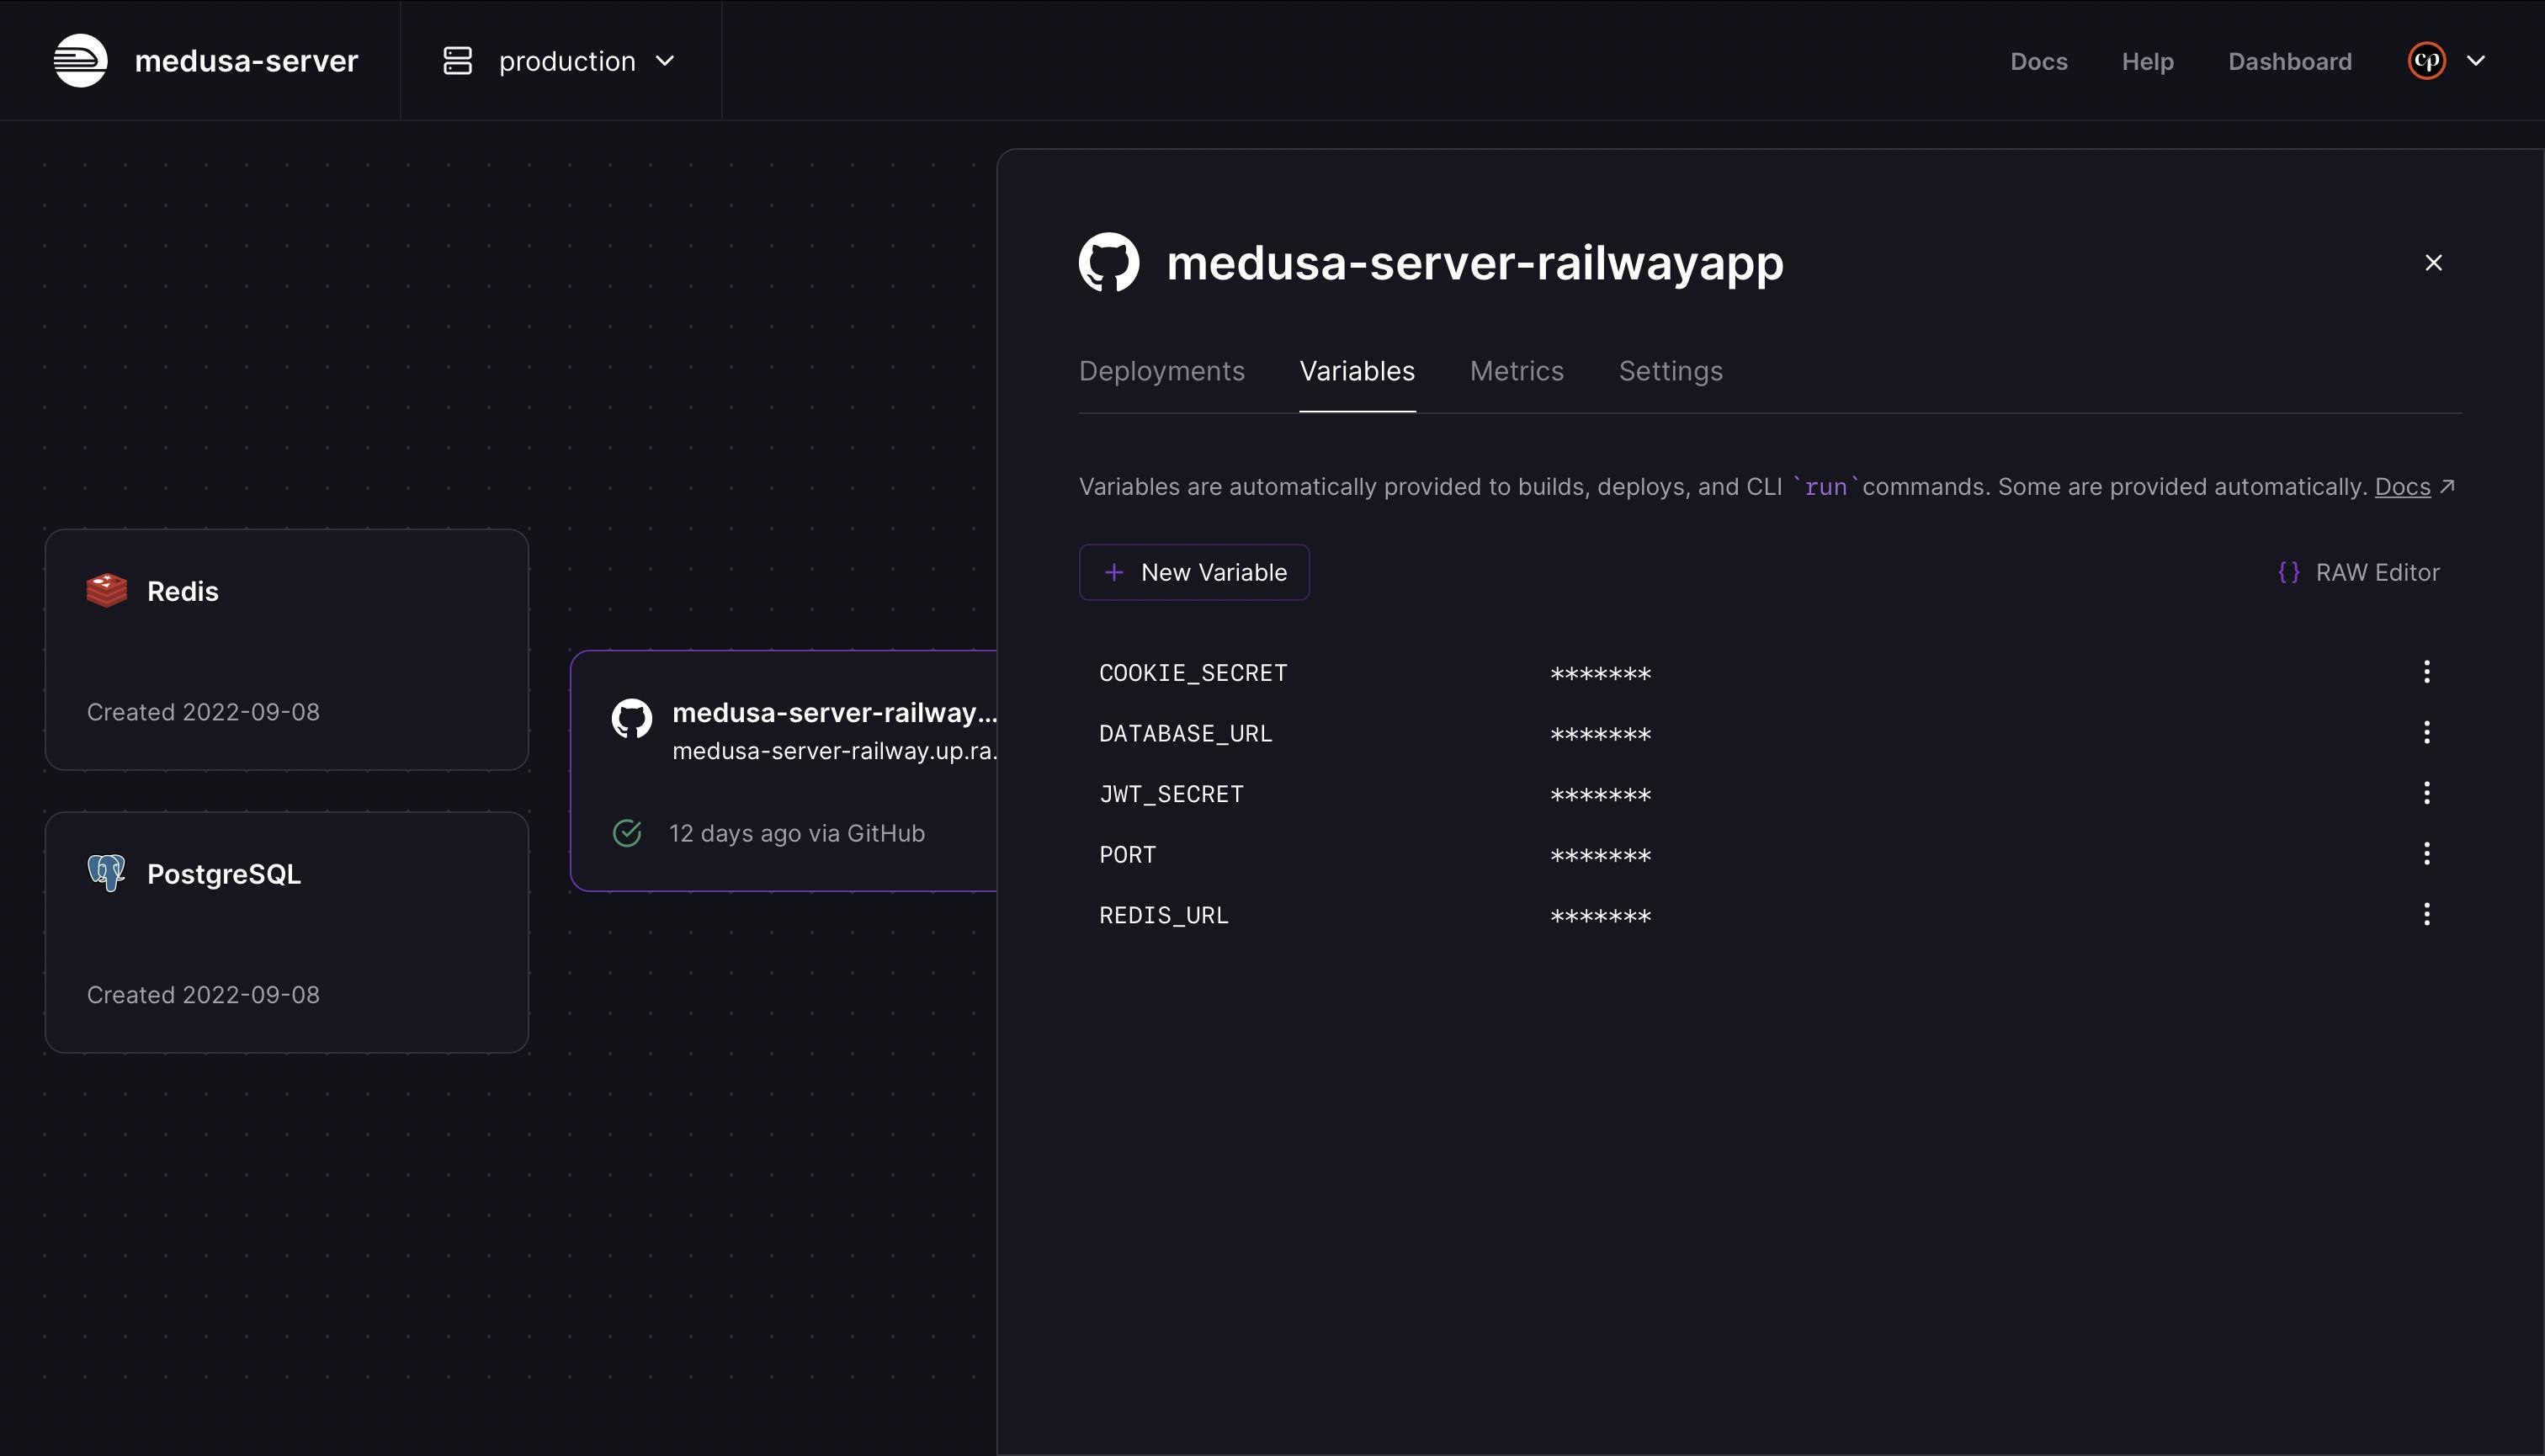
Note: Each time you add a new environment variable, a new redeploy is scheduled. You can cancel it for the first variables to avoid unnecessary redeploys and only leave it for the last one.
Change Start Command
Next, scroll down on the Settings tab until you get to the Service section. On the Start Command field, write the next command.
medusa migrations run && medusa develop
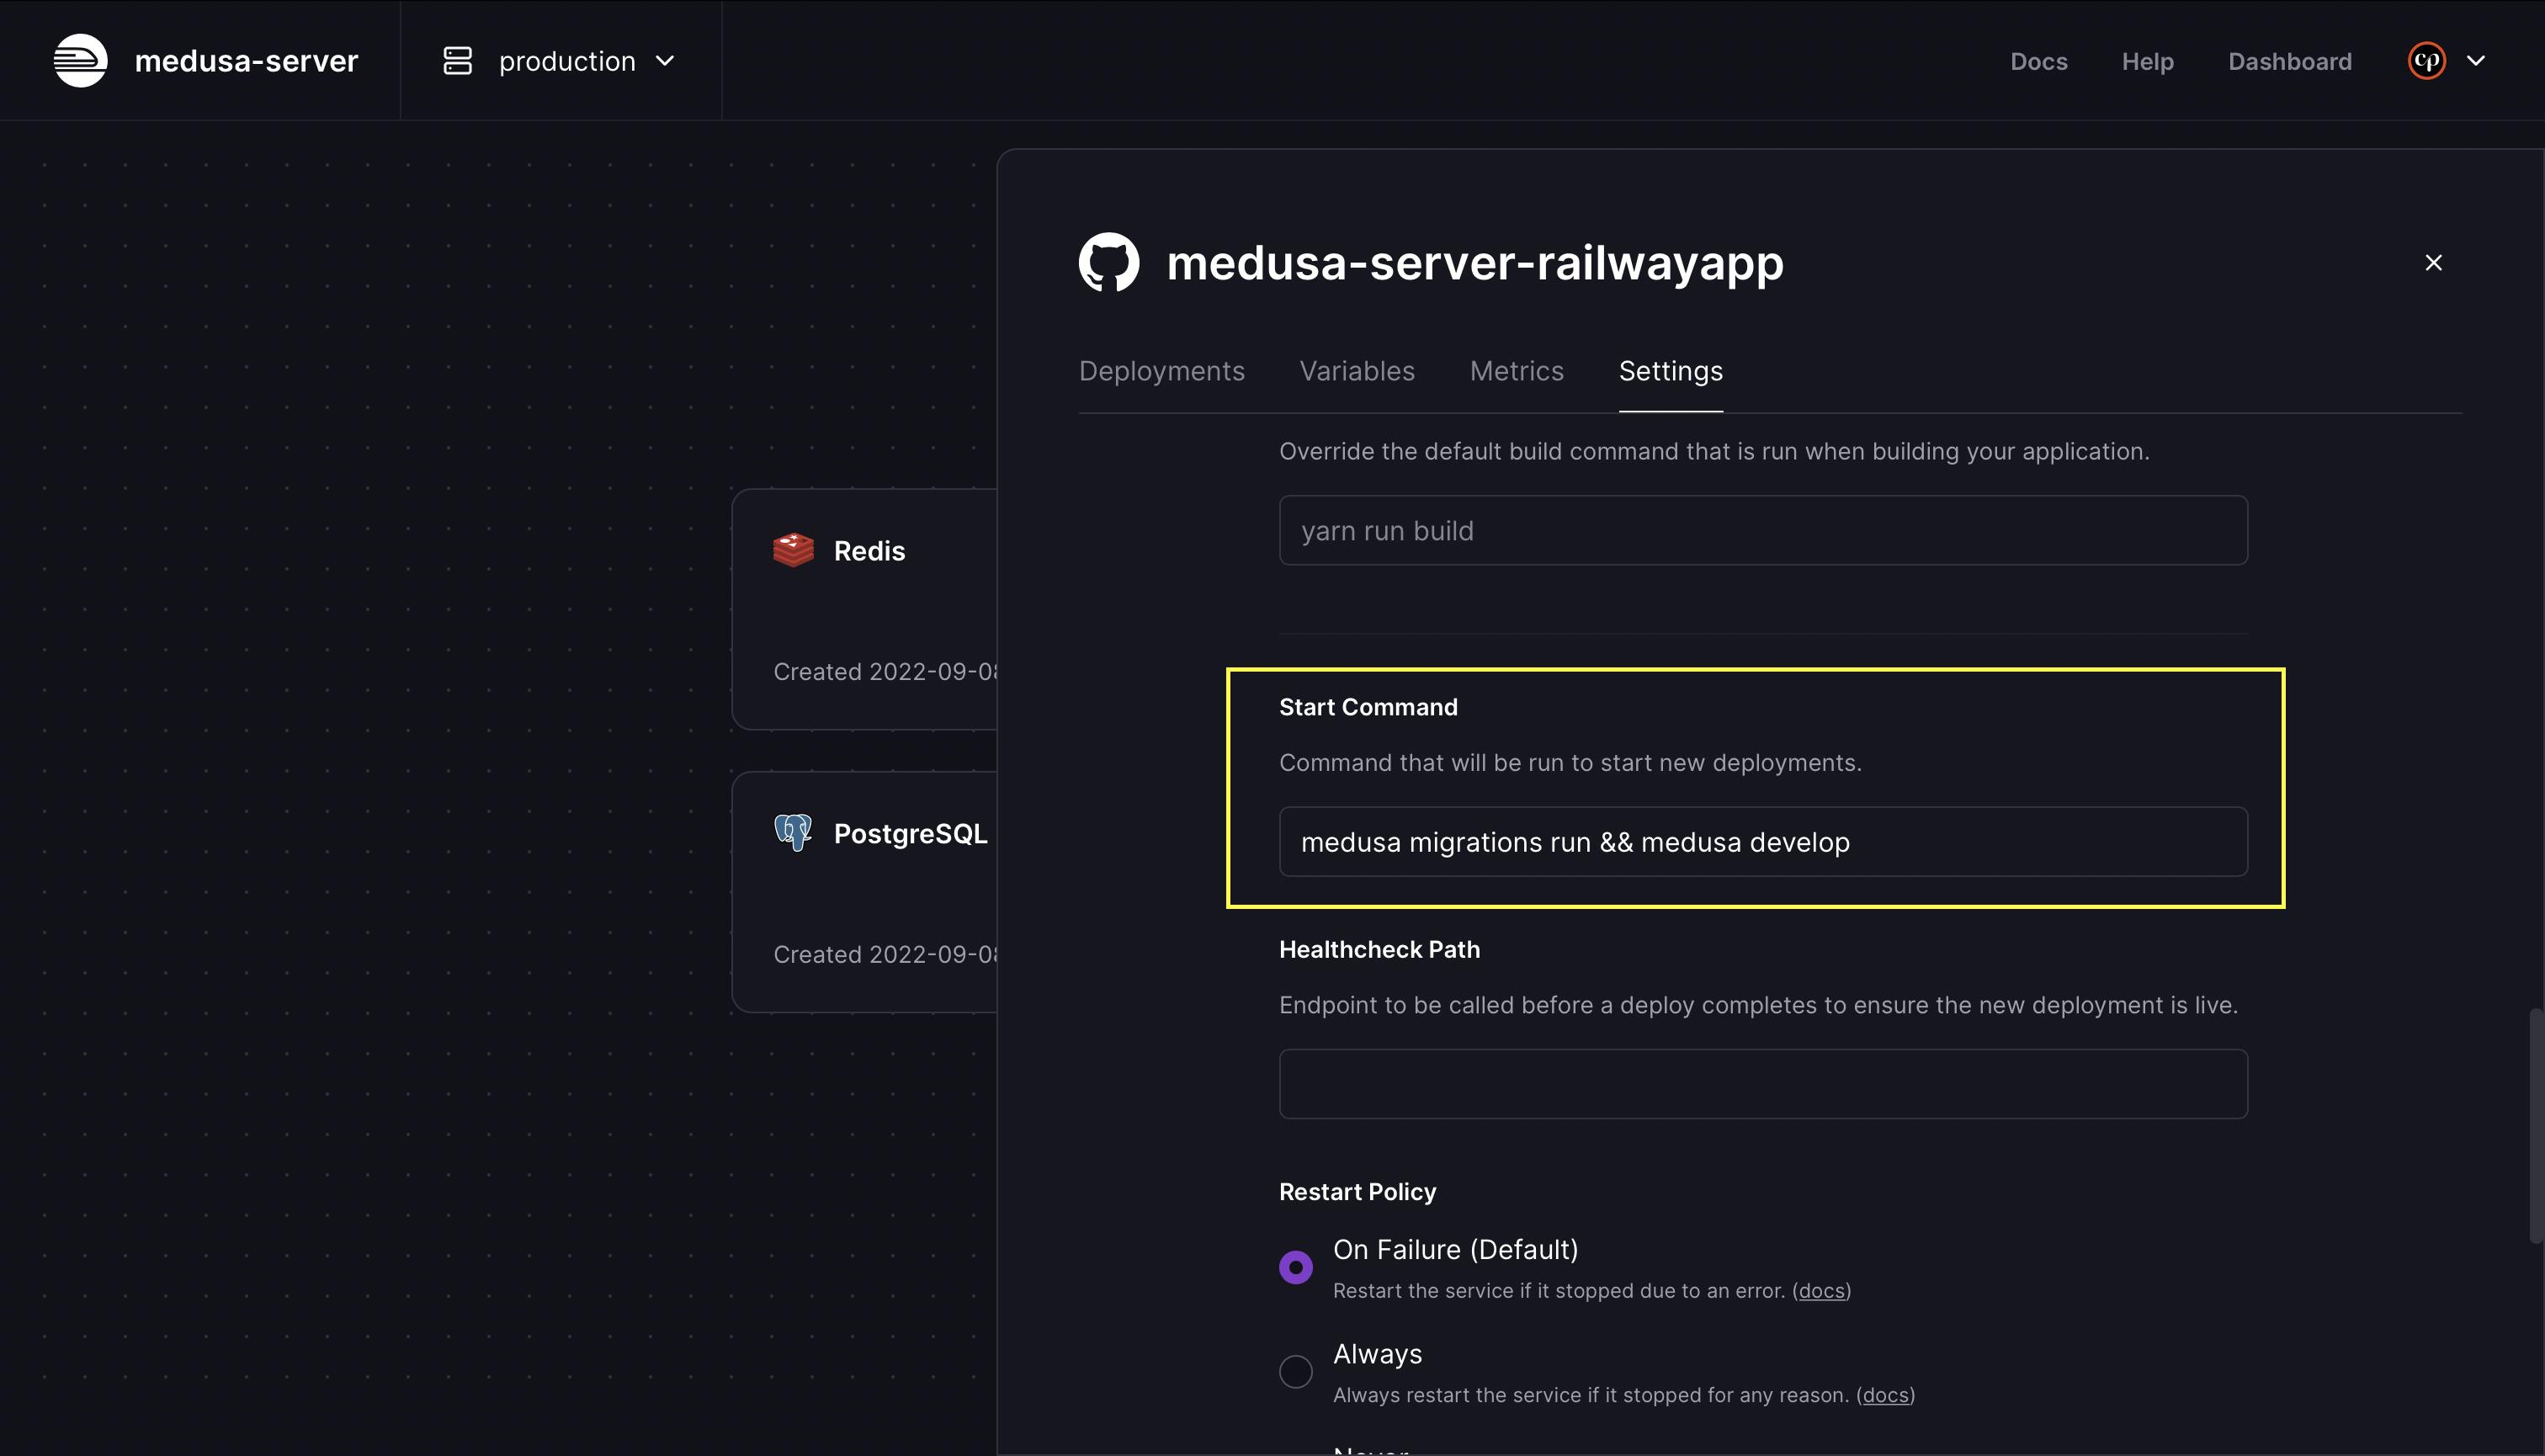
With this, you are instructing Railway that each time a new redeploy happens, first, it should run the migrations, and then it should start the server on port 9000 and bind it to the host 0.0.0.0. This last thing is a Railway requirement to be able to expose the app.
Expose the App to the Internet
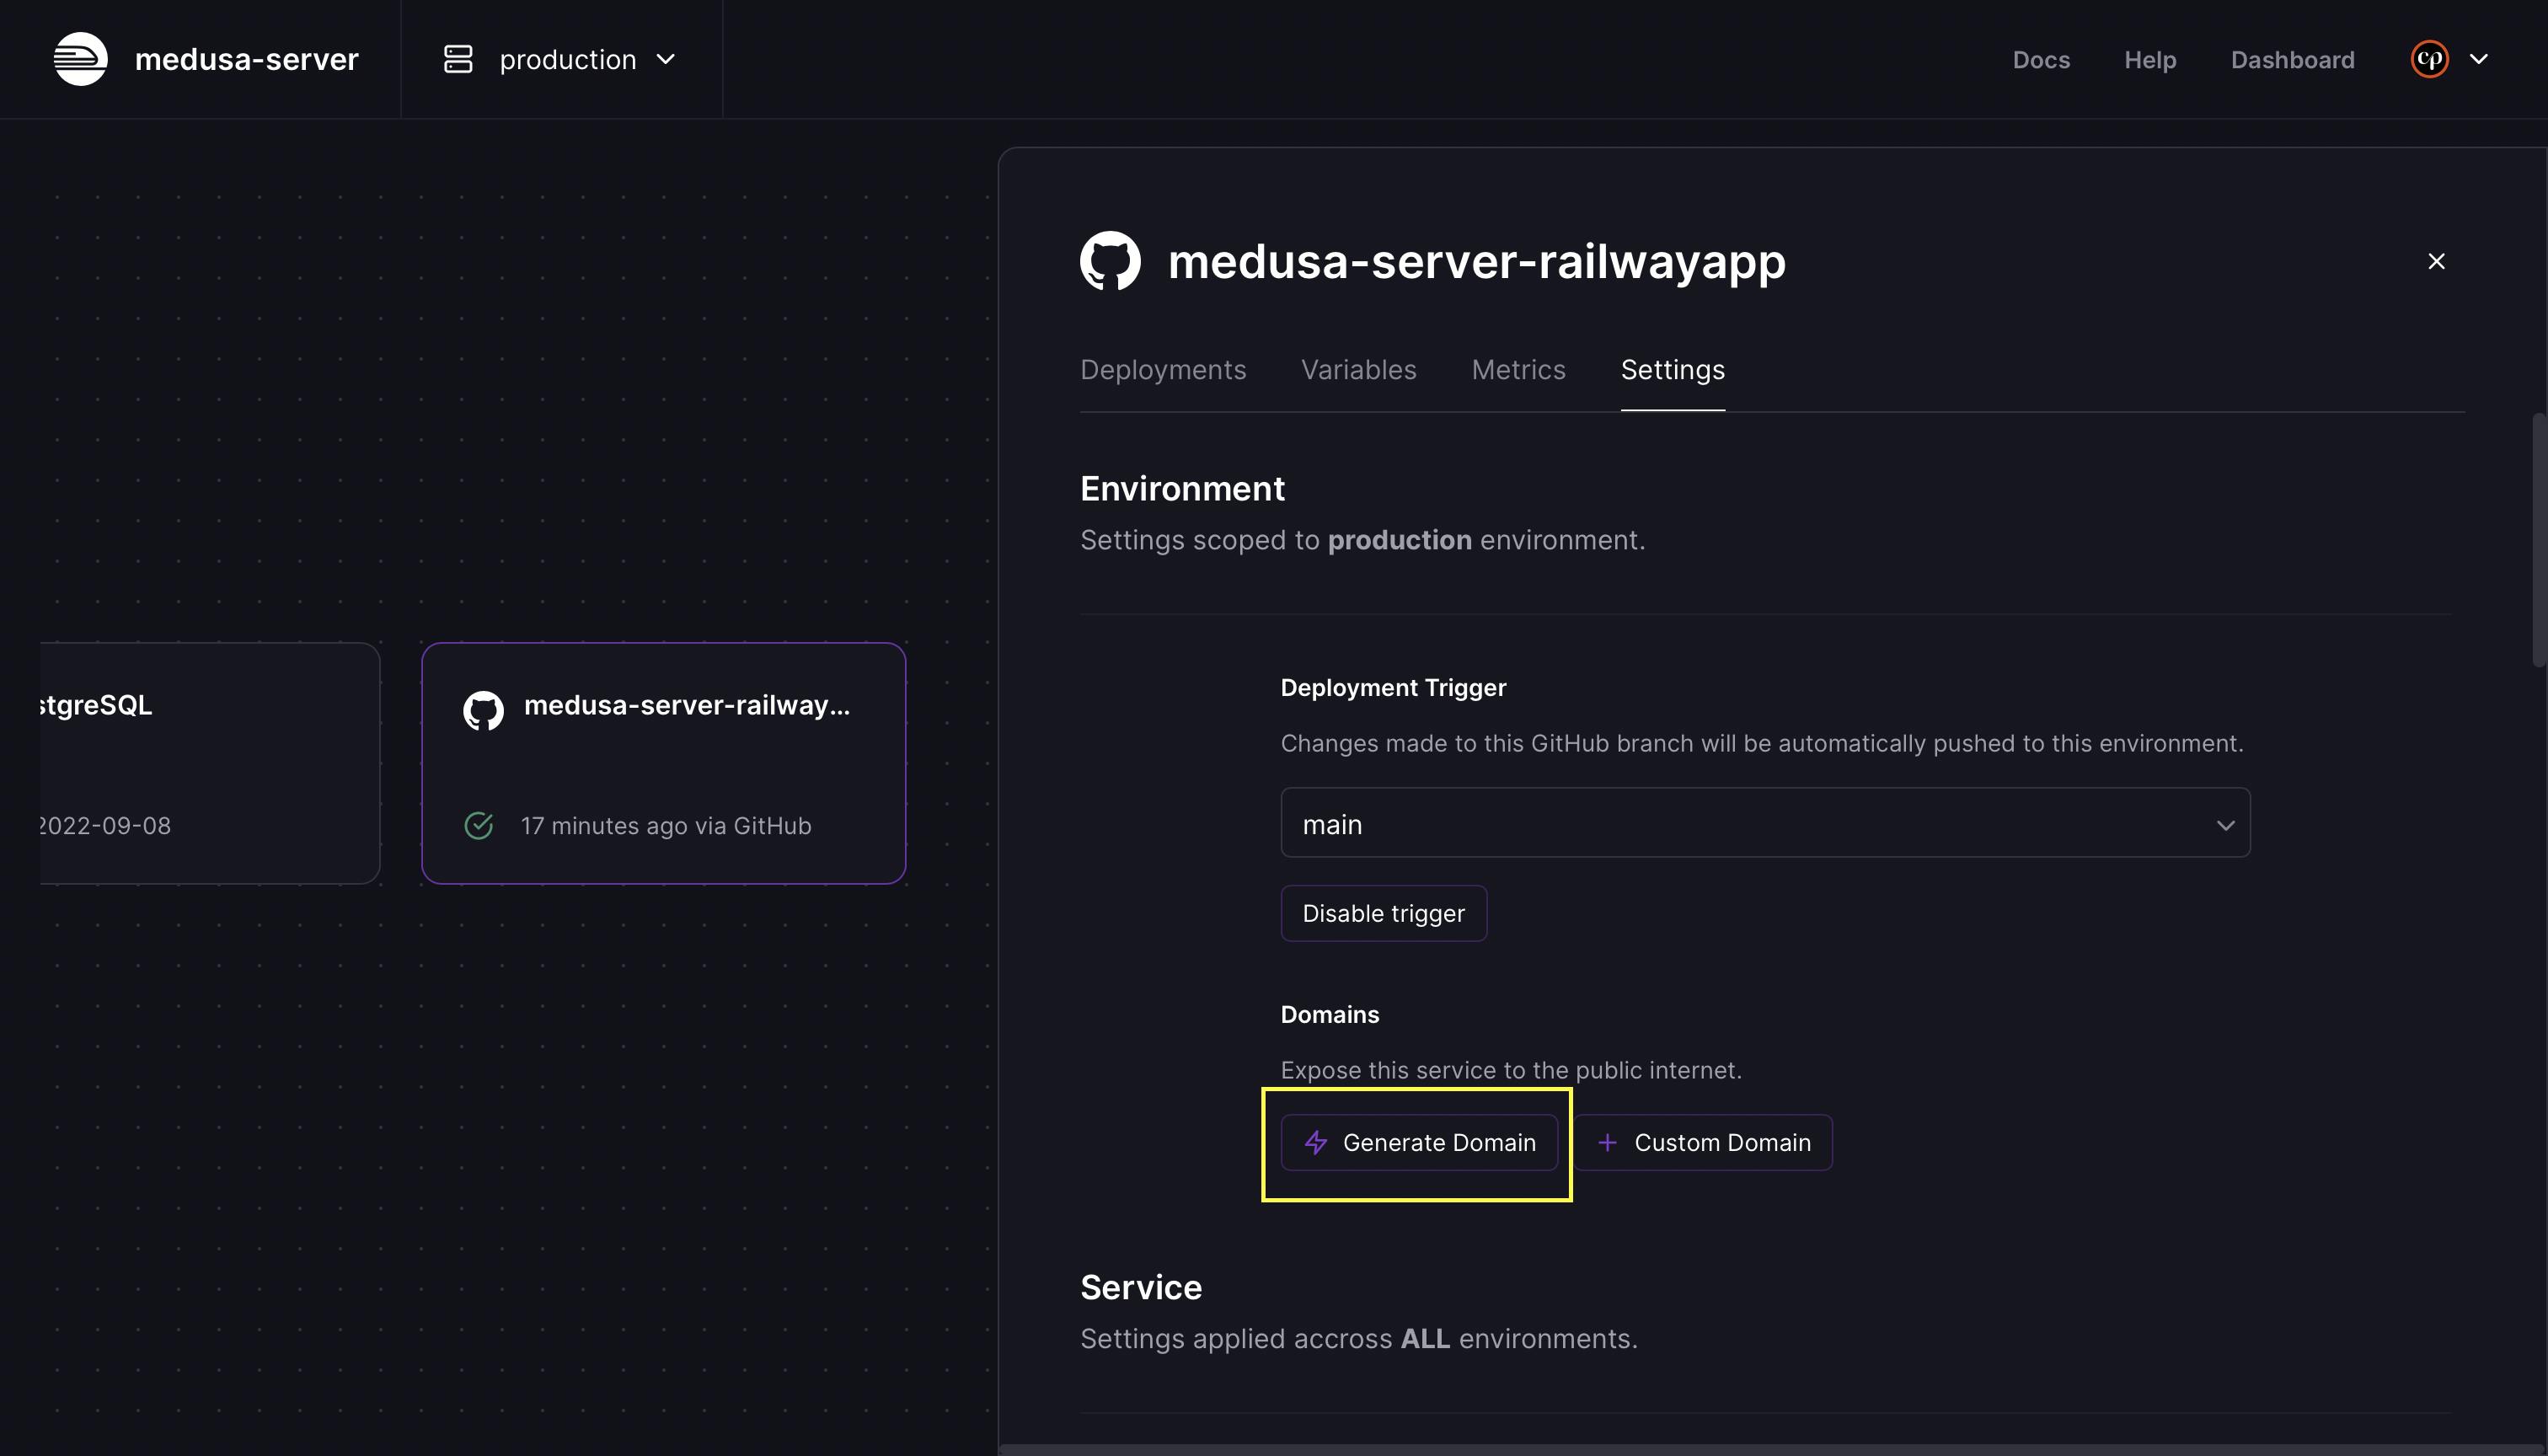
The next step is to make the app available over the internet. Go to the Settings tab and click on the Generate Domain button to get a public domain that you can visit to test the app.
Add Redis Database
Test it
Make sure you seed the database before trying to make requests to any endpoint on your Medusa server.
To check that your Medusa server is working, on the app sidebar, go to the Deployments tab and click on the app URL.

At end of the URL, add /store/products, so the URL would be something like this:
[https://medusa-server-railway.up.railway.app/store/products](https://medusa-server-railway.up.railway.app/store/products)
You should get a response with a list of the products on your database. If that is the case, you have successfully deployed your Medusa server into Railway.

Troubleshooting
If you run into any issues or a problem with your deployed server, you can check the logs in your Railway container instance by clicking on Logs in the Deployment tab.

Conclusion
Deploying a Medusa server on Railway is super easy and quick. Once you’re done, you can focus on adding new functionalities to your Medusa server, such as custom endpoints, services, or plugins.
To push the changes to your server, push them to your GitHub repository. Railway will detect changes and start a new deployment. Your application will then be updated with the new features.
To learn more about how to customize your store or how you can connect a storefront to your store, be sure to check out Medusa’s documentation.
If you have any issues or questions related to Medusa, then feel free to reach out to the Medusa team via Discord.
