

How I Built a Video Game Store with Medusa, Next.js, Stripe, and Algolia


Medusa is a Node.js-based, open-source, ecommerce platform. Medusa allows developers to create scalable and sophisticated commerce setups with minimal effort and a positive developer experience. It is an open-source alternative to Shopify with a fantastic developer experience and limitless customization options for merchants looking to scale.
Medusa has essential ecommerce features such as orders, exchanges, returns, and much more. All of these features set Medusa apart from other headless Commerce CMS.
Earlier this month, Medusa has launched a hackathon offering contributors the opportunity to win excellent prizes such as free swag, great project opportunities, and a $1,500 cash prize. This is an example of a project you can build to participate in the hackathon.
In this tutorial, you’ll learn how to create a video store with Medusa using its Next.js storefront. You’ll be integrating with it Stripe and Algolia.
You can check out the full code in this GitHub repository.

Prerequisites
Before you begin this tutorial, ensure you have the following requirements:
- Node.js version 14 or later.
- A Stripe account.
- An Algolia account.
- (Optional) MinIO is used as a file service plugin with Medusa. If you plan to use it as well, you must have MinIO installed and running.
- Yarn is used throughout this tutorial. You can also use NPM instead.
Create a Medusa Server
With the above requirements, install the Medusa CLI tool by running the command below:
yarn global add @medusajs/medusa-cli
Then, create a Medusa application with the command below:
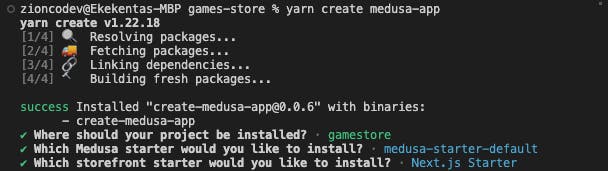
yarn create medusa-app
The above command will prompt you to choose the installation folder for this application. Enter gamestore as the project folder name, select medusa-starter-default as the starter for this project, and select Next.js Starter as the storefront starter to install.
Your selections should look like the ones in the screenshot below:
Now, wait while Medusa creates the necessary folders and files to run the application. Once the installation is completed, Medusa will create three main folders in the gamestore folder: admin, backend, and storefront.
Next, open three different terminal tabs. Change the directory into these folders, and start each part of the application with the following commands. Run each command in its respective terminal simultaneously:
# Medusa server
cd gamestore/backend
yarn start

# Admin
cd gamestore/admin
yarn start

# Storefront
cd gamestore/storefront
yarn dev
Install Algolia Plugin
Algolia is a search engine service that enables developers to integrate advanced search features such as typo tolerance, recommended results, and quick responses into their websites.
Before you install the plugin, follow the steps here to get your Algolia Application ID, Search-Only API Key, and Admin API Key.
Then, install the Algolia plugin by running the command below in your Medusa backend root folder:
yarn add medusa-plugin-algolia
And add the following environment variables to your Medusa server:
ALGOLIA_APP_ID=<YOUR_APP_ID>
ALGOLIA_ADMIN_API_KEY=<YOUR_ADMIN_API_KEY>
<YOUR_APP_ID> and <YOUR_ADMIN_API_KEY> are the Application ID and Admin API keys respectively.
Finally, in medusa-config.js, add the following item into the plugins array:
const plugins = [
  //...
  {
    resolve: `medusa-plugin-algolia`,
    options: {
      application_id: process.env.ALGOLIA_APP_ID,
      admin_api_key: process.env.ALGOLIA_ADMIN_API_KEY,
      settings: {
        products: {
          searchableAttributes: ["title", "description"],
          attributesToRetrieve: [
            "id",
            "title",
            "description",
            "handle",
            "thumbnail",
            "variants",
            "variant_sku",
            "options",
            "collection_title",
            "collection_handle",
            "images",
          ],
        },
      },
    },
  },
];
The searchableAttributes are attributes that can be searched in a product, and attributesToRetrieve are the product attributes that should be returned in the search result.
Install the Stripe Plugin
Stripe is a tested-and-trusted transaction processing platform. Stripe provides you with all of the technical components required to handle transactions safely and the analytical features required to gain insight into your sales.
Install the Stripe Plugin with the command below:
yarn add medusa-payment-stripe
Next, add configurations for your Stripe plugin in the backend/medusa-config.js file:
const plugins = [
//...
  resolve: `medusa-payment-stripe`,
    options: {
      api_key: STRIPE_API_KEY,
      webhook_secret: STRIPE_WEBHOOK_SECRET,
    },
   },
]
Finally, add in the backend/.env file your api_key and webhook_secret keys to the STRIPE_API_KEY and STRIPE_WEBHOOK_SECRET environment variables.
STRIPE_API_KEY=<YOUR STRIPE_API_KEY>
STRIPE_WEBHOOK_SECRET=<YOUR STRIPE_WEBHOOK_SECRET>
Install File Service Plugin (MinIO)
MinIO is an open-source distributed object storage server written in Go that is intended for private cloud infrastructure and provides S3 storage functionality.
Medusa uses file service plugins to store files such as product images. It’s important to add a file service plugin to create products. You can use MinIO, S3, or DigitalOcean Spaces.
Install the MinIO plugin module with the command below:
yarn add medusa-file-minio
Next, open your backend/.env file, and add the following credentials:
MINIO_ENDPOINT=<ENDPOINT>
MINIO_BUCKET=<BUCKET>
MINIO_ACCESS_KEY=<ACCESS_KEY>
MINIO_SECRET_KEY=<SECRET_KEY>
<ENDPOINT> is the URL of your MinIO server, <BUCKET> is the name of your MinIO bucket, and <ACCESS_KEY> and <SECRET_KEY> are your access and secret keys.
Finally, add the following configurations to the array of plugins in the backend/medusa-config.js file:
const plugins = [
//...
  {
    resolve: `medusa-file-minio`,
    options: {
        endpoint: process.env.MINIO_ENDPOINT,
        bucket: process.env.MINIO_BUCKET,
        access_key_id: process.env.MINIO_ACCESS_KEY,
        secret_access_key: process.env.MINIO_SECRET_KEY,
    },
  },
]
Add Products Using Medusa Admin
The Medusa Admin is an application connected to the Medusa Server to allow you to manage the data in your applications. Here you’ll add some products to the store from the Medusa admin.
While your Medusa server is running, run the Medusa admin if it’s not already running:
yarn start
Then, navigate to http://localhost:7000 to view the Medusa Admin. You'll see the a login screen.
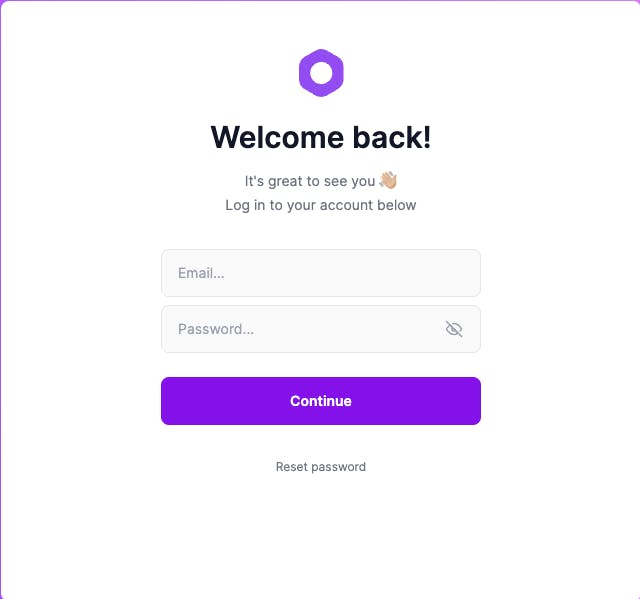
Medusa seeded your database with a demo admin that you can login with. Use the following credentials to login:
- Email:
admin@medusa-test.com - Password:
supersecret
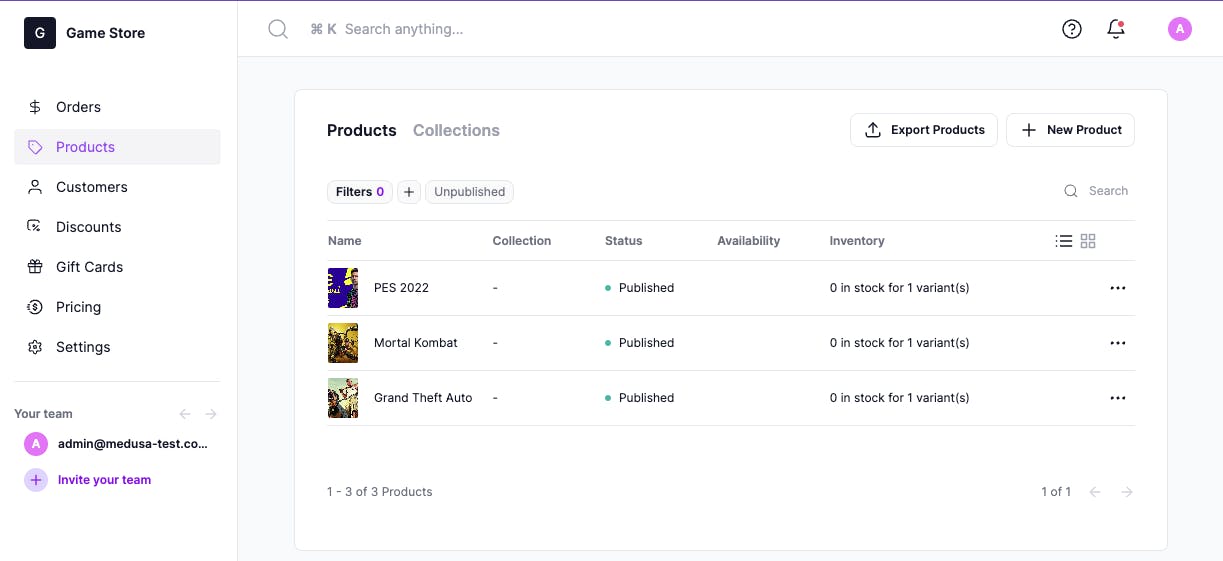
Once logged in, you should have access to the Medusa dashboard where you can manage your application content (create products, manage orders, and more).
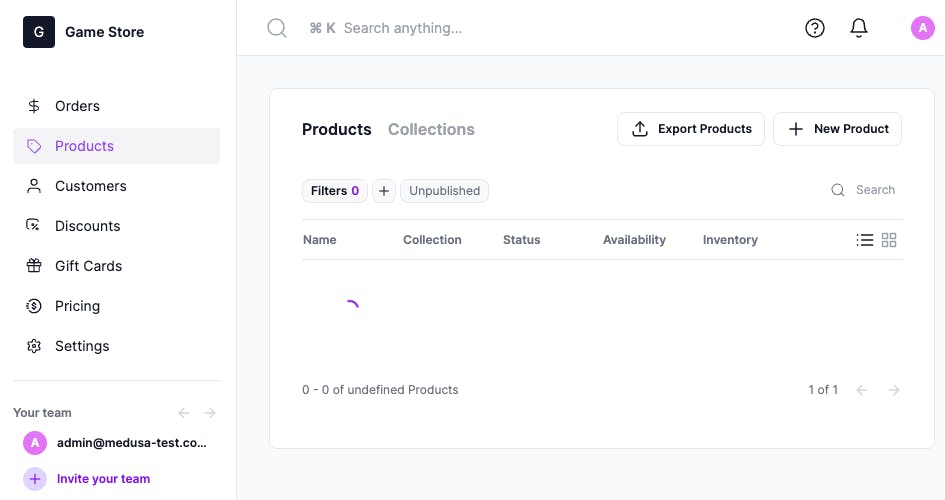
On the product page, click the “Add New Product” button **to add some video game products. You can add as many as you want.
Customize the Next.js Storefront
Now that we have added and created some video games in our admin, let’s customize the storefront to look like a games store application.
To do that, locate the storefront **directory and modify the following files.
You can download the images used in the storefront here on Github.
storefront/src/modules/home/components/featured-products/index.tsxwith the code snippet below:
...
const FeaturedProducts = () => {
  ...
  return (
    <div className="py-12">
      <div className="content-container py-12">
        <div className="flex flex-col items-center text-center mb-16">
          <span className="text-base-regular text-gray-600 mb-6">
            Trending On Funplay
          </span>
          <p className="text-2xl-regular text-gray-900 max-w-lg mb-4">
            Top 4 games this week
          </p>
          <UnderlineLink href="/store">Start Playing Now</UnderlineLink>
        </div>
          ...
      </div>
    </div>
  )
}
..
This changes title of the featured products component as well as some of the text to match the video game concept of our store.
storefront/src/modules/home/components/hero/index.tsx:
...
const Hero = () => {
  return (
    <div className="h-[90vh] w-full relative">
      <div className="text-white absolute inset-0 z-10 flex flex-col justify-center items-center text-center small:text-left small:justify-end small:items-start small:p-32">
        <h1 className="text-2xl-semi mb-4 drop-shadow-md shadow-black">
          The best games on the planet
        </h1>
        <p className="text-base-regular max-w-[32rem] mb-6 drop-shadow-md shadow-black">
          We have the best games for you.
        </p>
        <UnderlineLink href="/store">Start Playing Now</UnderlineLink>
      </div>
      <Image
        src="/4db11d22-7f83-482d-920d-f0033b1e6306.jpeg"
        layout="fill"
        loading="eager"
        priority={true}
        quality={90}
        objectFit="cover"
        alt="Photo by @thevoncomplex https://unsplash.com/@thevoncomplex"
        className="absolute inset-0"
        draggable="false"
      />
    </div>
  )
}

...
This changes the text and image in the hero section of the store.
storefront/src/modules/layout/components/footer-cta/index.tsx:
...
const FooterCTA = () => {
  return (
    <div className="bg-amber-100 w-full">
      <div className="content-container flex flex-col-reverse gap-y-8 small:flex-row small:items-center justify-between py-16 relative">
        <div>
          <h3 className="text-2xl-semi">Play 3D Games at afforadable rates </h3>
          <div className="mt-6">
            <UnderlineLink href="/store">Start Playing Now</UnderlineLink>
          </div>
        </div>

        <div className="relative w-full aspect-square small:w-[35%] small:aspect-[28/36]">
          <Image
            src="/photo-1553481187-be93c21490a9.jpeg"
            alt=""
            layout="fill"
            objectFit="cover"
            className="absolute inset-0"
          />
        </div>
      </div>
    </div>
  )
}

...
This changes the text and image in the section right before the footer.
storefront/src/modules/layout/components/footer-nav/index.tsx:
...

const FooterNav = () => {
 ...

  return (
    <div className="content-container flex flex-col gap-y-8 pt-16 pb-8">
      <div className="flex flex-col gap-y-6 xsmall:flex-row items-start justify-between">
        <div>
          <Link href="/">
            <a className="text-xl-semi uppercase">Funplay</a>
          </Link>
        </div>
        <div className="text-small-regular grid grid-cols-2 gap-x-16">
          <div className="flex flex-col gap-y-2">
            <span className="text-base-semi">Games</span>
            ...
        </div>
      </div>
      <div className="flex flex-col-reverse gap-y-4 justify-center xsmall:items-center xsmall:flex-row xsmall:items-end xsmall:justify-between">
        <span className="text-xsmall-regular text-gray-500">
          © Copyright 2022 Funplay
        </span>
        <div className="min-w-[316px] flex xsmall:justify-end">
          <CountrySelect />
        </div>
      </div>
    </div>
  )
}

...
This changes the text in the footer of the storefront.
storefront/src/modules/store/components/index.tsx:
//...
  return (
    <div>
      <div className="px-8 py-4  small:pr-0 small:pl-8 small:min-w-[250px]">
        <div className="flex gap-x-3 small:flex-col small:gap-y-3">
          <span className="text-base-semi">Games</span>
          {//...}
        </div>
      </div>
    </div>
  )
}

...
This changes the text in the store page.
storefront/src/pages/index.tsx:
...

const Home: NextPageWithLayout = () => {
  return (
    <>
      <Head
        title="Home"
        description="Shop all available games only at the Funplay. Worldwide Shipping. Secure Payment."
      />
      <Hero />
      <FeaturedProducts />
    </>
  )
}

...
This changes the metadata of the storefront.
Test Storefront
Make sure the Medusa server is still running. Then, run the following command to start the storefront:
yarn run dev
Now, navigate to http://localhost:8000 to preview the products in your Medusa store.

Then click on the Store link in the navigation bar **to view the products in the store.

Add Algolia Integration
The Algolia integration is built into the Next.js storefront by default. You only need to take three steps to get it to work.
First, enable the search feature in the store.config.json file:
{
  "features": {
    "search": true
  }
}
Then, add the necessary environment variables in the .env.local file:
If
.env.localis not available, make sure to rename.env.templateto.env.local.
NEXT_PUBLIC_SEARCH_APP_ID=<YOUR_APP_ID>
NEXT_PUBLIC_SEARCH_API_KEY=<YOUR_SEARCH_API_KEY>
NEXT_PUBLIC_SEARCH_INDEX_NAME=products
<YOUR APP ID> and <YOUR SEARCH API KEY> are the Application ID and Search-Only API Key on the API Keys page on Algolia respectively.
Finally, change the code in src/lib/search-client.ts to the code snippet below:
import algoliasearch from "algoliasearch/lite"

const appId = process.env.NEXT_PUBLIC_SEARCH_APP_ID || "" // You should add this to your environment variables

const apiKey = process.env.NEXT_PUBLIC_SEARCH_API_KEY || "test_key"

export const searchClient = algoliasearch(appId, apiKey)

export const SEARCH_INDEX_NAME =
  process.env.NEXT_PUBLIC_INDEX_NAME || "products"
If you run your Next.js storefront while the Medusa server is running, the search functionality will be available in your storefront by clicking the search icon in the navigation bar.
Add Stripe Integration
The last step in the tutorial is to integrate Stripe payment to allow customers to pay for their orders during checkout.
To do that, you’ll need to add Stripe to Regions in the Medusa Admin by following the steps below:
- Navigate to Settings > Regions.
- For each region, click the three dots at the top right of the first section on the right.
- Click on Edit Region Details from the dropdown.
- Under the providers section, select Stripe.
- Click Save.
Then in storefront/env.local add the following environment key:
NEXT_PUBLIC_STRIPE_KEY=<YOUR_PUBLISHABLE_KEY>
Where <YOUR_PUBLISHABLE_KEY> is your Stripe Publishable Key.
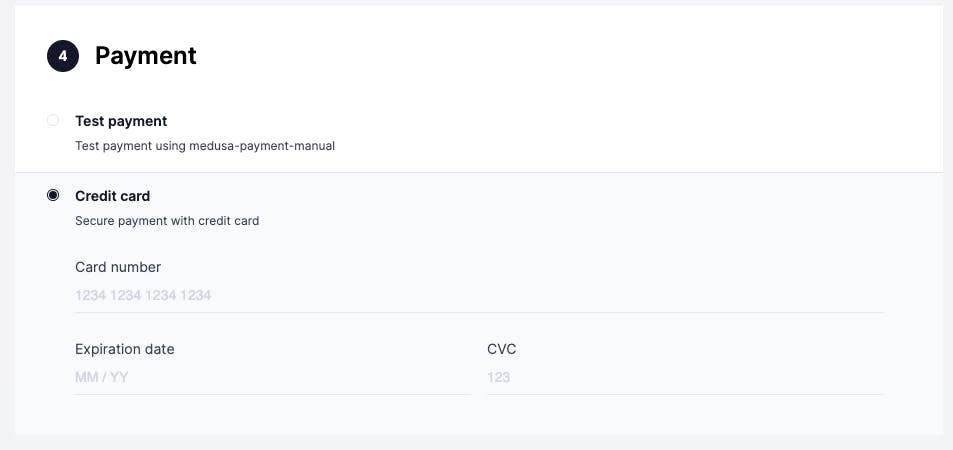
Test Stripe
Restart your Next.js storefront and make sure the Medusa server is still running. Then, try adding some products to the cart and proceed to checkout.
On checkout, in the Payment section you’ll be able to use Stripe to pay for the order.
Conclusion
Throughout this tutorial, you’ve learned how to build a video game store with Medusa. Whether you’re using the Next.js storefront or a storefront of your own, you can integrate other services like Stripe and Algolia using Medusa’s plugin system.
To learn about what more you can do with Medusa, check out Medusa’s documentation for guides on different integrations, API reference, user guide, and much more.
Should you have any issues or questions related to Medusa, then feel free to reach out to the Medusa team via Discord.