


Medusa is a rising ecommerce platform that fits all businesses. Medusa is an open source composable ecommerce platform with easy customizations and integrations. Medusa comes with a lot of ecommerce features that provide flexibility to both merchants and developers.
Having a headless architecture, Medusa’s frontend and backend are decoupled. This gives developers the freedom to choose what frontend framework or tool they use to build their storefront.
One option is using the Vue Storefront UI. It provides out-of-the-box customizable and performance-oriented components. You can use them in a Nuxt.js project to build stunning modern online stores.
In this article, you’ll learn how to use Vue Storefront UI to build a storefront for your Medusa server. You can find the full code of the storefront on this GitHub repository.
Prerequisites
To follow along with this guide, it's essential to have Node.js installed on your machine with at least version 14.
Set Up the Medusa Server
To create the Medusa server, you need the Medusa CLI tool. Run the following command to install it:
npm install @medusajs/medusa-cli -g
Then, run the following command to create the Medusa server:
medusa new local-medusa-server --seed
The --seed command populates an SQLite database with some test data once the setup is done.
Then, change to the newly created directory and start your medusa server:
cd local-medusa-server && medusa develop
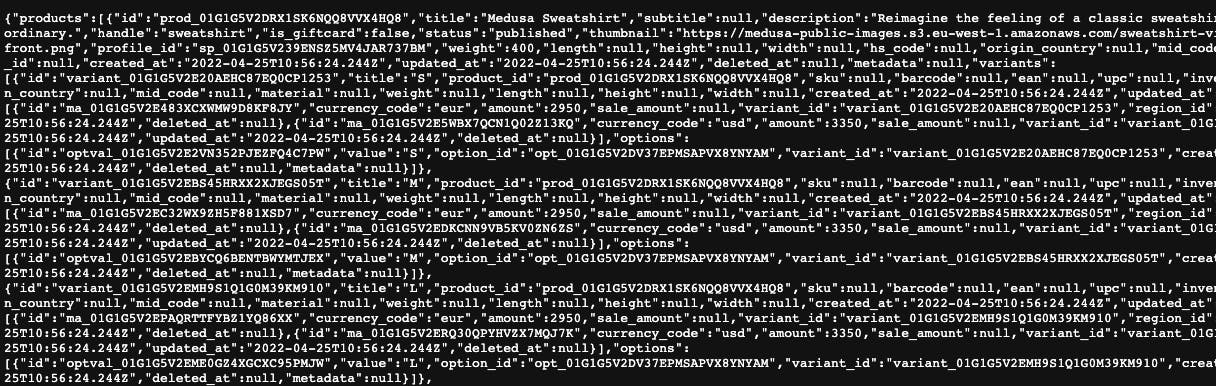
To test if the server is working, open http://localhost:9000/store/products in your browser. You should get a similar response as below:
Finally, it’s recommended to install a storage plugin to add products. You can use MinIO, S3, or Spaces.
Install Medusa Admin
Medusa provides a prebuilt admin dashboard that assists you in configuring and managing the products you have in your store. However, this is a complete optionally set up that you can choose to use in this tutorial.
To install the Medusa admin, open a new directory and run the following command:
git clone https://github.com/medusajs/admin medusa-admin
Once the installation process is done, change to the newly created directory medusa-admin and install the dependencies with NPM:
cd medusa-admin && npm install
Make sure the Medusa server is still running. Then, run the Medusa admin with the following command:
npm start
You can now access Medusa admin on http://localhost:7000/. If you seeded your database with demo data using the --seed option when you created your Medusa admin, you can log in using the email admin@medusa-test.com and password supersecret. Otherwise, you can use the [user command provided by the Medusa CLI tool](docs.medusajs.com/cli/reference#user).
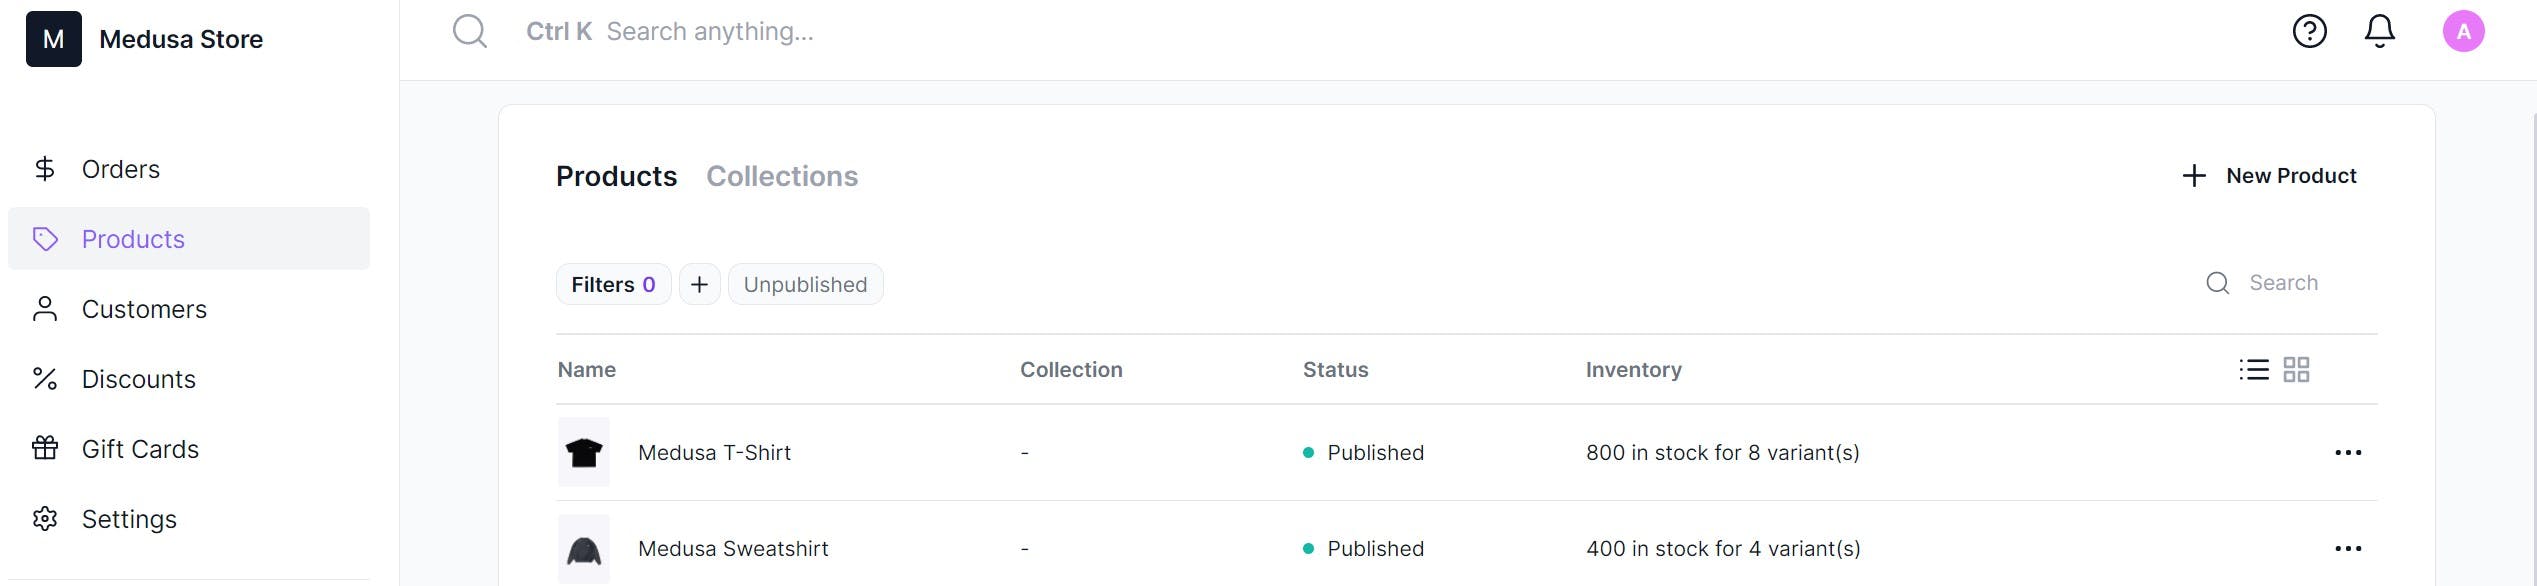
After logging in, navigate to the Products menu. You can add a few products from here by clicking on “New Product” at the top right.
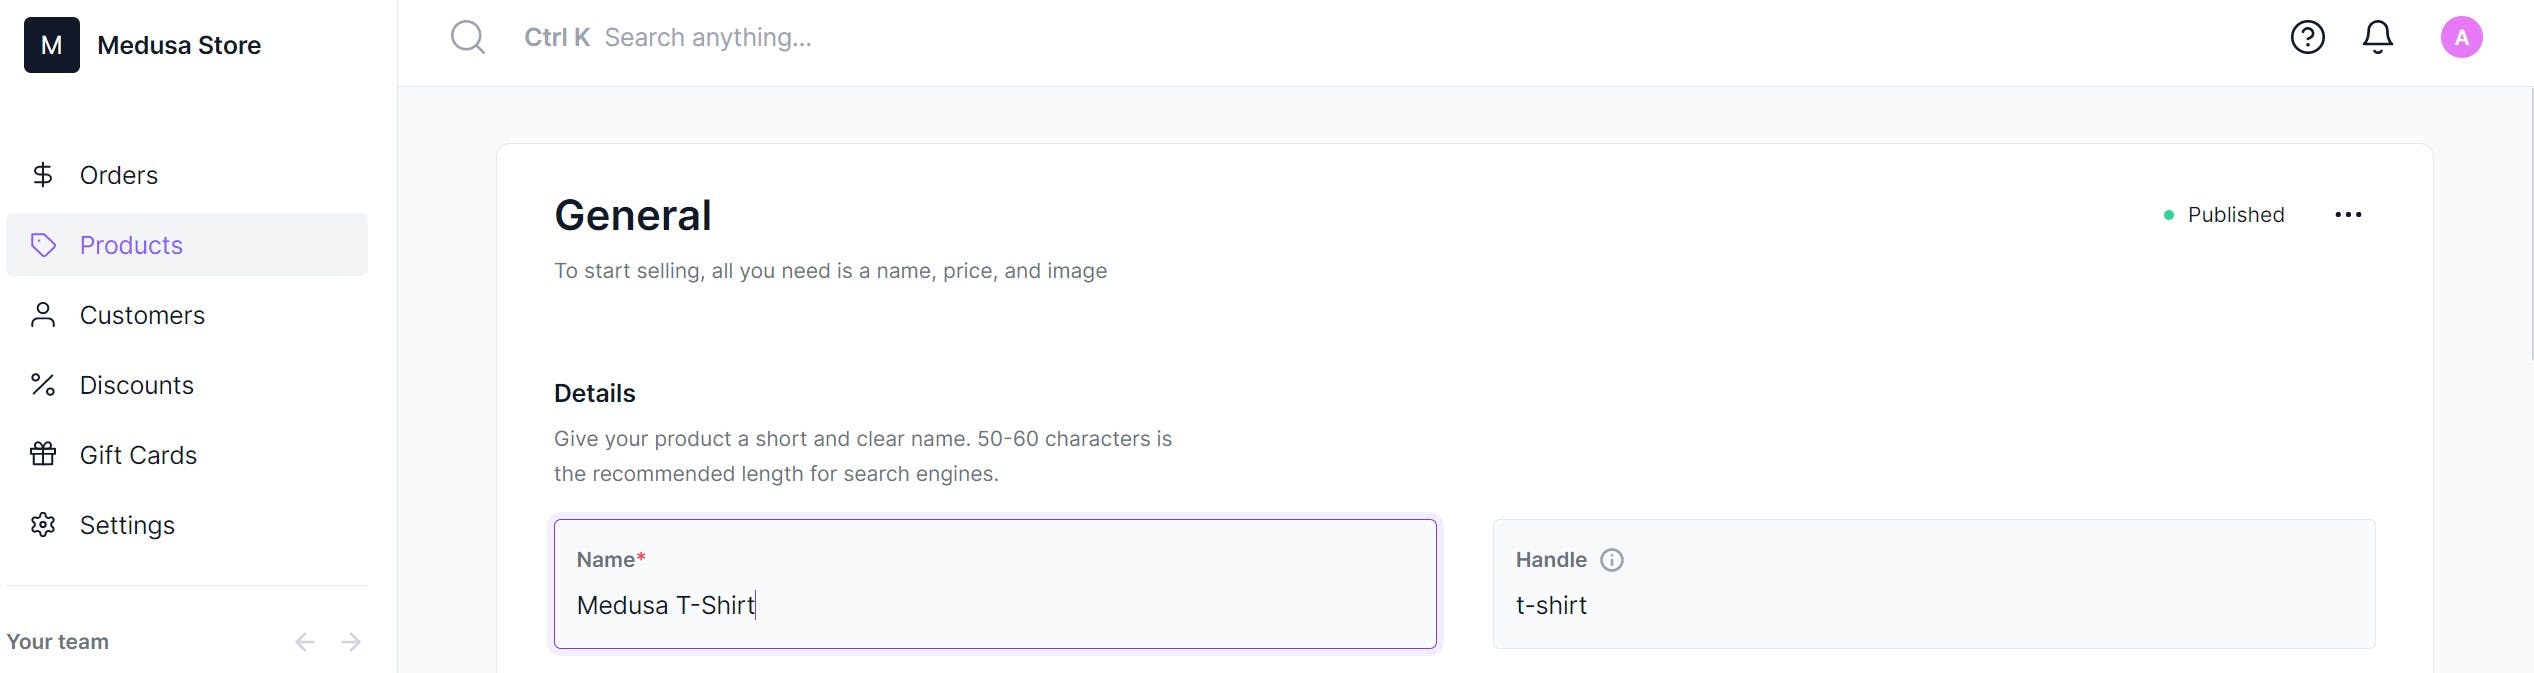
In the form, you can specify many information related to the product such as name, handle, description, weight, and more.
To learn more about the features in the Medusa admin, check out the documentation.
Setting up the Nuxt.js Storefront
In a different directory than the previous directories, run the following command to create a Nuxt.js website:
npx create-nuxt-app nuxtjs-storefront
You’ll be asked a few questions. You can answer as instructed in the image below:
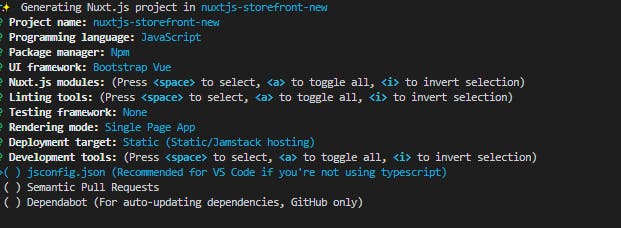
Feel free to change the package manager to either NPM or Yarn based on your preference.
When the installation process is done, proceed to the newly created folder:
cd nuxtjs-storefront
Connect the Vue Storefront to the Medusa Server
To start off, you need to install the Axios package. Axios is an HTTP package for making requests. Axios will process the requests between the Medusa server and the Storefront.
Run the following command to install it in the nuxtjs-storefront directory:
npm i -s axios
After the installation is done, you need to configure the Nuxt.js storefront to use the 8000 port. This is because the Medusa server uses CORS to ensure only defined hosts access the server and the default port expected for the storefront is 8000. You can learn more about it in Medusa’s documentation.
Add the following line after the ssr key in the nuxt.config.js file:
export default {
  ssr: false,
  server: {
    port: 8000
  },
    //...
}
Next, you need to add the URL to the Medusa server as an environment variable.
Start by installing the dotenv module:
npm install @nuxtjs/dotenv
Then, register the installed dotenv module innuxt.config.js file in the buildModules array:
buildModules: [
    '@nuxtjs/dotenv'
],
Finally, create a .env file at the root of your project directory and add your server URL as an environment variable:
baseUrl=http://localhost:9000
Install Vue Storefront UI
This tutorial uses Vue Storefront UI. This means you don’t have to create components from scratch and can use the ready-made components provided by Vue Storefront UI.
In the nuxtjs-storefront directory, run the following command to install Vue Storefront UI:
npm install --save @storefront-ui/vue
Set up components and layout
The Vue app will have the following components:
Navbar: Used to display the logo and links in the header of the website
ProductCard: Used to display short information about the product.
Footer: Used to display helpful links to customers.
Create the Navbar component
To create the Navbar component, create a file at components/App/Navbar.vue with the following content:
<template>
  <SfHeader :logo="shopLogo" :title="shopName" active-icon="account">
    <template #navigation>
      <SfHeaderNavigationItemv v-for="(category, key) in navbarLinks" :key="`sf-header-navigation-item-${key}`"
        :link="`${category.link}`" :label="category.title" />
    </template>
  </SfHeader>
</template>
<script>
  import {
    SfHeader
  } from "@storefront-ui/vue";
  export default {
    name: "Default",
    components: {
      SfHeader,
    },
    data() {
      return {
        shopName: "My Storefront App",
                shopLogo: "/logo.svg",
        navbarLinks: [{
          title: "Products",
          link: "/",
        }, ],
      };
    },
  };

</script>
This is a basic component that defines the navigation of your page. The Vue Storefront UI provides a SfHeader component. Inside that component, you can add other internal navigation components such as SfHeaderNavigation and SfHeaderNavigationItem.
You can also pass the component props to customize it such as the title, logo, or icons in the navigation bar.
Make sure you add the logo.svg file to be displayed in the navigation bar. The logo should be added to the static folder. If your logo has a different name, ensure you change that in the shopLogo property in the data function.
Create the Footer component
Next, create the components/App/Footer.vue file with the following content:
<template>
  <SfFooter>
    <SfFooterColumn v-for="(column, key) in footerColumns" :key="key" :title="column.title">
      <SfList>
        <SfListItem v-for="(menuItem, index) in column.items" :key="index">
          <SfMenuItem :label="menuItem" />
        </SfListItem>
      </SfList>
    </SfFooterColumn>
  </SfFooter>
</template>
<script>
  import {
    SfFooter,
    SfList,
    SfMenuItem
  } from "@storefront-ui/vue";
  export default {
    name: "Default",
    components: {
      SfFooter,
      SfList,
      SfMenuItem,
    },
    data() {
      return {
        footerColumns: [{
            title: "About us",
            items: ["Who we are", "Quality in the details", "Customer Reviews"],
          },
          {
            title: "Departments",
            items: ["Women fashion", "Men fashion", "Kidswear", "Home"],
          },
          {
            title: "Help",
            items: ["Customer service", "Size guide", "Contact us"],
          },
          {
            title: "Payment & delivery",
            items: ["Purchase terms", "Guarantee"],
          },
        ],
      };
    },
  };

</script>
The Footer component just includes helpful links for your customer. The Vue Storefront UI library provides a predefined UI for footers using the SfFooter component.
Create the ProductCard component
Create the components/ProductCard.vue file with the following content:
<template>
  <SfProductCard :image="item.thumbnail" :imageWidth="216" :imageHeight="326" badgeLabel="" badgeColor=""
    :title="item.title" :link="this.url" :linkTag="item.id" :scoreRating="4" :reviewsCount="7" :maxRating="5"
    :regularPrice="this.highestPrice.amount" :specialPrice="this.lowestPrice.amount" wishlistIcon="heart"
    isInWishlistIcon="heart_fill" :isInWishlist="false" showAddToCartButton :isAddedToCart="false"
    :addToCartDisabled="false" />
</template>
The product card uses the SfProductCard component provided by Vue Storefront UI to display a short summary of a product’s information including the title, price, and thumbnail.
Then, in the same file, add the following at the end of the file:
<script>
import { SfProductCard } from "@storefront-ui/vue"; // Import the components
export default {
    name:"ProductCard",
    components:{
        SfProductCard
    },
    props: {
        item: {
            type: Object,
        }
    },
    computed:{
        url(){
            return `/products/${this.item.id}`; // Product page
        },
        lowestPrice() {
        // Get the lowest price from the list of prices.
        const lowestPrice = this.item.variants.reduce(
            (acc, curr) => {
            return curr.prices.reduce((lowest, current) => {
                if (lowest.amount > current.amount) {
                return current;
                }
                return lowest;
            });
            },
            { amount: 0 }
        );
        // Format the amount and also add currency
        return {
            amount:
            lowestPrice.amount > 0
                ? (lowestPrice.amount / 100).toLocaleString("en-US", {
                    style: "currency",
                    currency: "USD",
                })
                : 0,
            currency_code: "USD",
        };
        },
        highestPrice() {
        // Get the highest price from the list of prices
        const highestPrice = this.item.variants.reduce(
            (acc, curr) => {
            return curr.prices.reduce((highest, current) => {
                if (highest.amount < current.amount) {
                return current;
                }
                return highest;
            });
            },
            { amount: 0 }
        );

        // Format the amount and also add currency
        return {
            amount:
            highestPrice.amount > 0
                ? (highestPrice.amount / 100).toLocaleString("en-US", {
                    style: "currency",
                    currency: "USD",
                })
                : 0,
            currency_code: "USD",
        };
        },
    }

}
</script>
This script prepares the data to be displayed by the template. That includes formatting the price and URL of the component.
Create the Storefront Layout
To set up the layout, create the file layouts/default.vue with the following content:
<template>
  <div>
    <app-navbar />
    <main>
      <div class="container">
        <Nuxt />
      </div>
    </main>
    <app-footer />
  </div>
</template>
<script>
  import "@storefront-ui/vue/styles.scss"; // vuestorefront UI styles.
  export default {
    name: 'DefaultLayout'
  }
</script>
This will display the page with the default Vue Storefront UI layout.
Create Home Page
Under the pages directory, edit the index.vue file to the following:
<template>
  <div>
    <div class="row">
      <div class="col-md-12">
                <SfHero class="hero" :slider-options="{ autoplay: false }">
          <SfHeroItem
            v-for="(img, index) in heroes"
            :key="index"
            :title="img.title"
            :subtitle="img.subtitle"
            :button-text="img.buttonText"
            :background="img.background"
            :class="img.className"
          />
        </SfHero>
      </div>
            <div class="col-md-12">
        <h4 class="text-center mt-5 mb-5">All Products</h4>
      </div>
    </div>
    <div v-if="products.length">
      <div class="row">
        <ProductCard v-for="product in products" :key="product.id" :item="product" />
      </div>
    </div>
  </div>
</template>

<script>
import Axios from 'axios';
import { SfHero } from "@storefront-ui/vue";
export default {
name: 'ProductsIndex',
components: {
    SfHero,
  },
    data () {
    return {
    products: [],
        heroes: [
        {
          title: "Colorful T-shirts already in store",
          subtitle: "JUNE COLLECTION 2022",
          buttonText: "Learn more",
          background: "rgb(236, 239, 241)",
        },
        {
          title: "Colorful Sweatshirts already in store",
          subtitle: "JUNE COLLECTION 2022",
          buttonText: "Learn more",
          background: "rgb(239, 235, 233)",
        },
        {
          title: "Colorful Sweatpants already in store",
          subtitle: "JUNE COLLECTION 2022",
          buttonText: "Learn more",
          background: "rgb(236, 239, 241)",
        },
      ],
    }
},
async fetch(){ // Fetching the products from Medusa server
        try{
        const {data:{products}} = await Axios.get(`${process.env.baseUrl}/store/products`);
        this.products = products
        }catch(e){
        console.log('An error occured', e)
        }
    }
}
</script>
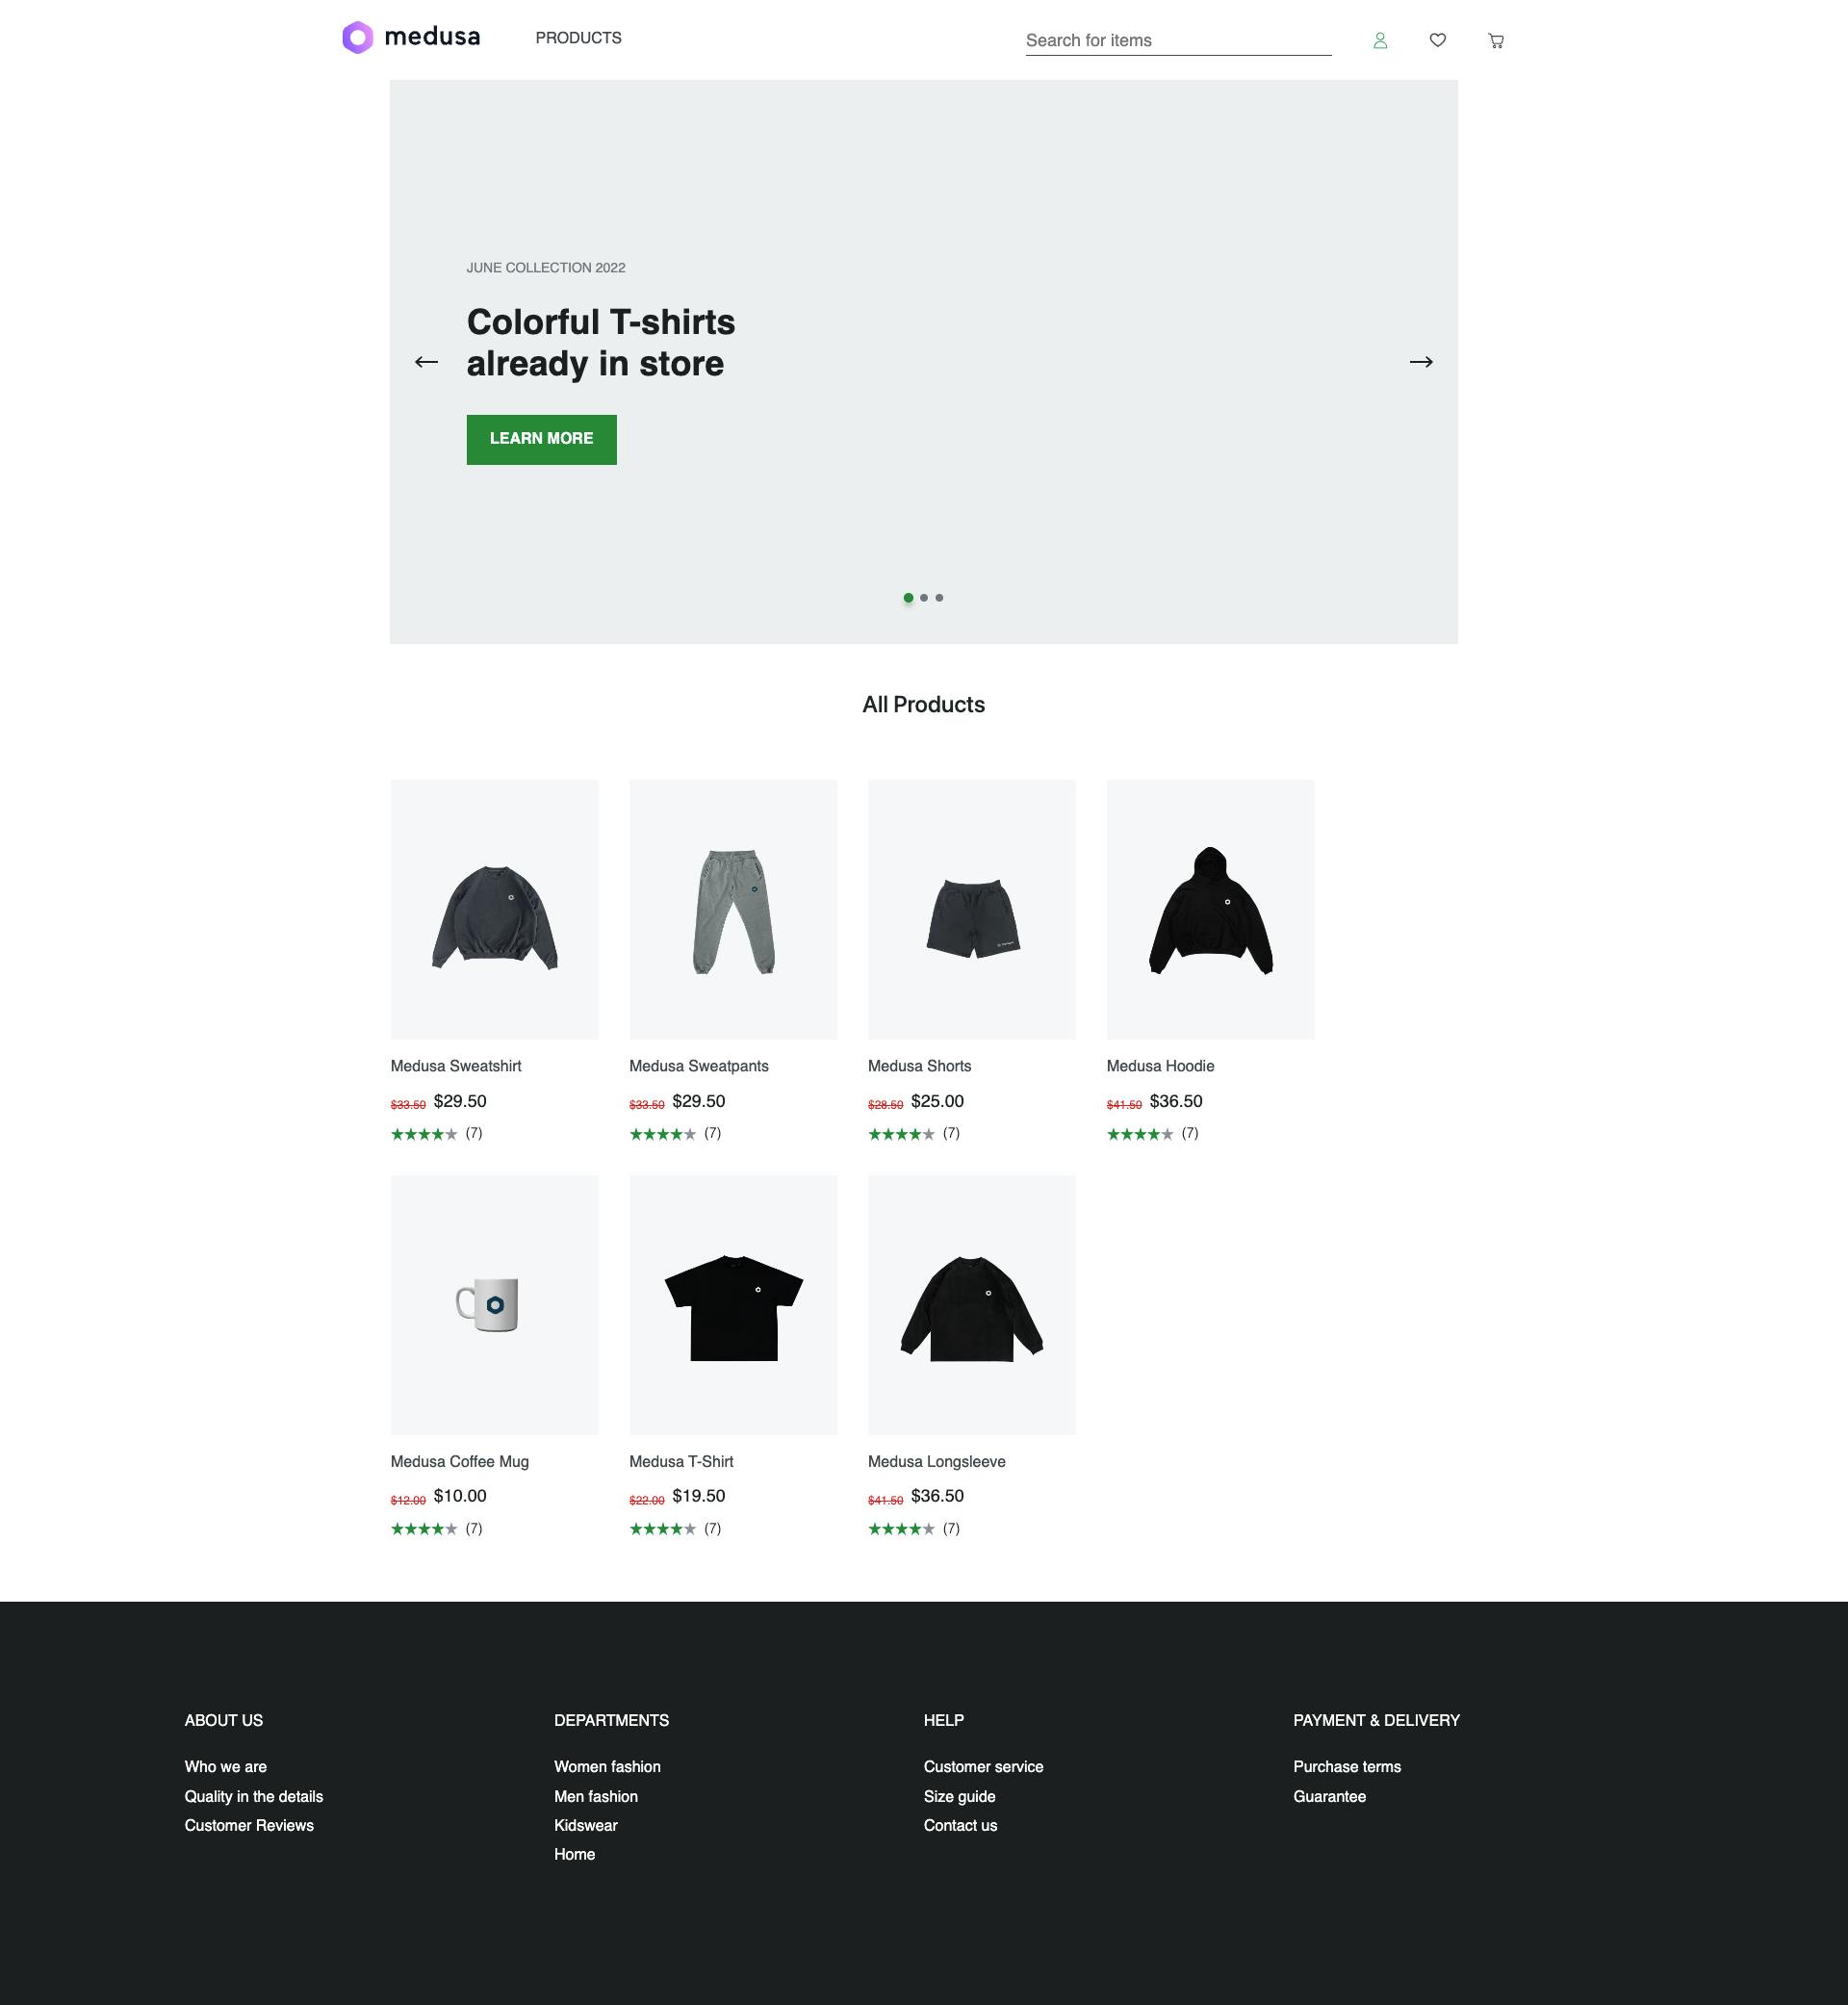
This fetches products from the Medusa server using Axios and displays them using the ProductCard component you created earlier.
You also add a carousel using the SfHero component. It shows an automatic slider with buttons and text. Each slide is defined as a SfHeroItem component.
Test Home Page
To test out the home page, make sure the Medusa server is running and start the Nuxt.js development server:
npm run dev
Then, open http://localhost:8000 in a browser, you should see the home page with a carousel, products, and a footer.
Create a Single Product Page
In this section, you’ll create a single product page to display more details of a product.
To create a single product page, Create the file pages/products/_id.vue with the following content:
<template>
  <div id="product">
    <SfBreadcrumbs class="breadcrumbs desktop-only" :breadcrumbs="breadcrumbs" />

        <p v-if="$fetchState.pending">Fetching Data...</p>
    <p v-else-if="$fetchState.error">An error occurred :(</p>

    <div v-else class="product">
      <SfGallery :images="this.getImages" class="product__gallery" :image-width="422" :image-height="664"
        :thumb-width="160" :thumb-height="160" :enableZoom="true"/>
      <div class="product__info">
        <div class="product__header">
          <SfHeading :title="product.title" :level="1" class="sf-heading--no-underline sf-heading--left" />
          <SfIcon icon="drag" size="42px" color="#E0E0E1" class="product__drag-icon smartphone-only" />
        </div>
        <div class="product__price-and-rating">
          <SfPrice :regular="this.lowestPrice.amount" />
        </div>
        <div>
          <p class="product__description desktop-only">{{ this.product.description }}
          </p>
          <SfAddToCart v-model="qty" class="product__add-to-cart" @click="addToCart" />
        </div>
      </div>
    </div>
    <transition name="slide">
      <SfNotification class="notification desktop-only" type="success" :visible="isOpenNotification"
        :message="`${qty} ${product.title} has been added to CART`" @click:close="isOpenNotification = true">
        <template #icon>
          <span></span></template></SfNotification>
    </transition>
  </div>
</template>
This page displays the following components from the Vue Storefront UI library:
SfBreadcrumbs - Displays the path to the current product.
SfGallery - Arranges product images that users can browse through with zoom-in functionality. Alternatively, you can use Carousel navigation to organize your product images.
SfHeading - Displays product titles and can have an optional description.
SfPrice - Display the product’s price.
SfAddToCart - Displays Add to Cart button with quantity options.
SfNotification - Displays notification at the bottom of the page that indicates the items are added to the cart. This component is only used to simulate adding a product to the cart but this is not covered in this tutorial.
Next, add the following at the end of the same file:
<script>
  import { // UI components
    SfGallery,
    SfHeading,
    SfPrice,
    SfIcon,
    SfAddToCart,
    SfBreadcrumbs,
    SfNotification,
  } from "@storefront-ui/vue";
  import Axios from "axios";
  export default {
    name: "Product",
    components: {
      SfGallery,
      SfHeading,
      SfPrice,
      SfIcon,
      SfAddToCart,
      SfBreadcrumbs,
      SfNotification,
    },
    data() { // default data
      return {
        current: 1,
        qty: 1,
        selected: false,
        product: {
          name: "",
          title: "",
          description: "",
          images: [],
          price: {
            regular: 0,
          },
        },
        breadcrumbs: [{
          text: "Home",
          link: "/",
        }, ],
        isOpenNotification: false,
      };
    },
    computed: {
      getImages() { // Format Product images in a way that the component understands.
        return this.product ?
          this.product.images.map((image) => {
            return {
              mobile: {
                url: image.url,
              },
              desktop: {
                url: image.url,
              },
              big: {
                url: image.url,
              },
              alt: this.product?.title,
              name: this.product?.title,
            };
          }) :
          [];
      },
      lowestPrice() {
        // Get the least price
        const lowestPrice = this.product.variants ?
          this.product.variants.reduce(
            (acc, curr) => {
              return curr.prices.reduce((lowest, current) => {
                if (lowest.amount > current.amount) {
                  return current;
                }
                return lowest;
              });
            }, {
              amount: 0
            }
          ) :
         {
            amount: 0
          };
        // Format the amount and append the currency.
        return {
          amount: lowestPrice.amount > 0 ?
            (lowestPrice.amount / 100).toLocaleString("en-US", {
              style: "currency",
              currency: "USD",
            }) :
            0,
          currency: "USD",
        };
      },
    },
    methods: {
      addToCart() {
        this.isOpenNotification = true; // show notification
        setTimeout(() => {
          this.isOpenNotification = false; // hide notification
        }, 3000);
      },
    },
    async fetch() {
      // Fetch the product based on the id.
      try {
        const {
          data: {
            product
          },
        } = await Axios.get(
          `${process.env.baseUrl}/store/products/${this.$route.params.id}`);
        this.product = product;
      } catch (e) {
        // eslint-disable-next-line no-console
        console.log("The server is not responding");
      }
    },
  };
</script>
This just imports the components used in the template, fetches the product’s information from the Medusa server, and formats the product’s information such as the price or URL before displaying them in the template.
Finally, add the following styling at the end of the same file:
<style lang="scss" scoped>
@import "~@storefront-ui/vue/styles";
#product {
box-sizing: border-box;
@include for-desktop {
    max-width: 1272px;
    padding: 0 var(--spacer-sm);
    margin: 0 auto;
}
}
.product {
    margin-bottom:20px;
    @include for-desktop {
        display: flex;
    }
    &__info {
        margin: var(--spacer-xs) auto;
        @include for-desktop {
        max-width: 32.625rem;
        margin: 0 0 0 7.5rem;
        }
    }
    &__header {
        --heading-title-color: var(--c-link);
        --heading-title-font-weight: var(--font-weight--bold);
        --heading-title-font-size: var(--h3-font-size);
        --heading-padding: 0;
        margin: 0 var(--spacer-sm);
        display: flex;
        justify-content: space-between;
        @include for-desktop {
        --heading-title-font-weight: var(--font-weight--semibold);
        margin: 0 auto;
        }
    }
    &__drag-icon {
        animation: moveicon 1s ease-in-out infinite;
    }
    &__price-and-rating {
        margin: 0 var(--spacer-sm) var(--spacer-base);
        align-items: center;
        @include for-desktop {
        display: flex;
        justify-content: space-between;
        margin: var(--spacer-sm) 0 var(--spacer-lg) 0;
        }
    }
    &__count {
        @include font(
        --count-font,
        var(--font-weight--normal),
        var(--font-size--sm),
        1.4,
        var(--font-family--secondary)
        );
        color: var(--c-text);
        text-decoration: none;
        margin: 0 0 0 var(--spacer-xs);
    }
    &__description {
        color: var(--c-link);
        @include font(
        --product-description-font,
        var(--font-weight--light),
        var(--font-size--base),
        1.6,
        var(--font-family--primary)
        );
    }
    &__add-to-cart {
        margin: var(--spacer-base) var(--spacer-sm) 0;
        @include for-desktop {
        margin-top: var(--spacer-2xl);
        }
    }
    &__guide,
    &__compare,
    &__save {
        display: block;
        margin: var(--spacer-xl) 0 var(--spacer-base) auto;
    }
    &__compare {
        margin-top: 0;
    }
    &__property {
        margin: var(--spacer-base) 0;
        &__button {
        --button-font-size: var(--font-size--base);
        }
    }
    &__additional-info {
        color: var(--c-link);
        @include font(
        --additional-info-font,
        var(--font-weight--light),
        var(--font-size--sm),
        1.6,
        var(--font-family--primary)
        );
        &__title {
        font-weight: var(--font-weight--normal);
        font-size: var(--font-size--base);
        margin: 0 0 var(--spacer-sm);
        &:not(:first-child) {
            margin-top: 3.5rem;
        }
        }
        &__paragraph {
        margin: 0;
        }
    }
    &__gallery {
        flex: 1;
    }
}
.breadcrumbs {
margin: var(--spacer-base) auto var(--spacer-lg);
}
.notification {
position: fixed;
bottom: 0;
left: 0;
right: 0;
--notification-border-radius: 0;
--notification-max-width: 100%;
--notification-font-size: var(--font-size--lg);
--notification-font-family: var(--font-family--primary);
--notification-font-weight: var(--font-weight--normal);
--notification-padding: var(--spacer-base) var(--spacer-lg);
}

.slide-enter-active,
.slide-leave-active {
transition: all 0.3s;
}

.slide-enter {
transform: translateY(40px);
}

.slide-leave-to {
transform: translateY(-80px);
}
@keyframes moveicon {
0% {
    transform: translate3d(0, 0, 0);
}
50% {
    transform: translate3d(0, 30%, 0);
}
100% {
    transform: translate3d(0, 0, 0);
}
}
</style>
Test Single Product Page
Make sure that both your Medusa server and Nuxt.js development servers are running. Then, go to localhost:8000 and click on a product on the home page. You’ll be redirected to the product’s page with more information about it.
If you click the Add to Cart button, you’ll see a notification at the bottom of the page indicating you added the product to the cart. As mentioned earlier, this is only used for simulation and does not actually add the product to the cart.
Conclusion
This tutorial only scratches the surface of what you can do with Medusa and Vue Storefront UI.
With Medusa, you can implement other ecommerce features in your storefront such:
Cart functionalities and features. You can use Vue Storefront UI’s Cart component.
Add Payment integrations with Stripe.
Checkout flow. You can use Vue Storefront’s Checkout and Order Summary components.
Should you have any issues or questions related to Medusa, then feel free to reach out to the Medusa team via Discord.