

Simple steps to Build a Food Ecommerce Restaurant with Medusa, Next.js, and Paystack


Food restaurants remain one of the best lucrative businesses around the world. They get patronage on a daily basis without being much affected by a country's economy because people depend on food for survival.
Creating an avenue for your food restaurant to sell online helps your business reach a wide range of people who won’t be available to buy in your physical shop and increases your daily sales
In this tutorial, you will learn how to build a complete food ecommerce restaurant using Medusa ecommerce engine with Paystack integration.
The full code for this project is on this GitHub repository.
.gif)
What is Medusa?
Medusa provides bespoke commerce infrastructure for developers. Its composable commerce engine addresses the challenges of existing ecommerce platforms which APIs offer bad developer experiences, extension capabilities are insufficient, and results are hacky and hard to maintain.
The solutions ships as a headless backend with a comprehensive feature set covering core elements related to order, product, and customer handling. In addition, it provides advanced features related to promotions, multi-currency handling, RMA flows, customer group handling and much more. For a comprehensive overview of the solutions and integrations, see Medusa’s documentation.
If you like this tutorial, please give Medusa a 🌟 on GitHub
What is Next.js?
Next.js is a JavaScript open source framework for building superfast and extremely user-friendly frontend websites using React. It is a server-rendered, lightweight, and flexible React framework that requires little or no configuration during usage.
Using Medusa commerce engine to build your online stores gives you the opportunity to work with Medusa Next.js storefront starter, which can be easily installed through CLI commands.
Medusa Next.js storefront is a 100% ready-to-use Medusa storefront template. It comes with all ecommerce storefront features such as product display, featured products, shopping cart, checking out, multiple payment processing, and more.
What is Paystack?
Paystack is the #1 African payment gateway that helps businesses to accept online payments through their ecommerce stores, websites, and applications. Paystack provides other services such as point-of-sale (PoS), payment through an invoice, and more.
The integration between Medusa and Paystack can be achieved using a community plugin, which you’ll learn in this tutorial.
Prerequisites
Before you start, be sure you have the following:
Set up Your Food Restaurant Ecommerce with Medusa
To start building with Medusa, follow these simple steps below:
Install Medusa CLI
Medusa CLI tool can be installed either using npm or yarn, but this tutorial is based on npm. Use the command below to install Medusa CLI:
npm install @medusajs/medusa-cli -g
Creating Your New Food Restaurant Store Server
The command below will create a new Medusa store for you:
medusa new my-food-restaurant --seed
my-food-restaurant will be your project name, but you can change this to your preferred choice of name.
Switch to the project directory:
cd my-food-restaurant
Installing Paystack Medusa Plugin
In the root of your project, my-food-restaurant, run this command to install Medusa Paystack plugin:
npm install medusa-payment-paystack
Next, you need to configure your Paystack plugin in your project. To do this, first, add PAYSTACK SECRET KEY to your .env file:
PAYSTACK_SECRET_KEY=example_key_xxxxx
In the above, replace example_key_xxxxx with the secret key gotten from your Paystack API Key.
In medusa-config.js, add the following at the end of the pluginsarray:
{
    resolve: `medusa-payment-paystack`,
    options: {
      secret_key: process.env.PAYSTACK_SECRET_KEY,
    },
  },
The above code snippet adds Medusa Paystack plugin to your project configurations.
Installing MinIO Medusa Plugin
Managing images in Medusa requires a file service plugin for uploading images of products. Medusa provides different options for handling image upload for products, but this tutorial will focus only on using MinIO file service plugin.
MinIO is a high-performance open source object storage solution that provides S3 storage functionality. You can follow this documentation to learn how to install it and create a bucket.
Install MinIO plugin in the Medusa server directory with the command below:
npm install medusa-file-minio
Next, add the following block of code to your .env:
MINIO_ENDPOINT=<ENDPOINT>
MINIO_BUCKET=<BUCKET>
MINIO_ACCESS_KEY=<ACCESS_KEY>
MINIO_SECRET_KEY=<SECRET_KEY>
Note: <ENDPOINT> is the URL of your MinIO server, <BUCKET> is the name of the bucket you created earlier, and <ACCESS_KEY> and <SECRET_KEY> are the keys you generated in the previous section.
Finally, in medusa-config.js, add the following at the end of the pluginsarray:
{
    resolve: `medusa-file-minio`,
    options: {
        endpoint: process.env.MINIO_ENDPOINT,
        bucket: process.env.MINIO_BUCKET,
        access_key_id: process.env.MINIO_ACCESS_KEY,
        secret_access_key: process.env.MINIO_SECRET_KEY,
    },
  },
If you’ve completed the above processes, start your store server with the command below:
medusa develop
You can navigate to localhost:9000/store/products/ to see available products in your store.
Creating Medusa Admin for your Food Restaurant
To set up your Medusa Admin, follow the steps below.
- Clone the Medusa Admin repository and change to the newly created folder:
git clone https://github.com/medusajs/admin medusa-admin
cd medusa-admin
- Run the command below to install all necessary dependencies:
npm install
- Test it:
(Note: Ensure your Medusa store server is running before testing your admin.)
npm start
By default, Medusa Admin runs on port 7000. You can go to localhost:7000 on your browser to access your admin page.
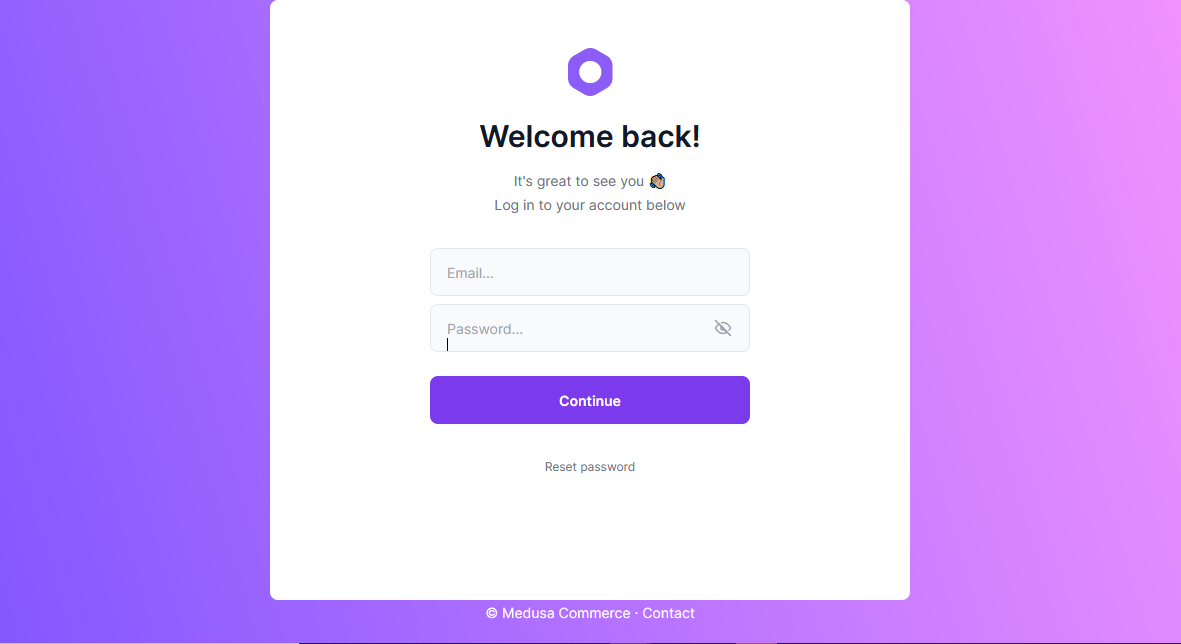
Medusa Server comes with admin login details, which are admin@medusa-test.com as the email address and supersecret as the password. This demo data is a result of --seed added while creating your store server.
You can visit the User Guide to learn more about Medusa Admin.
Adding Paystack Payment Provider to your Regions
Food restaurants could be inter-state or international businesses, which means your store should be focused on selling products to a particular country.
This tutorial will be focused on using the Nigerian currency since it’s one of the Paystack-supported countries.
If you are not selling to Paystack-supported African countries, you can easily integrate Medusa Stripe Payment Plugin in your store.
To add Paystack to your regions, follow the steps below to set your store currency;
1. Go to Settings ⇒ Currencies.
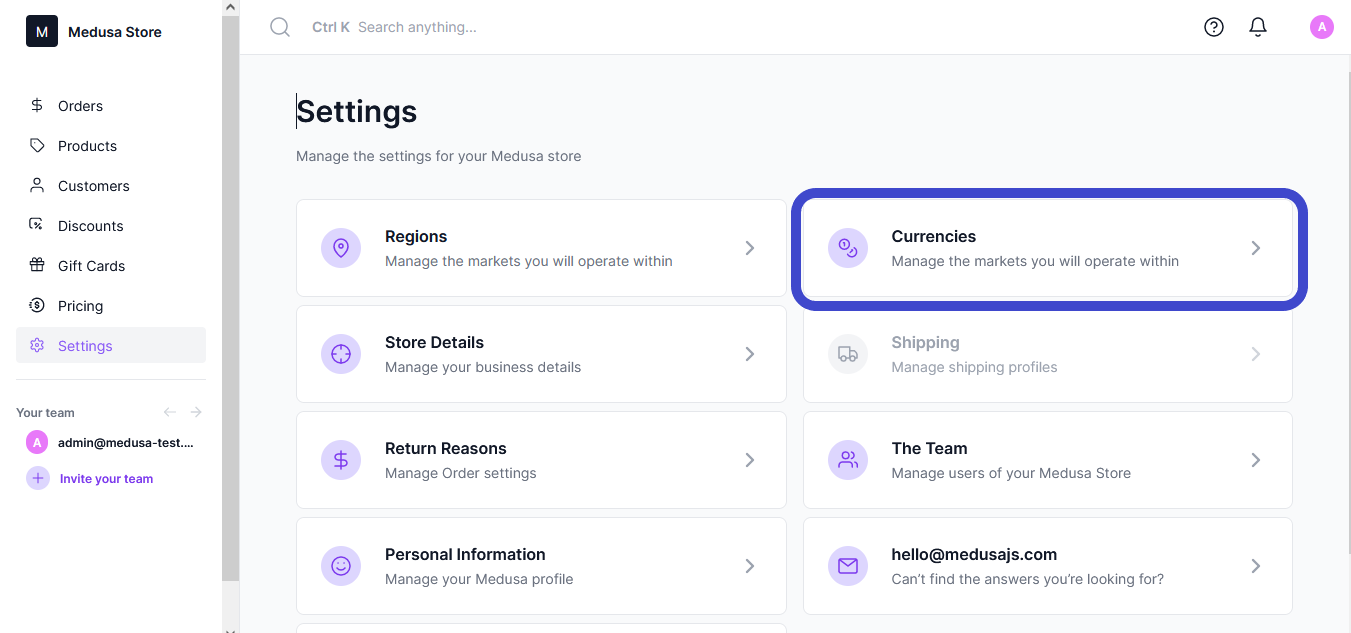
2. Click on the Edit currencies button in the Store Currencies section.
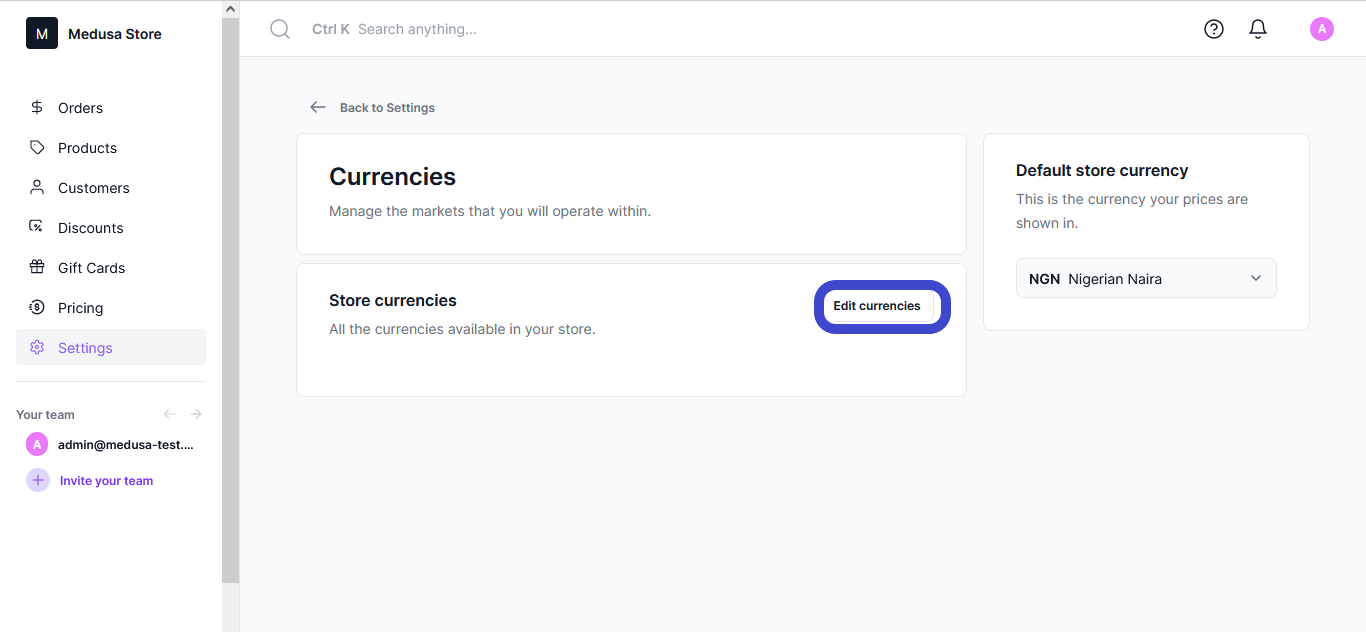
3. In the new window that opens, click on the Add Currencies button and select all the currencies you want to add.

4. Click on the Save and close button.
Note: Set your default currency to Nigerian Naira after the 4th step.
You can learn more about how to manage currencies.
Adding Paystack to your Region:
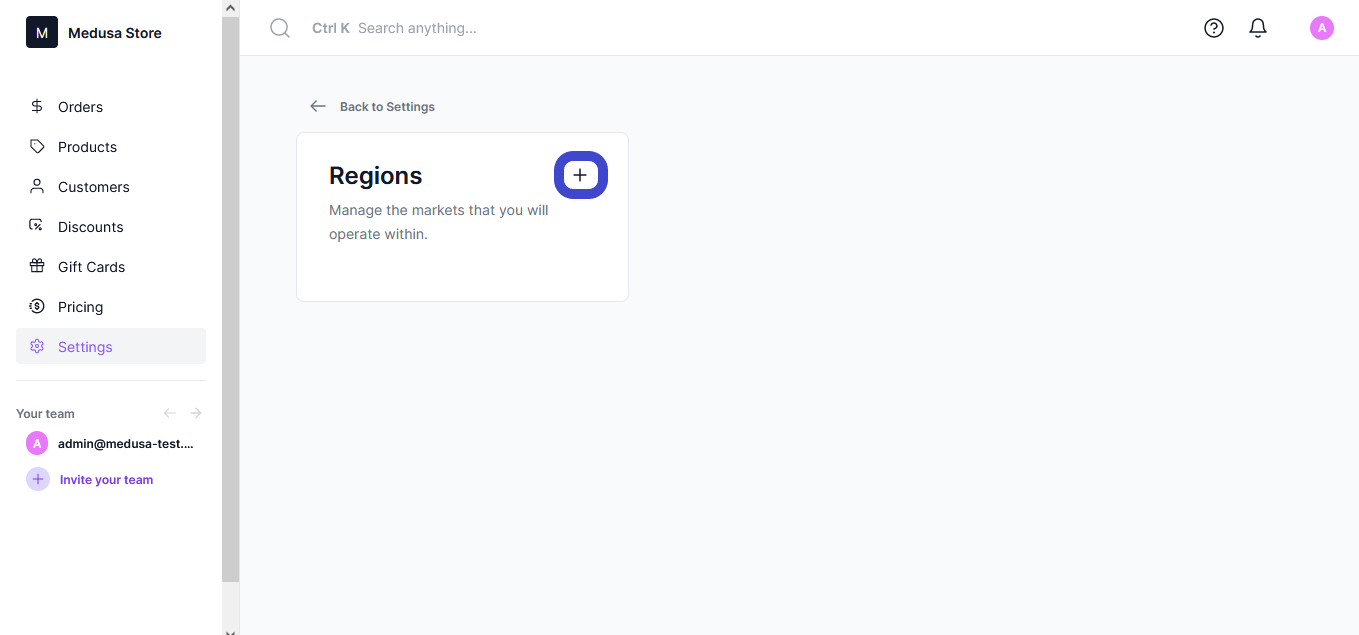
1. Go to Settings ⇒ Regions.
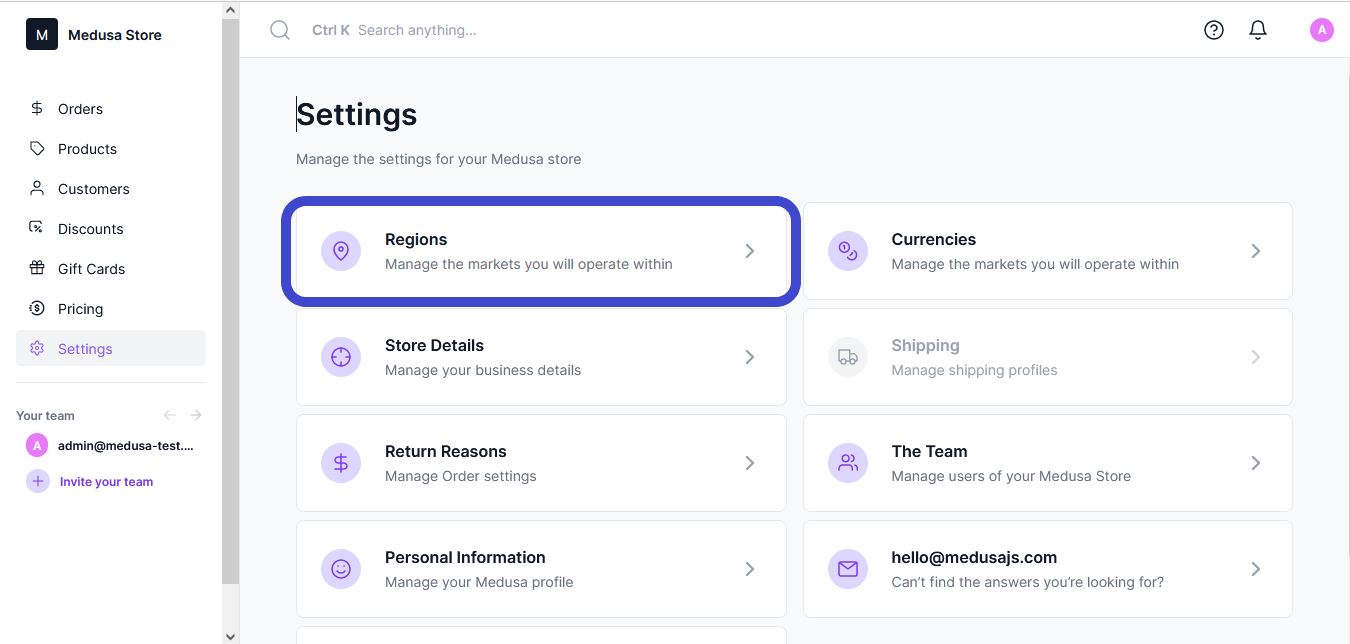
2. Click on the plus icon at the top right of the Regions section .
3. In the form that opens, enter the Regions details. It is required to enter a title, choose a currency, enter a tax rate, and choose at least one country where your restaurant is based, payment provider (select Paystack), and fulfillment provider.
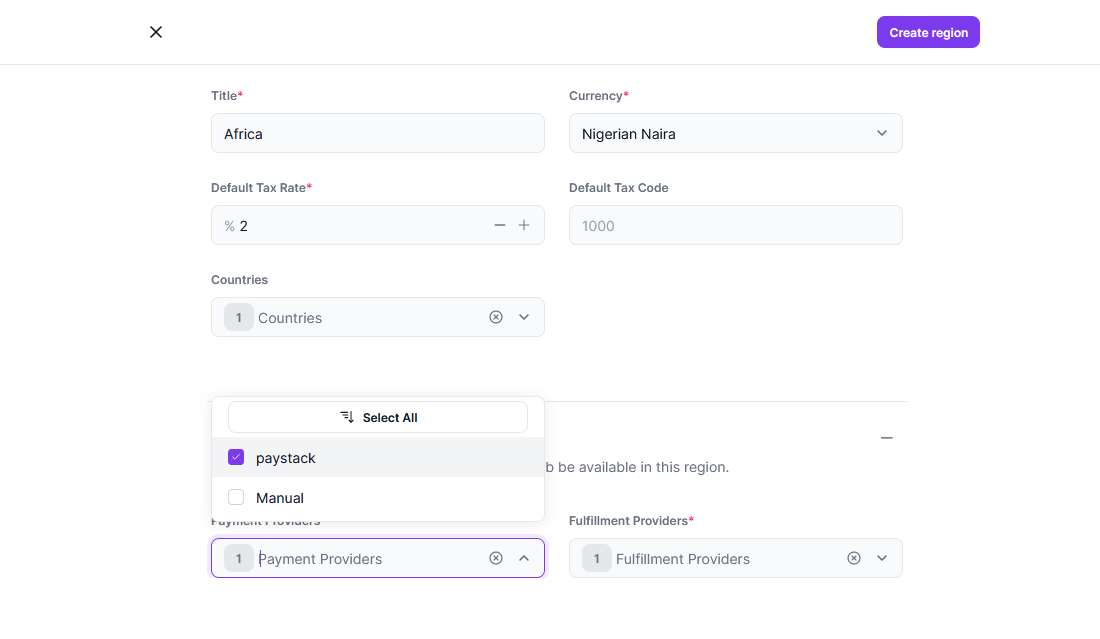
Once done, click on the Create region button at the top-right side.
Learn more about Regions from Medusa User Guide.
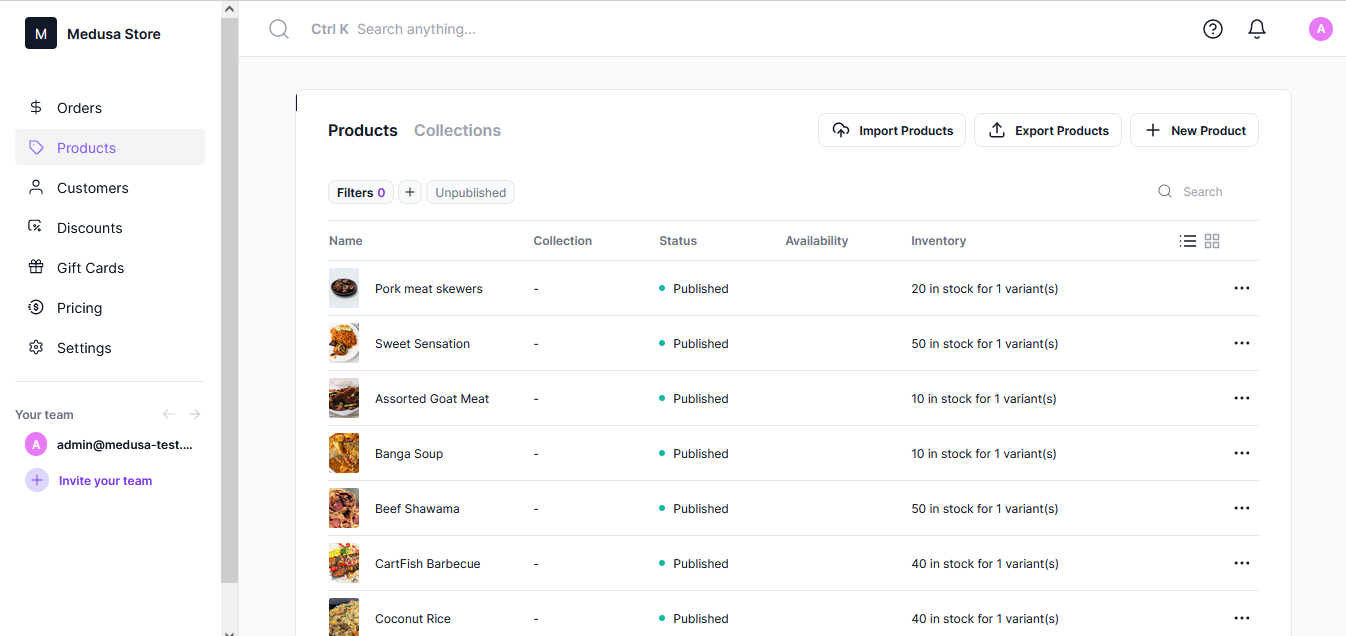
Adding Food Products to your Admin
Medusa Admin supports product management which includes adding new products, editing, publishing, unpublishing, duplicating, and deleting products.
By default, the Medusa store server comes with a few products. You’ll delete them and add new products according to your restaurant's food menu.
Visit Medusa Products Overview for a complete user guide on how to manage products in your store.
Creating Medusa Next.js Storefront
In this tutorial, you will use the Medusa Next.js Storefront Template to build your storefront.
Medusa Next.js Storefront Template already has every feature you may need in your storefront in it; this helps to quicken your development process when you choose to work with Medusa as your commerce engine.
The steps below will help you create your food restaurant Storefront:
1. Run the command below to create a new Next.js starter project:
npx create-next-app -e https://github.com/medusajs/nextjs-starter-medusa food-restaurant-storefront
food-restaurant-storefront represents the name of your project; you can rename it as you wish.
2. Switch to the newly created directory food-restaurant-storefront and rename the template environment variable file to use environment variables in development:
cd food-restaurant-storefront
mv .env.template .env.local
Customizing Your Storefront
Since you have successfully created your food restaurant storefront, you can customize your storefront to your taste.
You can find all images used for this project in the GitHub repository.
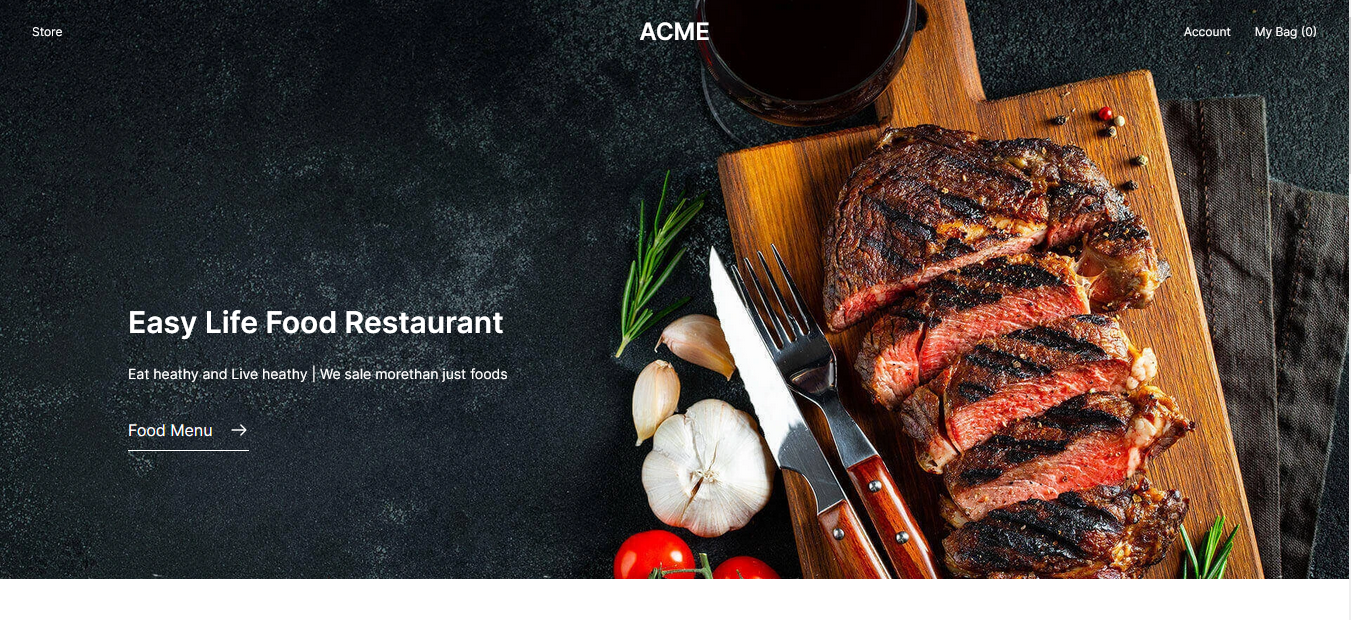
Modify Your Homepage Banner: To do so, locate src/modules/home/components/hero/index.tsx and replace its contents with the code below:
import UnderlineLink from "@modules/common/components/underline-link"
import Image from "next/image"

const Hero = () => {
  return (
    <div className="h-[90vh] w-full relative">
      <div className="text-white absolute inset-0 z-10 flex flex-col justify-center items-center text-center small:text-left small:justify-end small:items-start small:p-32">
        <h1 className="text-2xl-semi mb-4 drop-shadow-md shadow-black">
          Easy Life Food Restaurant
        </h1>
        <p className="text-base-regular max-w-[32rem] mb-6 drop-shadow-md shadow-black">
          Eat heathy and Live heathy | We sale morethan just foods
        </p>
        <UnderlineLink href="/store">Food Menu</UnderlineLink>
      </div>
      <Image
        src="/h2-slide.jpg"
        layout="fill"
        loading="eager"
        priority={true}
        quality={90}
        objectFit="cover"
        alt="homepage banner"
        className="absolute inset-0"
        draggable="false"
      />
    </div>
  )
}

export default Hero
The above code block will change the banner image and change the text.
Secondly, modify your Featured Product section. To do so, locate src/modules/home/components/featured-products/index.tsx and replace its contents with the code below:
import { useFeaturedProductsQuery } from "@lib/hooks/use-layout-data"
import UnderlineLink from "@modules/common/components/underline-link"
import ProductPreview from "@modules/products/components/product-preview"
import SkeletonProductPreview from "@modules/skeletons/components/skeleton-product-preview"

const FeaturedProducts = () => {
  const { data } = useFeaturedProductsQuery()

  return (
    <div className="py-12">
      <div className="content-container py-12">
        <div className="flex flex-col items-center text-center mb-16">
          <span className="text-base-regular text-gray-600 mb-6">
            Enjoy More on
          </span>
          <p className="text-2xl-regular text-gray-900 max-w-lg mb-4">
            Our Today's Food Menu
          </p>
          <UnderlineLink href="/store">Food products</UnderlineLink>
        </div>
        <ul className="grid grid-cols-2 small:grid-cols-4 gap-x-4 gap-y-8">
          {data
            ? data.map((product) => (
                <li key={product.id}>
                  <ProductPreview {...product} />
                </li>
              ))
            : Array.from(Array(4).keys()).map((i) => (
                <li key={i}>
                  <SkeletonProductPreview />
                </li>
              ))}
        </ul>
      </div>
    </div>
  )
}

export default FeaturedProducts
The above code snippet will change the default texts to match what you are building the store for.
Third, modify your part of the footer section. To do so, locate your src/modules/**layout**/components/footer-cta/index.tsx and replace its content with the code below:
import UnderlineLink from "@modules/common/components/underline-link"
import Image from "next/image"

const FooterCTA = () => {
  return (
    <div className="bg-gray-800 w-full">
      <div className="content-container flex flex-col-reverse gap-y-8 small:flex-row small:items-center justify-between py-16 relative">
        <div>
          <h3 className="text-3xl-semi text-white">Flavourful Flame</h3>
          <h3 className="text-2xl text-white">Grilled Chicken</h3>
          <p className="text-white">Marinated for 24 hours in our herb-infused traditional marinade, the perfectly grilled chicken on your plate is the healthiest and tastiest in town!</p>
          <div className="mt-6 text-white">
            <UnderlineLink href="/store">Order Now</UnderlineLink>
          </div>
        </div>

        <div className="relative w-full aspect-square small:w-[35%] small:aspect-[28/36]">
          <Image
            src="/more.jpg"
            alt=""
            layout="fill"
            objectFit="cover"
            className="absolute inset-0"
          />
        </div>
      </div>
    </div>
  )
}

export default FooterCTA
The above code block will change the background image and text.
Enable Paystack Payment
To enable using Paystack to accept payments from your storefront, you follow the steps below accordingly:
1. Install the React Paystack library:
npm install react-paystack
Once the library is installed successfully, it will add the react Paystack package to your storefront project.
2. Add the Paystack public key to your .env.local file:
NEXT_PUBLIC_PAYSTACK_PUBLIC_KEY=pk_test_xxxxxx
On the above, replace pk_test_xxxxxx with the secret key gotten from your Paystack API Key.
3. Modify your payment buttons by adding the block of code below into your src/modules/checkout/components/payment-button/index.tsx file:
import clsx from "clsx"
import { PaystackButton } from "react-paystack"
The above code will import your Paystack button from react-payment library, and clsx library for Paytsack button styling.
Next, add PaystackPaymentButton among the switch case for the payment session:
case "paystack":
      return (
        <PaystackPaymentButton notReady={notReady} session={paymentSession} />
      )
Finally, add the block of code before your last line of code on this same file:
const PAYSTACK_PUBLIC_KEY = process.env.NEXT_PUBLIC_PAYSTACK_PUBLIC_KEY || ""

const PaystackPaymentButton = ({
  session,
  notReady,
}: {
  session: PaymentSession
  notReady: boolean
}) => {
  const { cart } = useCart()
  const { onPaymentCompleted } = useCheckout()

  const txRef = String(session.data?.paystackTxRef)
  const total = cart?.total || 0
  const email = cart?.email || ""
  const currency =
    cart?.region.currency_code.toUpperCase() // Update this to your currency

  return (
    <PaystackButton
      amount={total}
      publicKey={PAYSTACK_PUBLIC_KEY}
      email={email}
      currency={currency}
      reference={txRef}
      text="Pay with Paystack"
      onSuccess={onPaymentCompleted}
      className={clsx(
        "w-full uppercase flex items-center justify-center min-h-[50px] px-5 py-[10px] text-small-regular border transition-colors duration-200 disabled:opacity-50",
        "text-white bg-[#3bb75e] border-[#3bb75e] hover:bg-white hover:text-[#3bb75e] disabled:hover:bg-gray-900 disabled:hover:text-white"
      )}
    />
  )
}
The above code block will add Paystack button as part of the payment option for your storefront.
PaystackButton triggers the checkout payment button to process the payment whenever it’s clicked on your storefront.
To be sure you got the above two code blocks correctly, you can make a reference here.
4. Modify your payment container by adding the code block as part of the PaymentInfoMap collection. Here is the file path src/modules/checkout/component/payment-container/index.tsx:
paystack: {
    title: "Paystack",
    description: "Secure payment with Paystack",
  }
The above code makes it possible for Paystack to appear as part of the payment option in your storefront.
To be sure you got the above code block correctly, you can make a reference here.
Test your Storefront
Ensure your Medusa Server is running, then run this command:
npm run dev
If you navigate to localhost:8000, you’ll see your storefront homepage.
If you click on Food Menu you’ll see all foods populated from your Medusa Server.

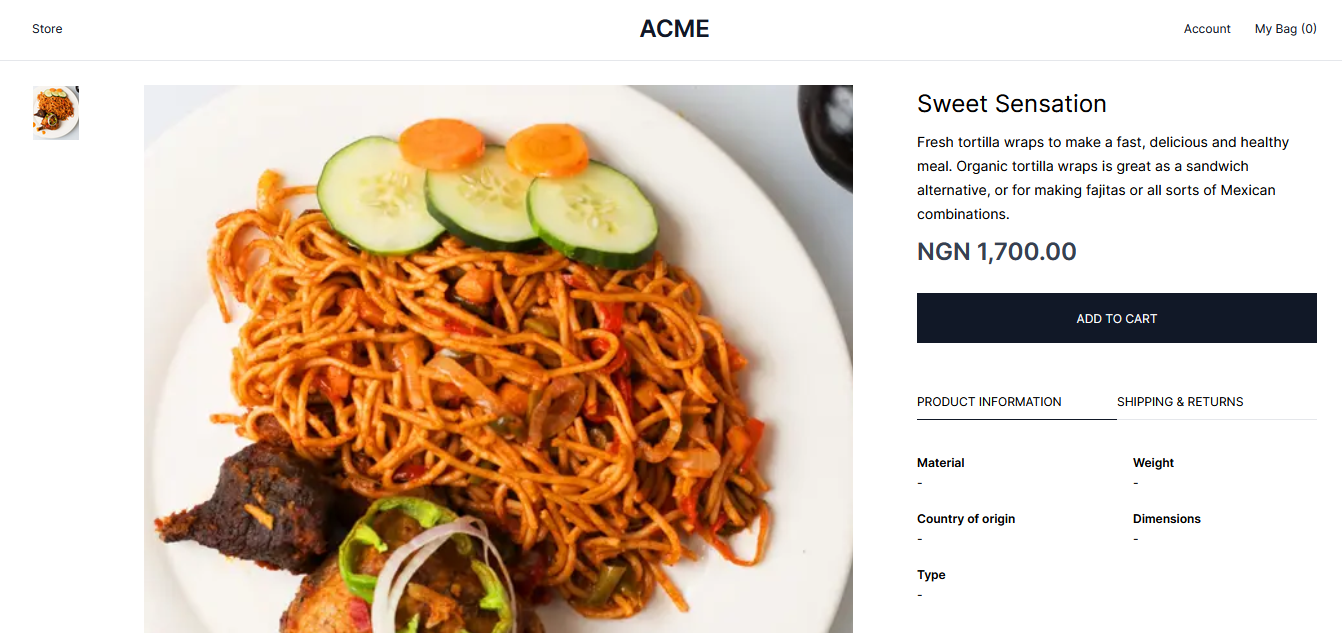
If you click on any of the food items, you’ll see the single product page and an Add to cart option.
If you click on My Bag after adding an item to the cart, you should see the Shopping Bag page.

If you click on GO TO CHECKOUT, you’ll see your Checkout Page, where you will provide your delivery information.
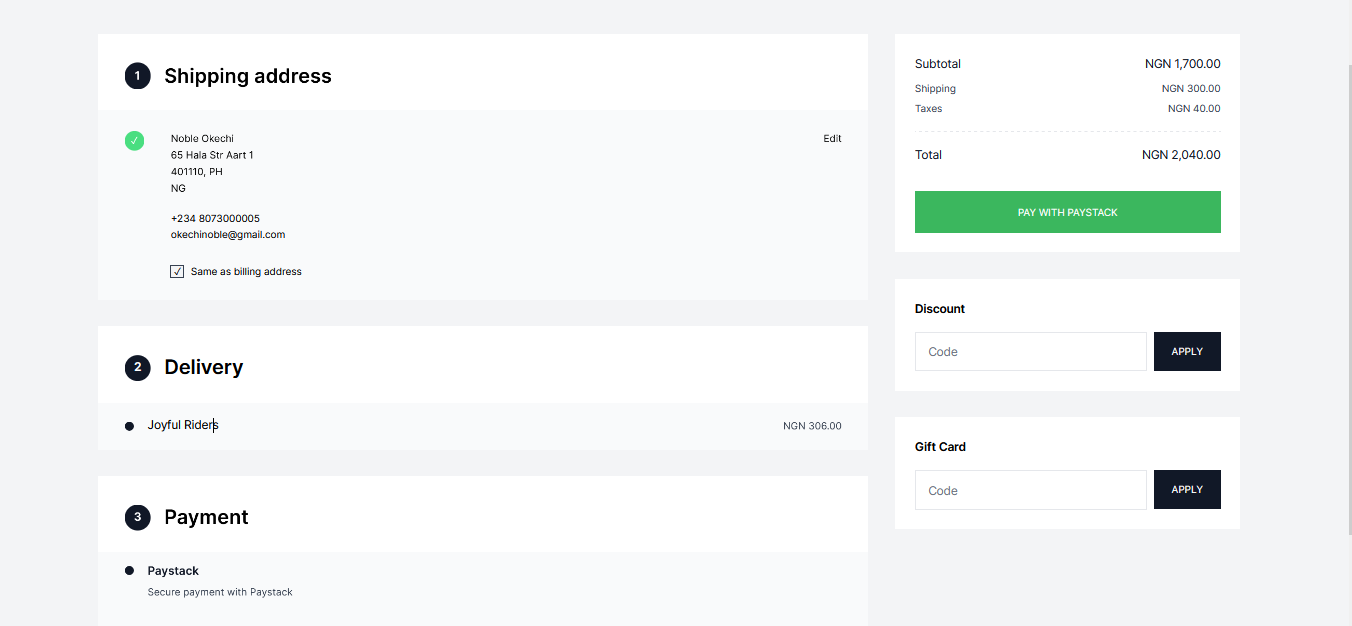
If you click on “PAY WITH PAYSTACK” you’ll see the Paystack Payment pop-up:
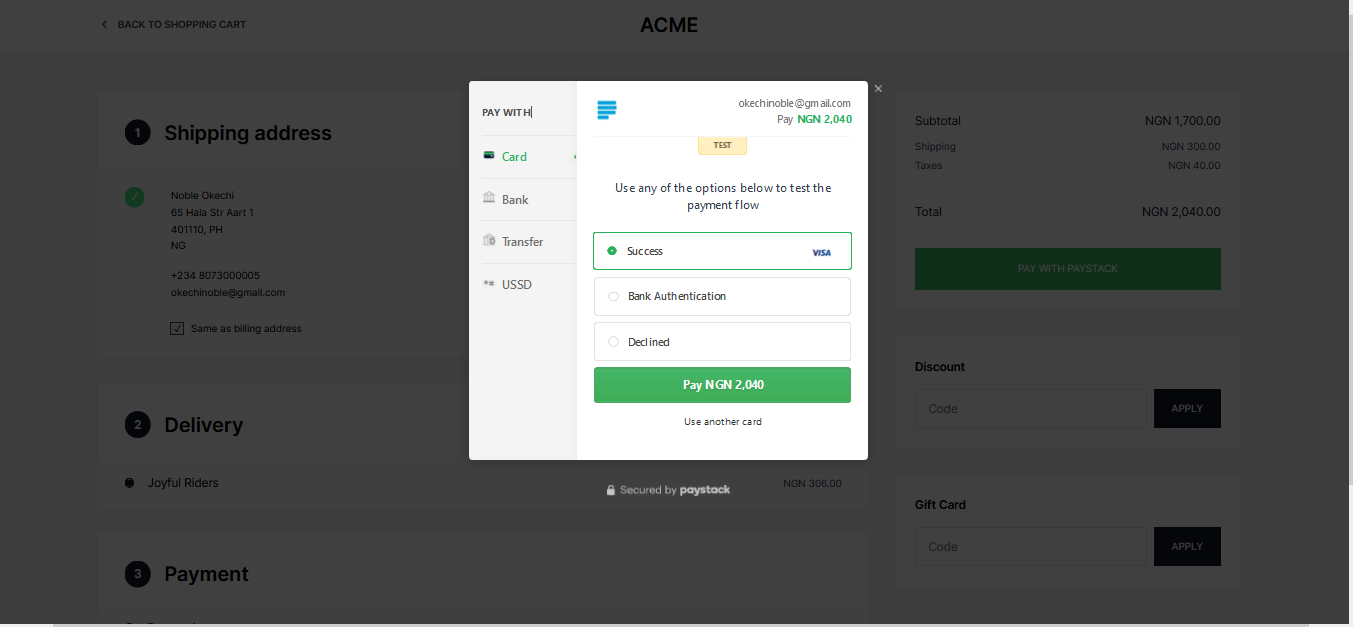
If you select Success and click on the Pay button, your payment will be processed and you’ll see the Order Receipt Page;
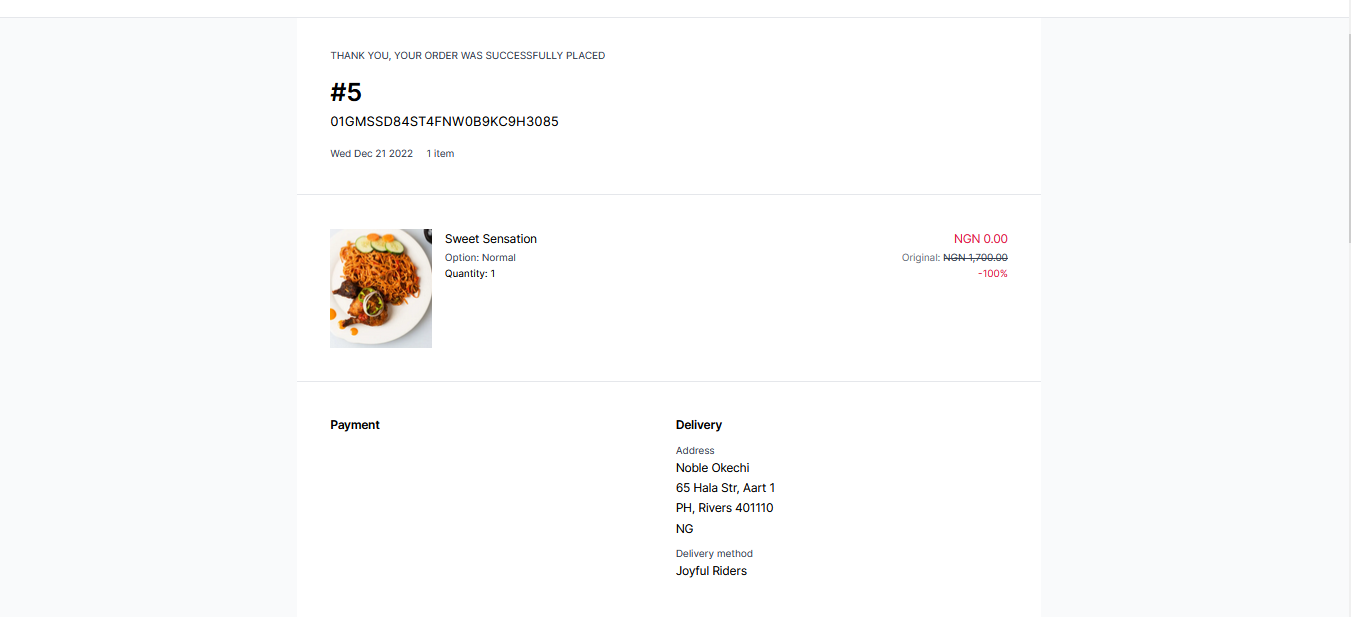
You can confirm the orders from your Medusa Admin panel for this project.
Conclusion
In this tutorial, you have learned how to use the Medusa commerce engine as your ecommerce store for food restaurants, working with Medusa’s Next.js Storefront Template and Integrating Paystack payment gateway into Medusa.
You can learn more about building awesome ecommerce stores with Medusa; check out Medusa’s Documentation for more guides.
Should you have any issues or questions related to Medusa, then feel free to reach out to the Medusa team via Discord.